We love our latest IKEA built-in hack in the great room! (See the built-in IKEA Besta/Pax hack in the living room we finished a year before.) In the great room, we’d had a dark IKEA shelving unit on the TV wall. We decided to replace that shelving unit with a full wall of built-in shelves with lower cabinets, using IKEA Besta shelves, with a few creative touches thrown in. “We” (loosely used; here, meaning 95% Chris, 5% Shirley) probably spent a few hours a day for the better part of a week on this project.
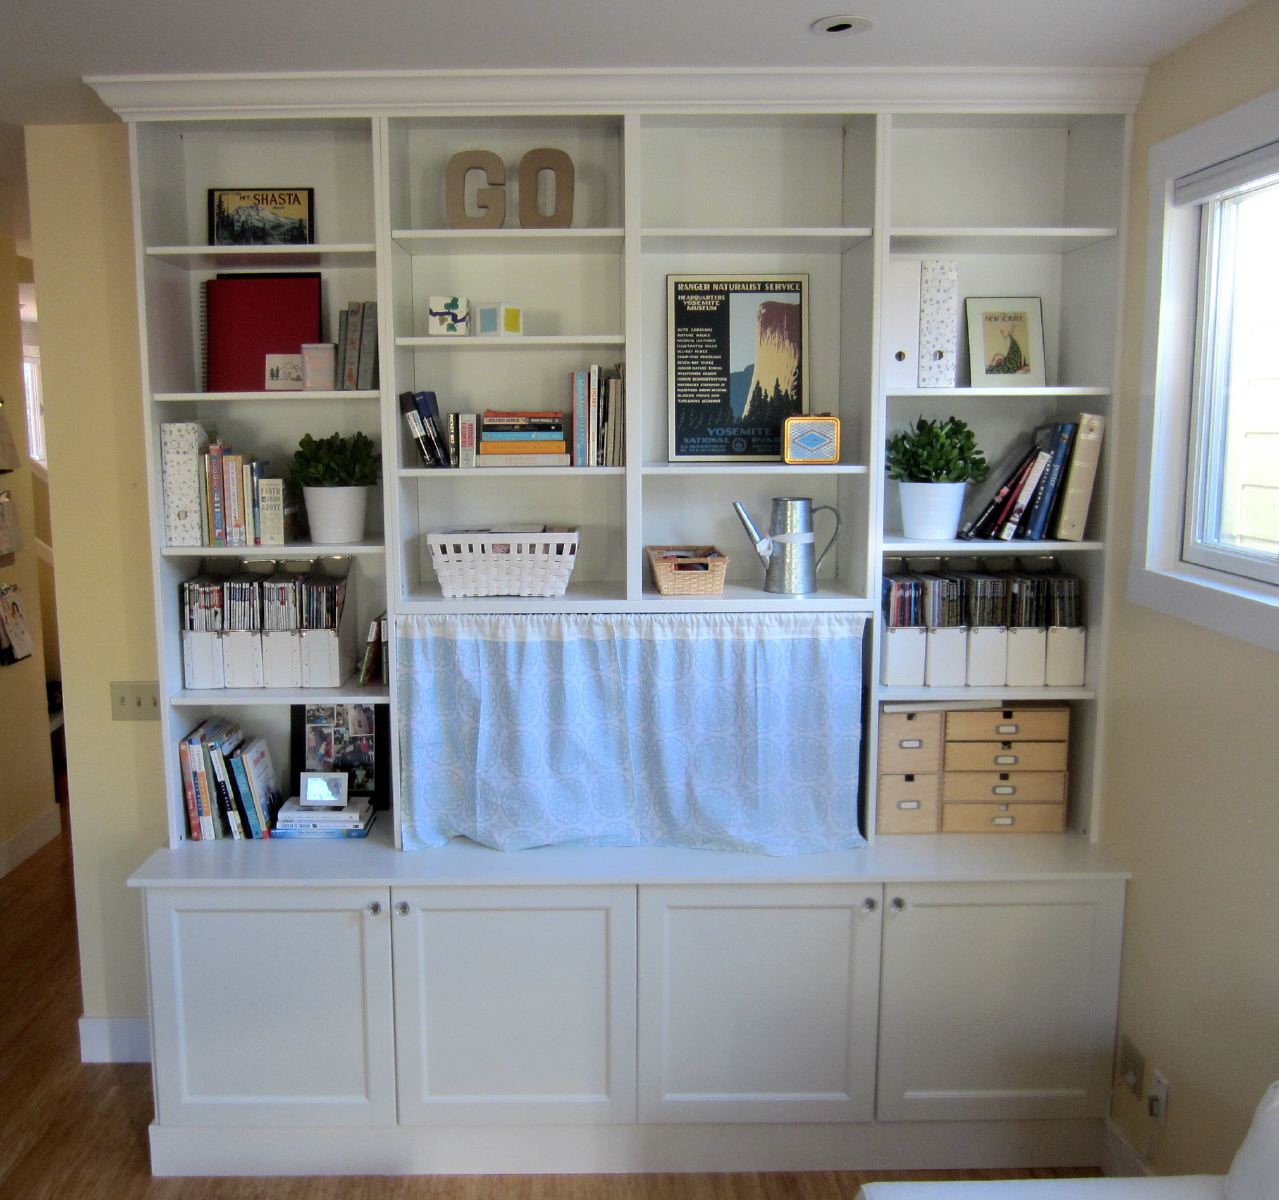
Here’s the result:
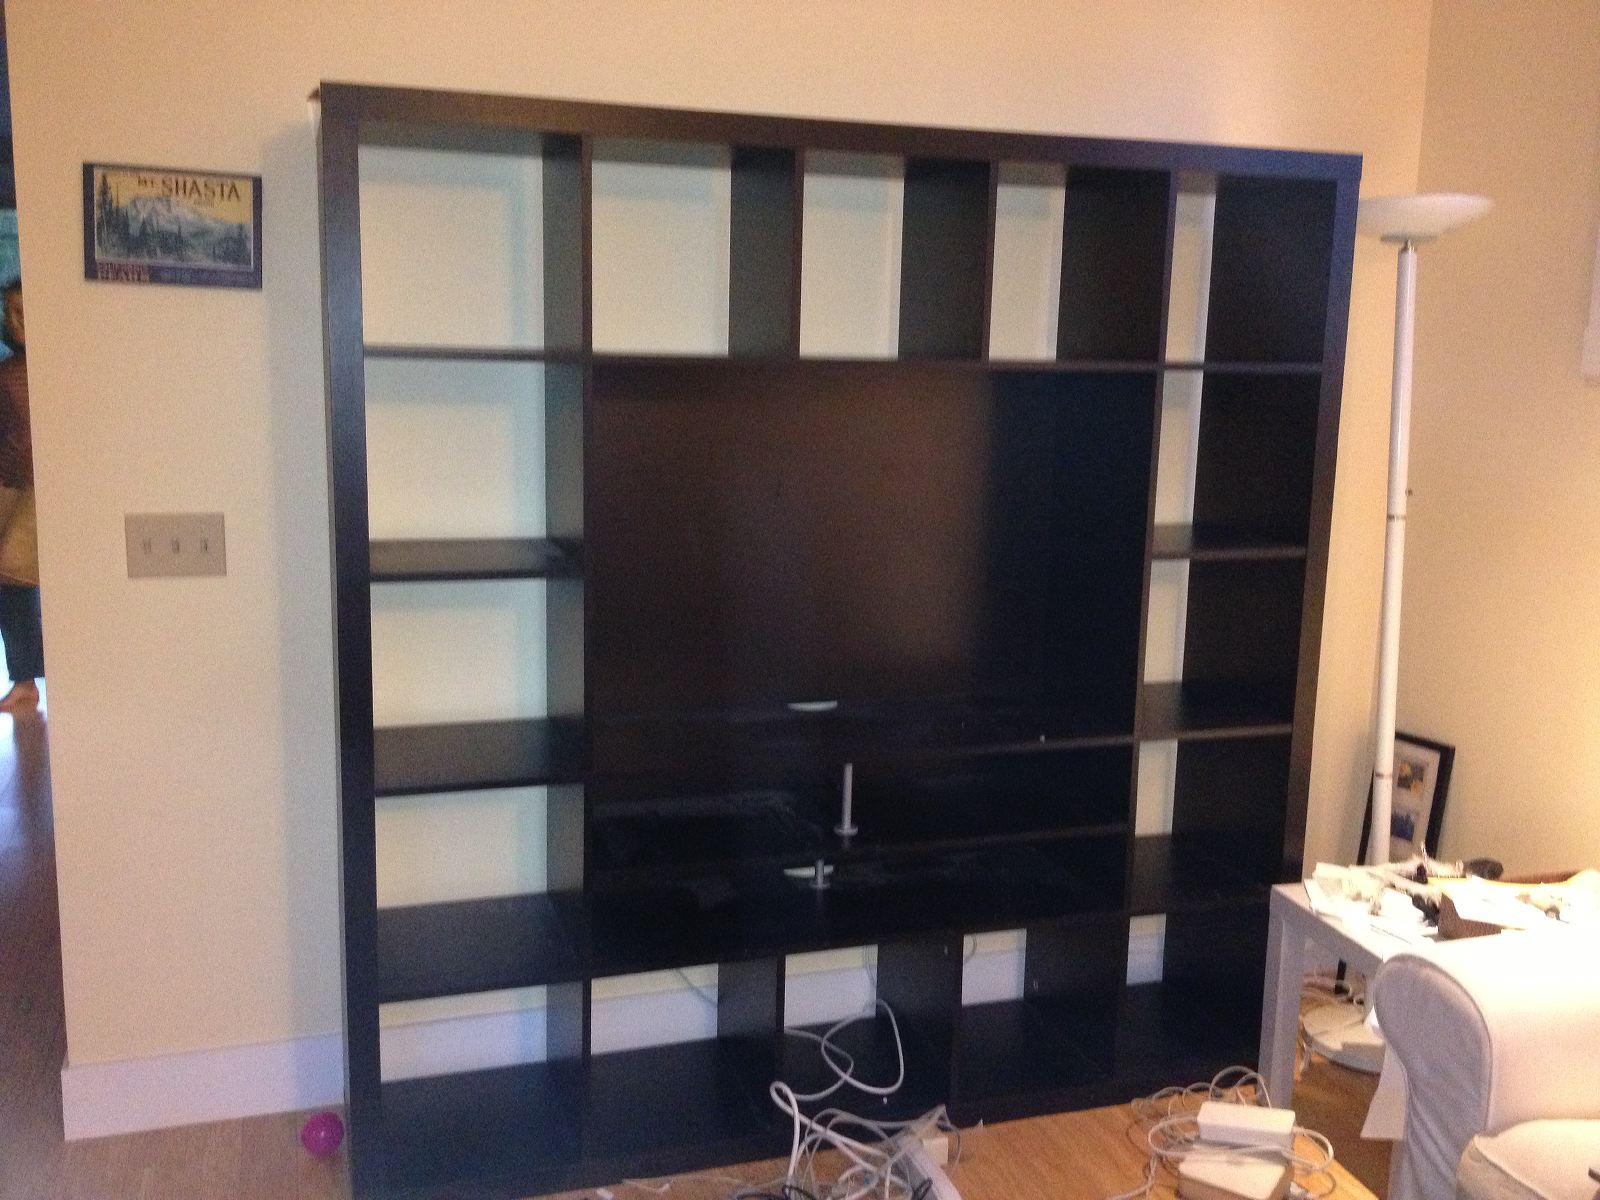
Before: Our IKEA Expedit TV shelf. It was relatively short (only 6 ft tall), which looked a little strange with our 9-ft-tall ceilings.
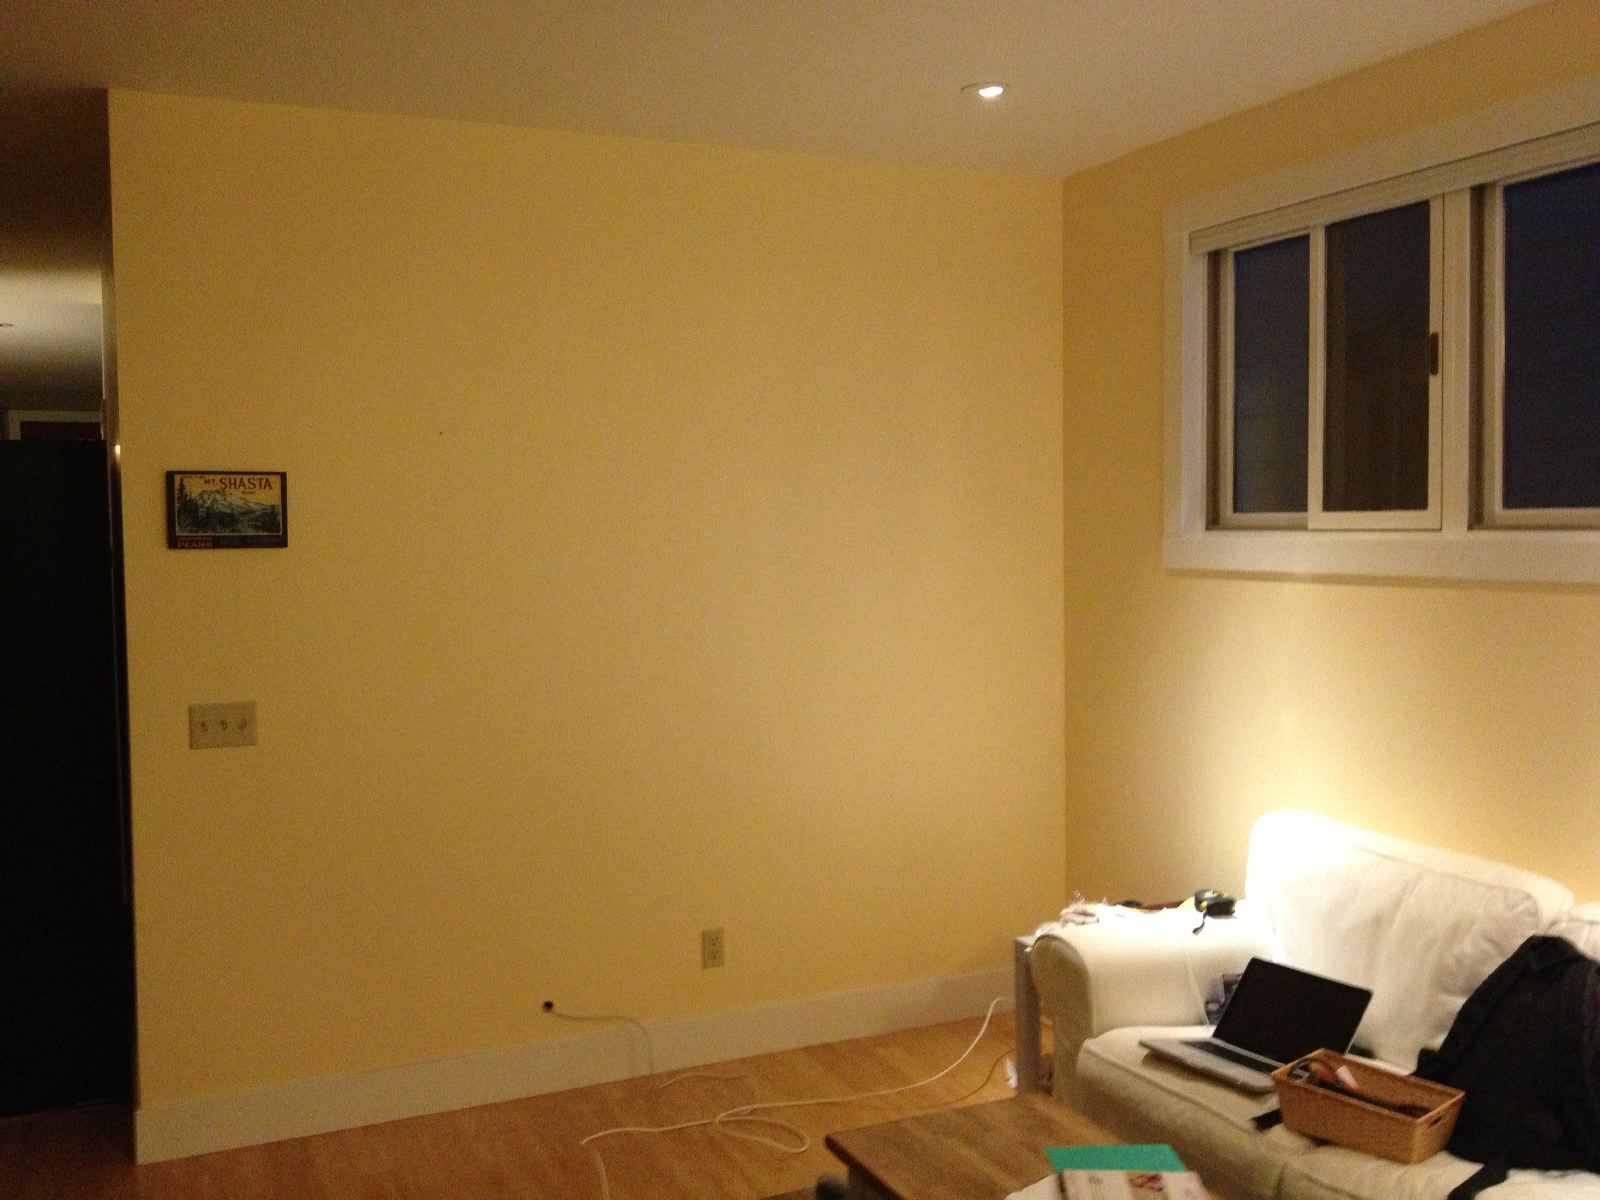
After we removed the shelf (by re-Craigslisting it for as much as we originally got it for), we had a nice blank slate for our built-in shelves.
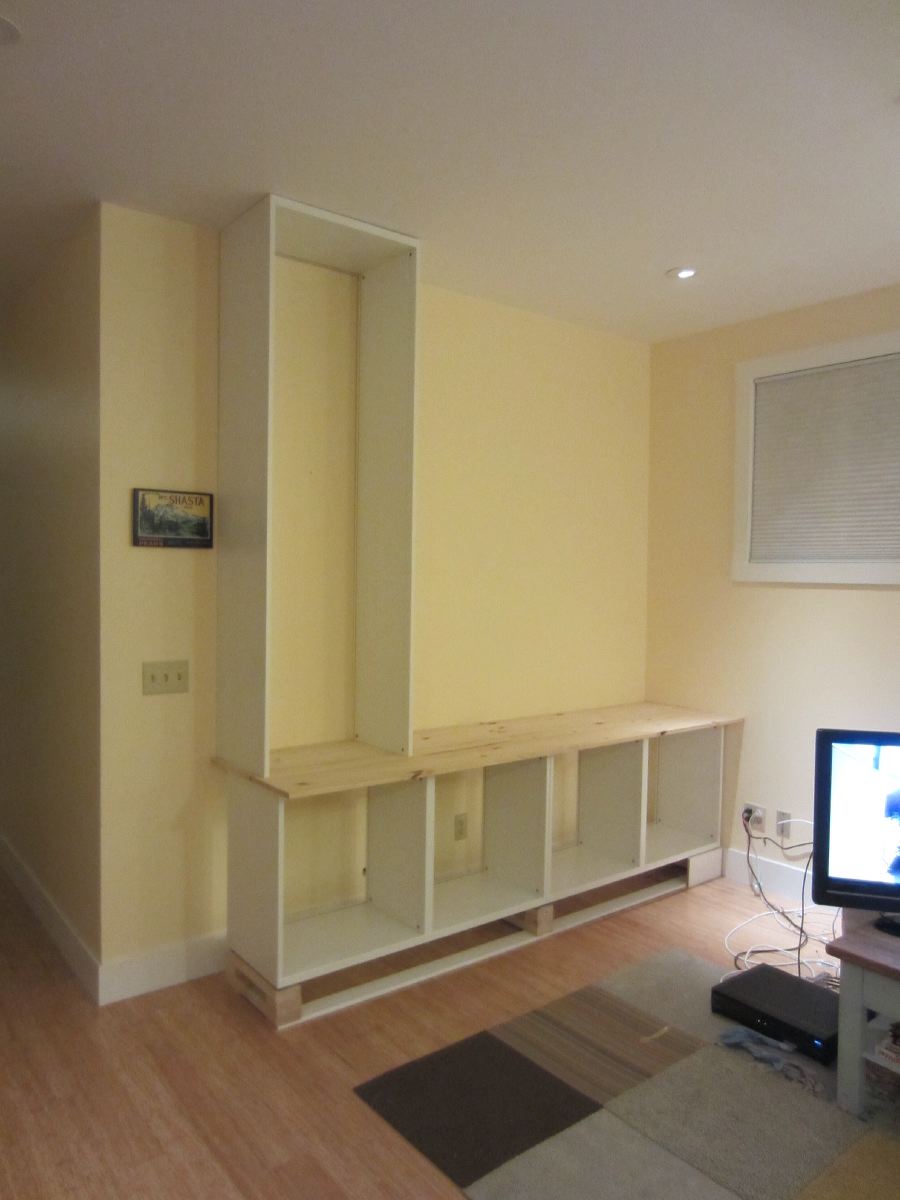
We measured the space (approximately 9 feet tall by 8 feet wide), and we discovered that the right configuration of Besta shelves would fit pretty much perfectly (including with 5-1/2″ baseboards at the bottom). The next photo shows which Besta shelves we used (dimensions are in inches). In the photo, the space under the middle shelf (behind the curtain) is for our TV. The two tall shelves on either side (highlighted in red) normally have bottoms, but those were not installed, and the sides of the shelf were instead attached to a countertop (more details below).

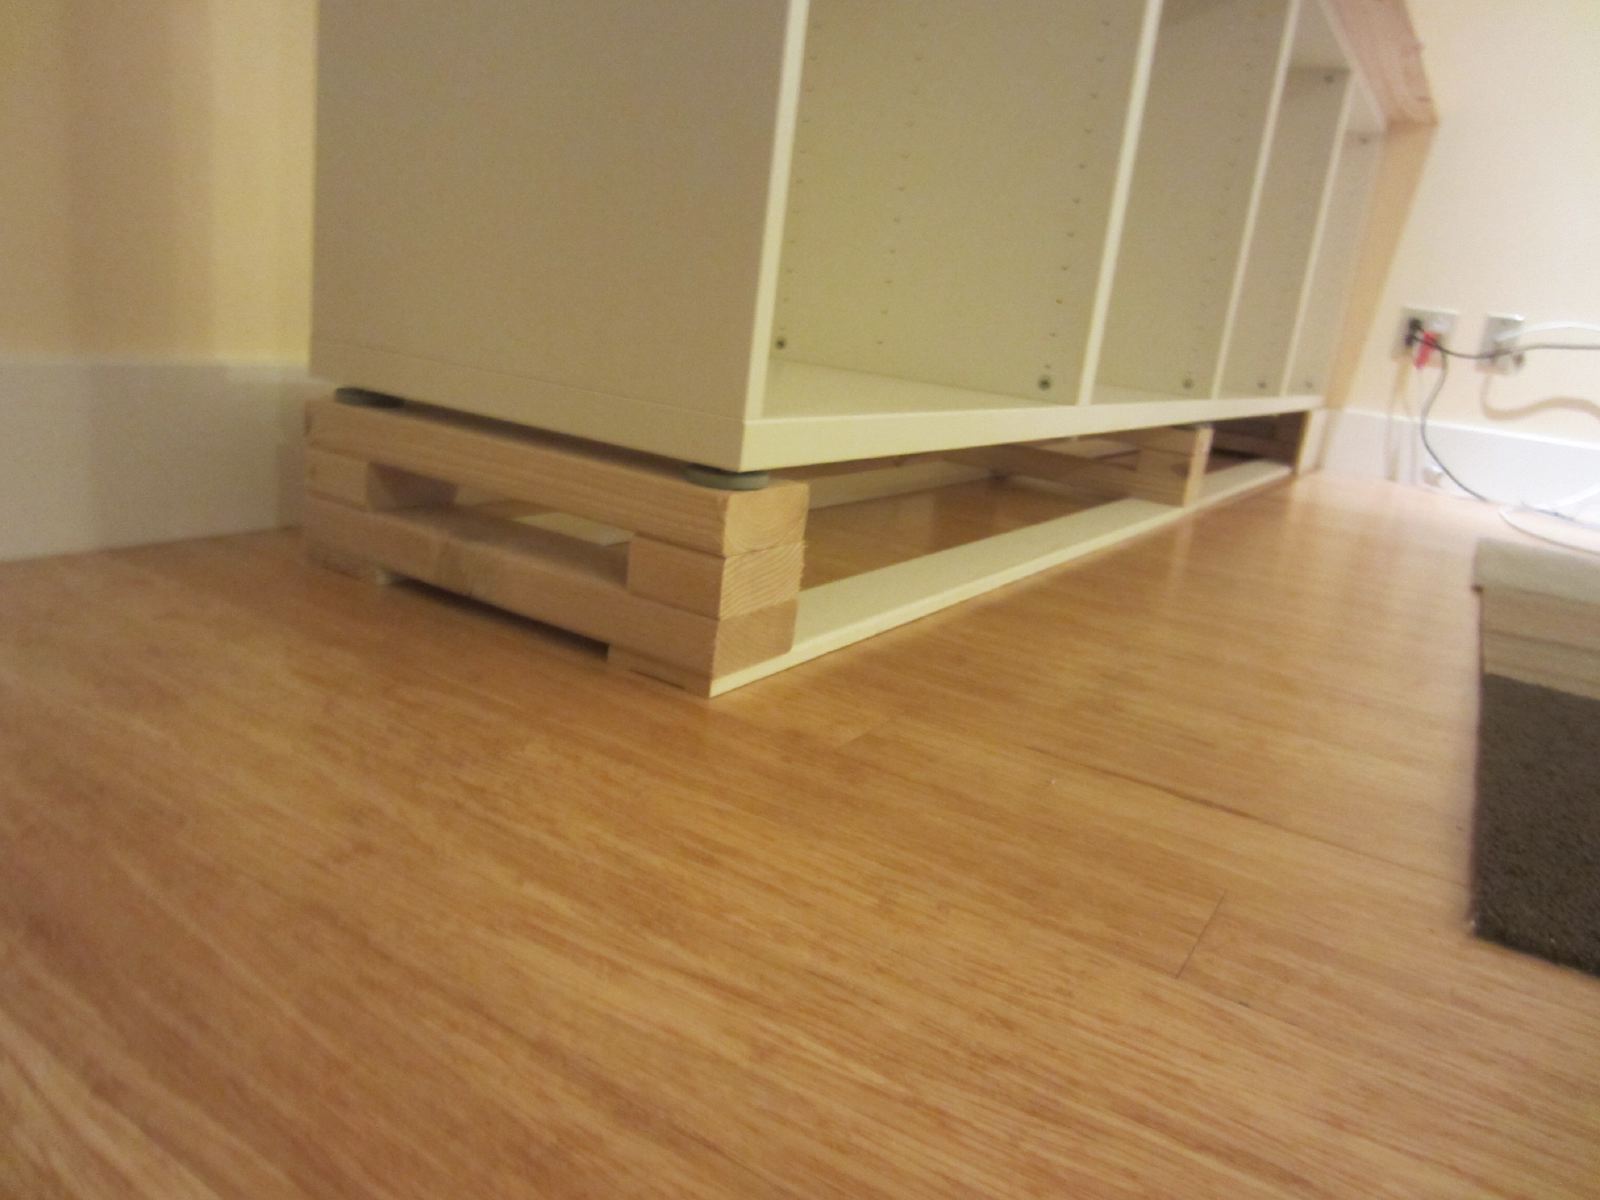
Chris attached two 1×12 pine boards together using pocket screws to make a 22.5″ wide countertop (the 1×12 is only 11.25″ wide). The lower “cabinets” of our built-in are not actually deeper cabinets but just the same-depth Besta shelving as the upper shelves (15″ deep) that have been pushed out about 7 inches away from the wall so that they are closer to the front edge of the counter.
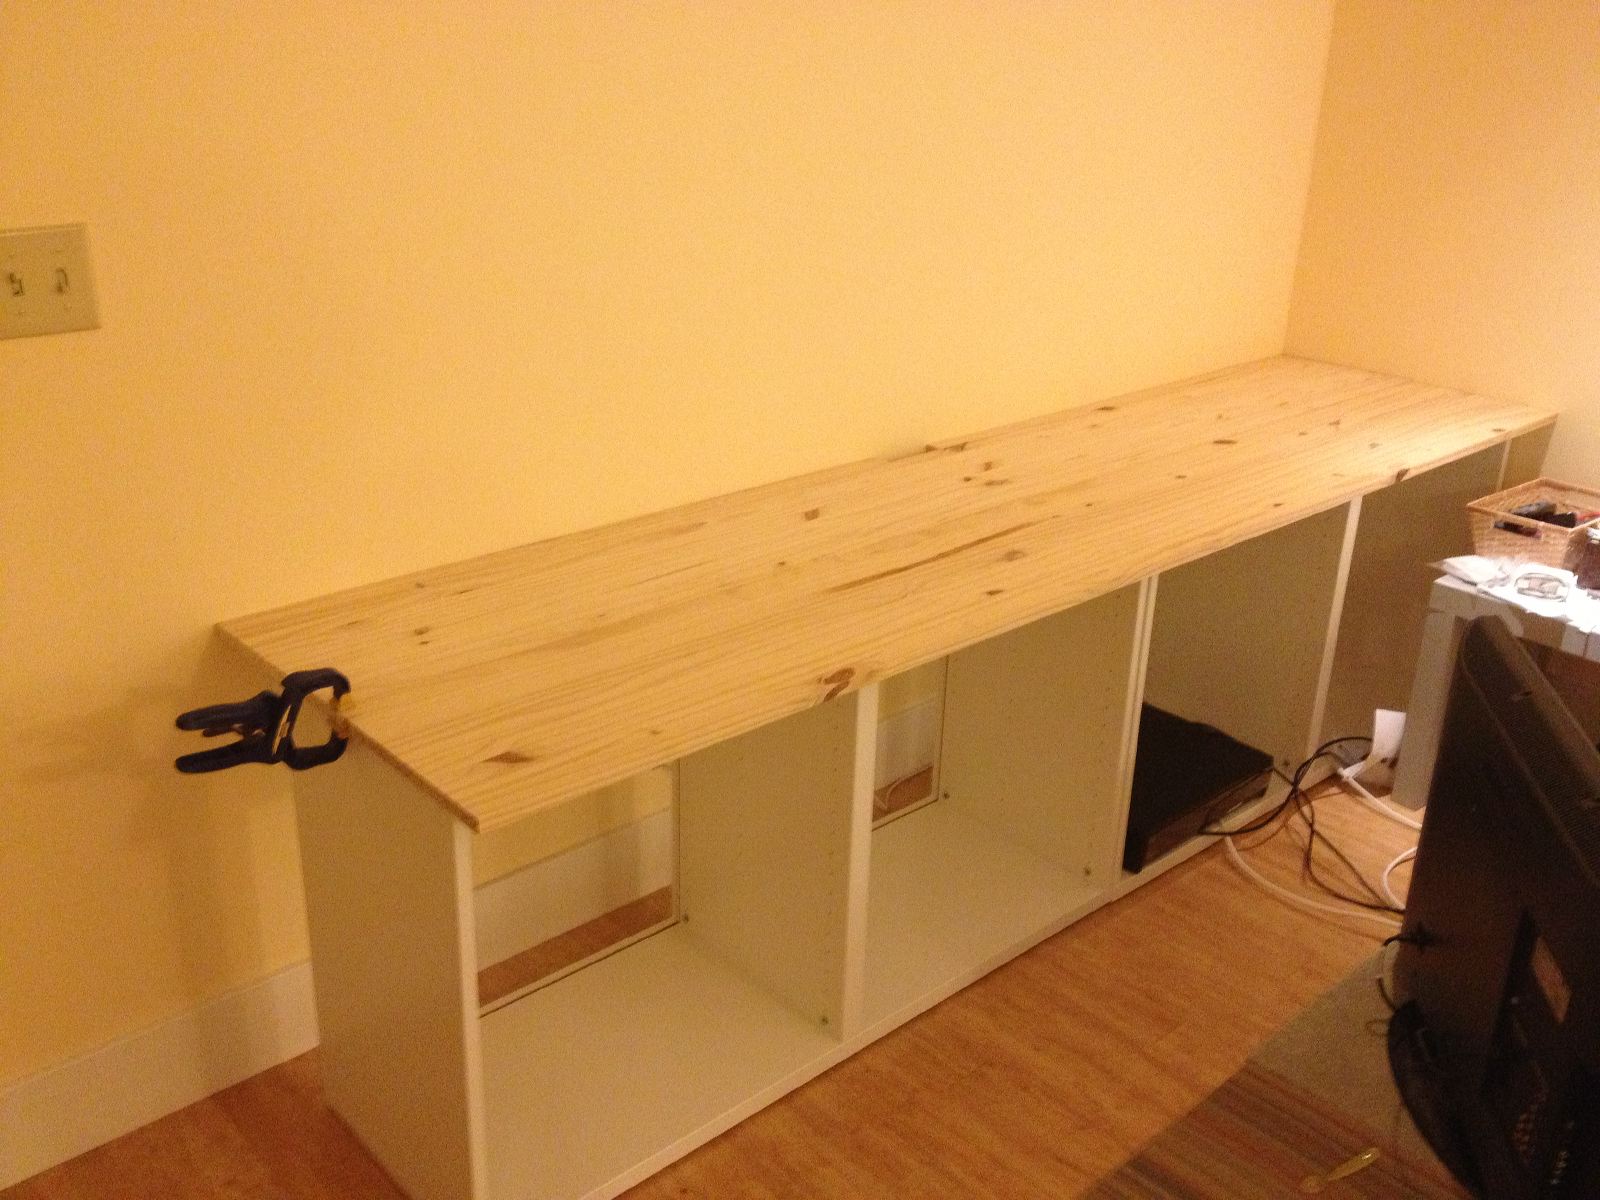
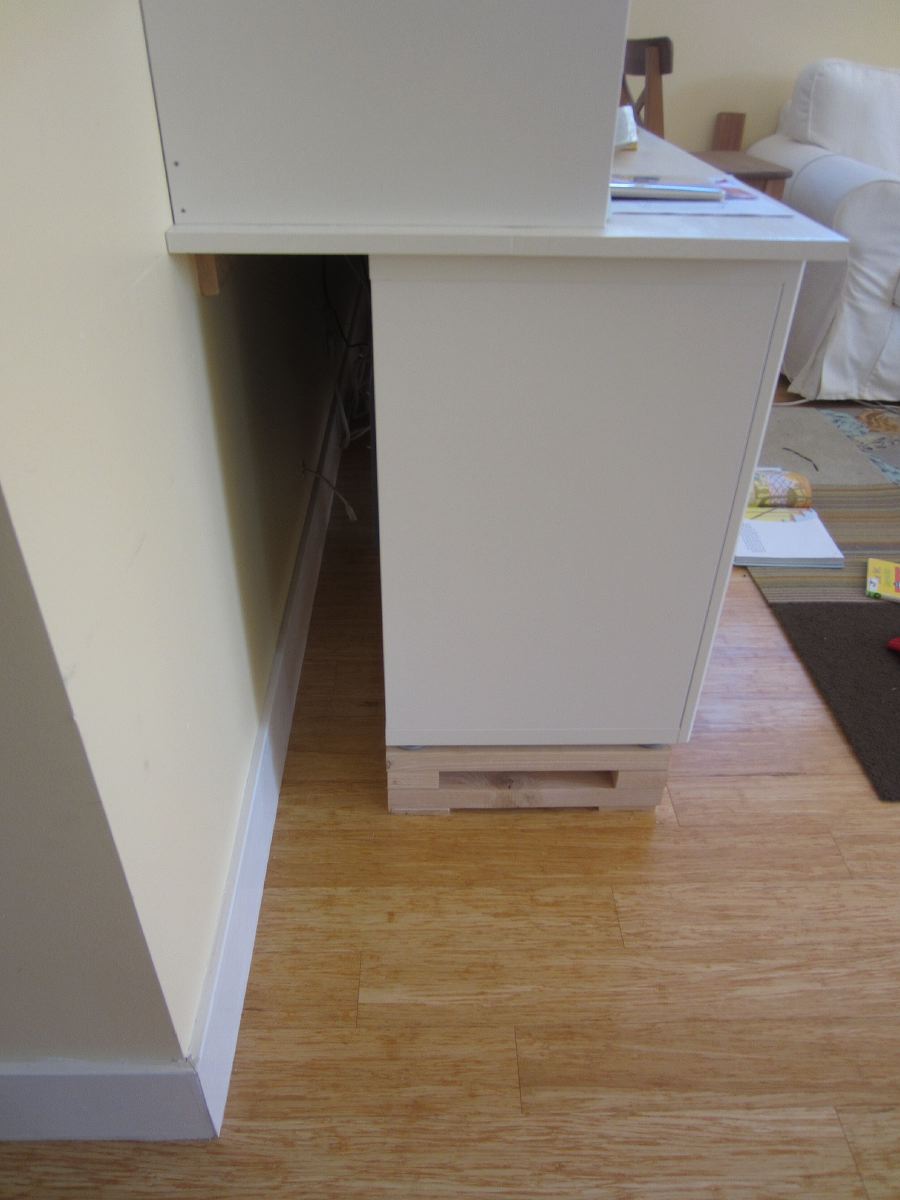
Chris installed 1×3 cleats on the wall to support the back of the countertop. And he used the same method as our last hack (see link above) to raise the Besta shelves so that they were the right height to install our 5.5″ baseboards. These base shelves had to be a little higher off the ground than the ones in our living room – we couldn’t cover the bottom of the base shelf here because the doors need to cover that area.
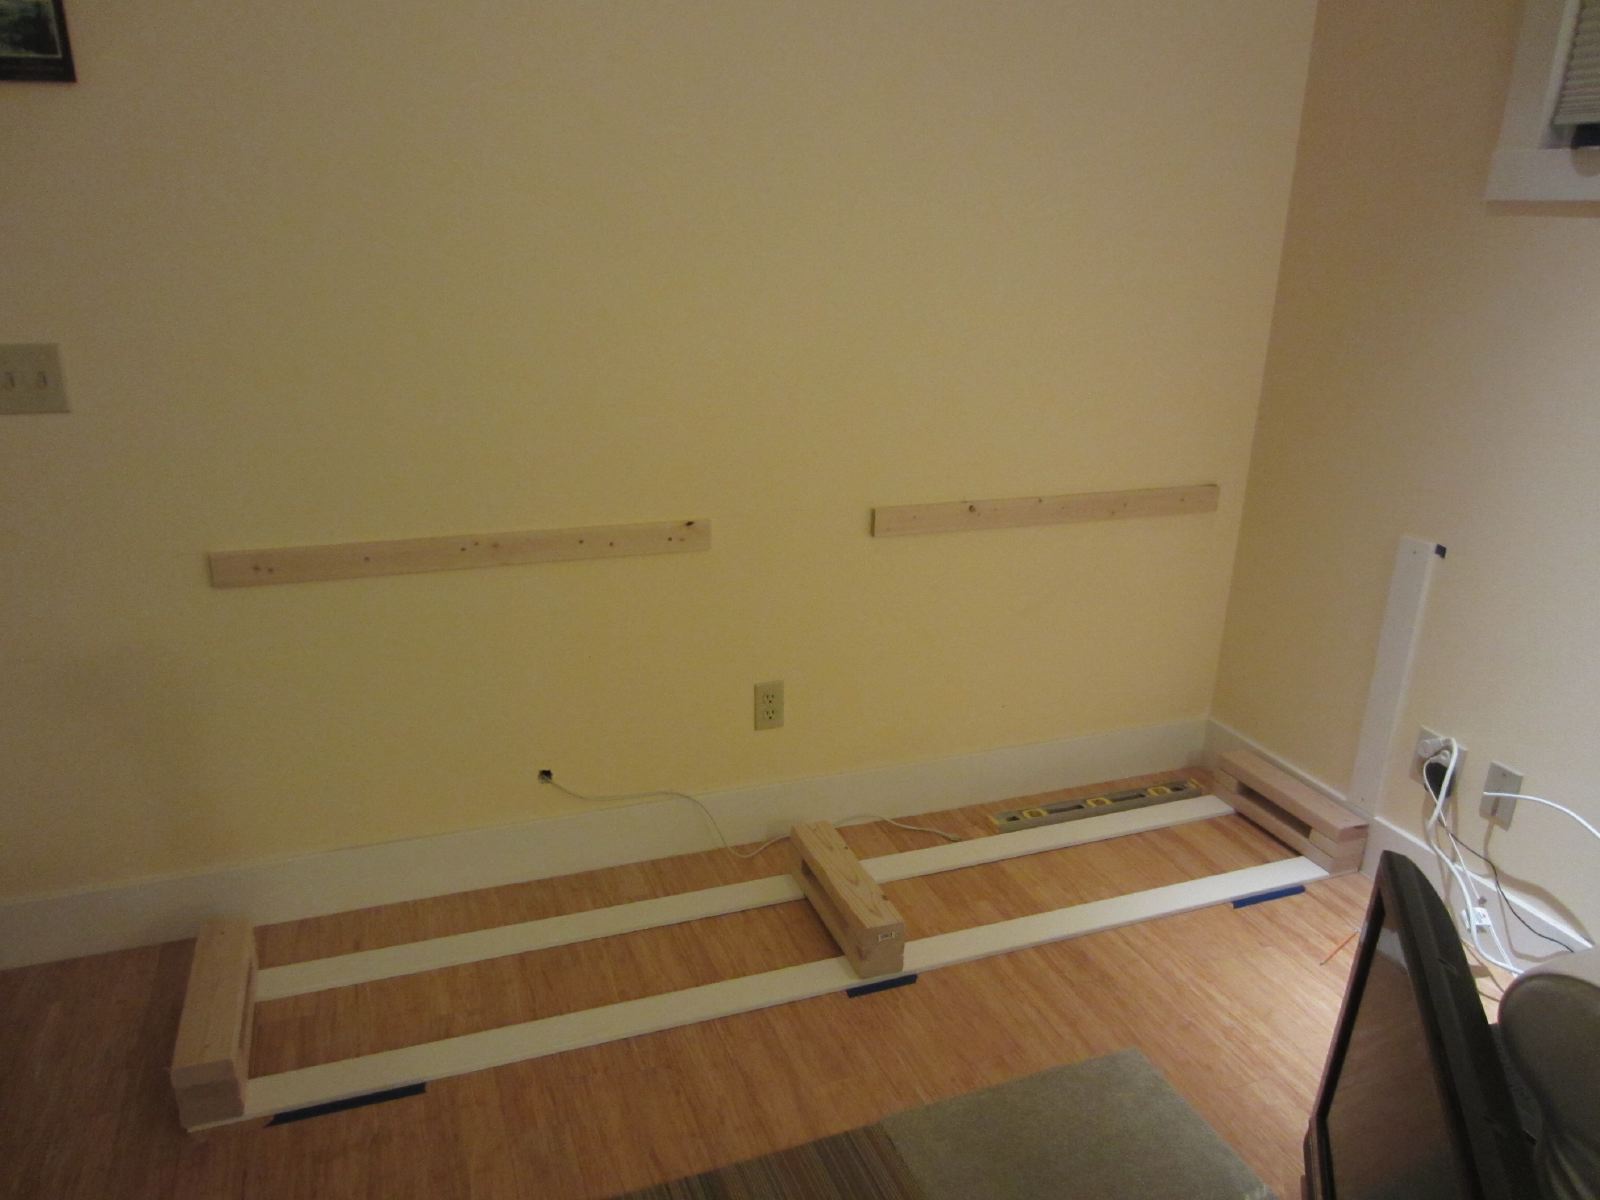
The Bestas have plastic feet that are attached to screws that can be turned to adjust the height of the shelf.
We did a test fit to make sure that the total height of the built-in would be right and that the upper cabinets would fit when everything was installed at the proper height. The tops of the tall side shelves were touching the ceiling and made us realize that we wouldn’t be able to lift the tall shelf over the top of the IKEA cam lock screws we were going to use to attach them to the countertop (since we weren’t installing the shelf bottoms).
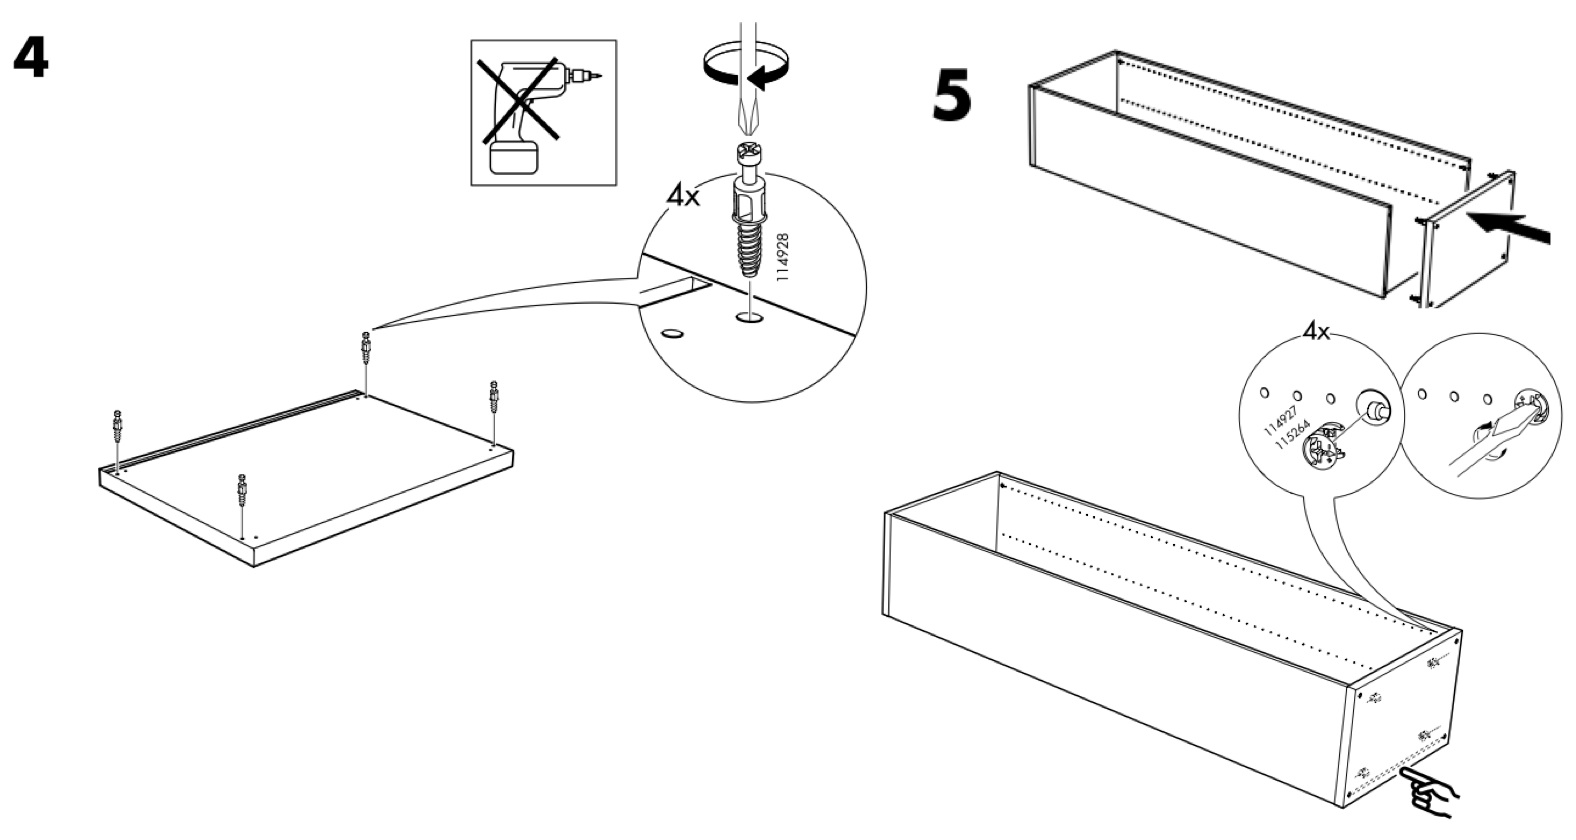
The cam lock screws are installed sticking up out of the countertop, and the tall shelf sides need to be lowered so that the screws fit into pre-drilled holes in the shelf sides, and then the cam locks are used to grab the screw heads. (You can see how they are supposed to attach in this picture from the IKEA instruction manual). Chris used the bottoms of the shelves as a template to drill the holes into which to install the cam lock screws – 4 screws for each tall side shelf.
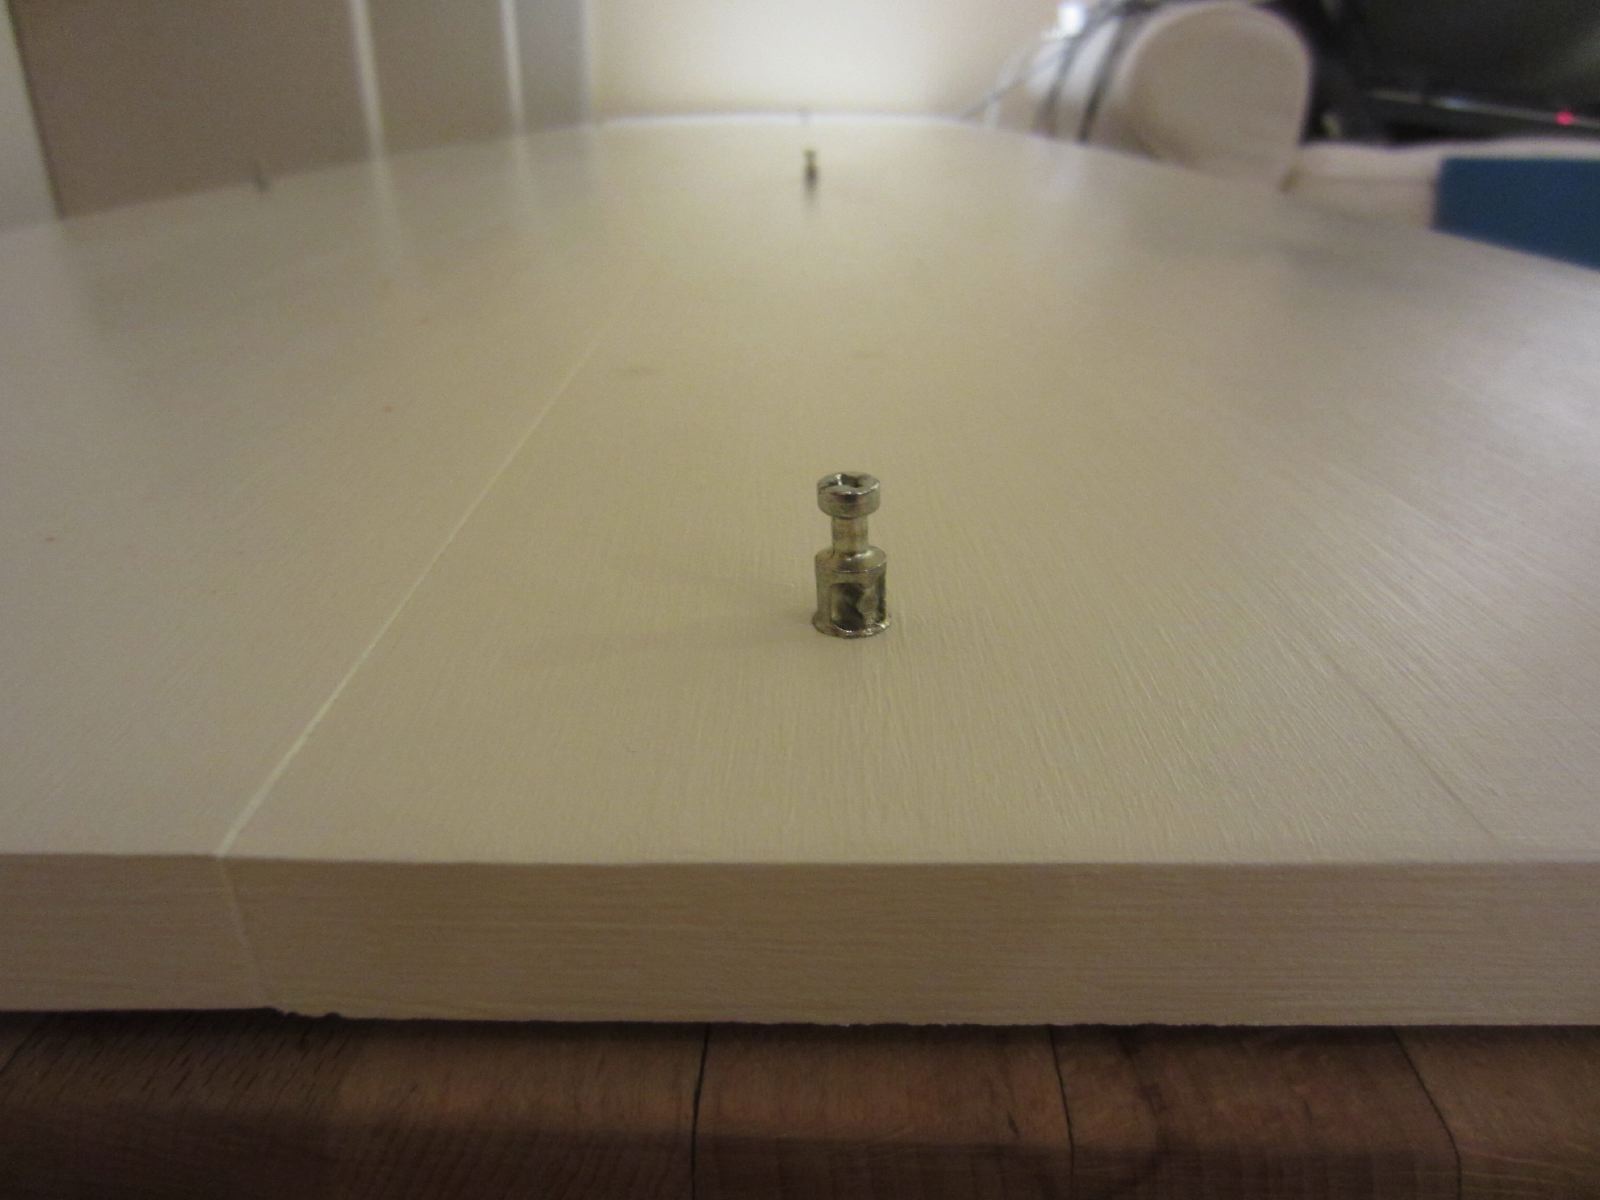
Here is a view of the shelf sides that have the cam locks (the circles at the front and back), which grab the top of the screws and hold the shelf together and give it some rigidity.
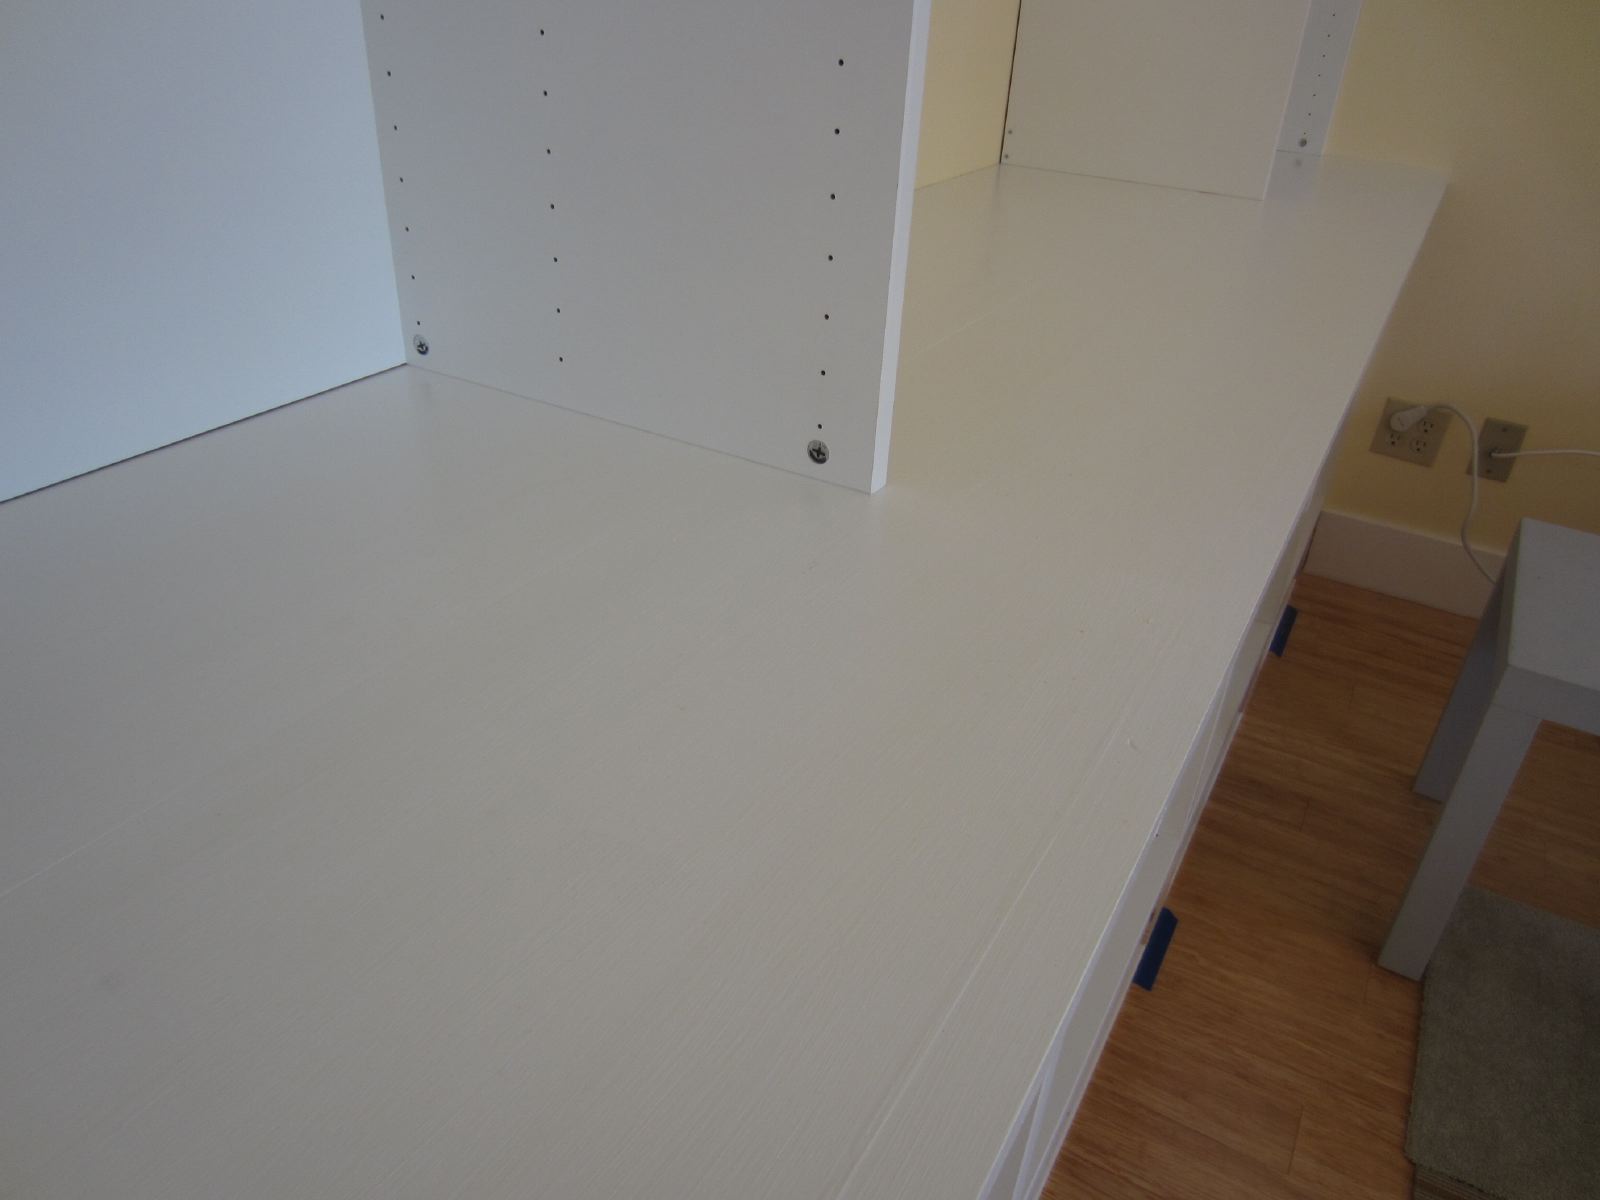
Because we eliminated the bottom of each tall shelf, the rather flimsy backing material for the shelf didn’t have a groove to sit in, so we had to cut it so that it would sit flush on the countertop. We also installed a filler strip of wood on the back of the bottom to give the backing some rigidity. There is approximately a 1/2″ gap between the back of the shelf backing and the back side of the shelf, so a thin board fit perfectly. We also installed one on the top so that there would be something substantial to screw through when we attached the built-in to the wall.
Since there wasn’t enough clearance to lower the tall shelves onto the cam lock screws when the countertop was in place, we installed the shelves onto the countertop on a lower surface and then hoisted the combined countertop/side shelves, which weighed ~100 lb, onto the lower shelves.

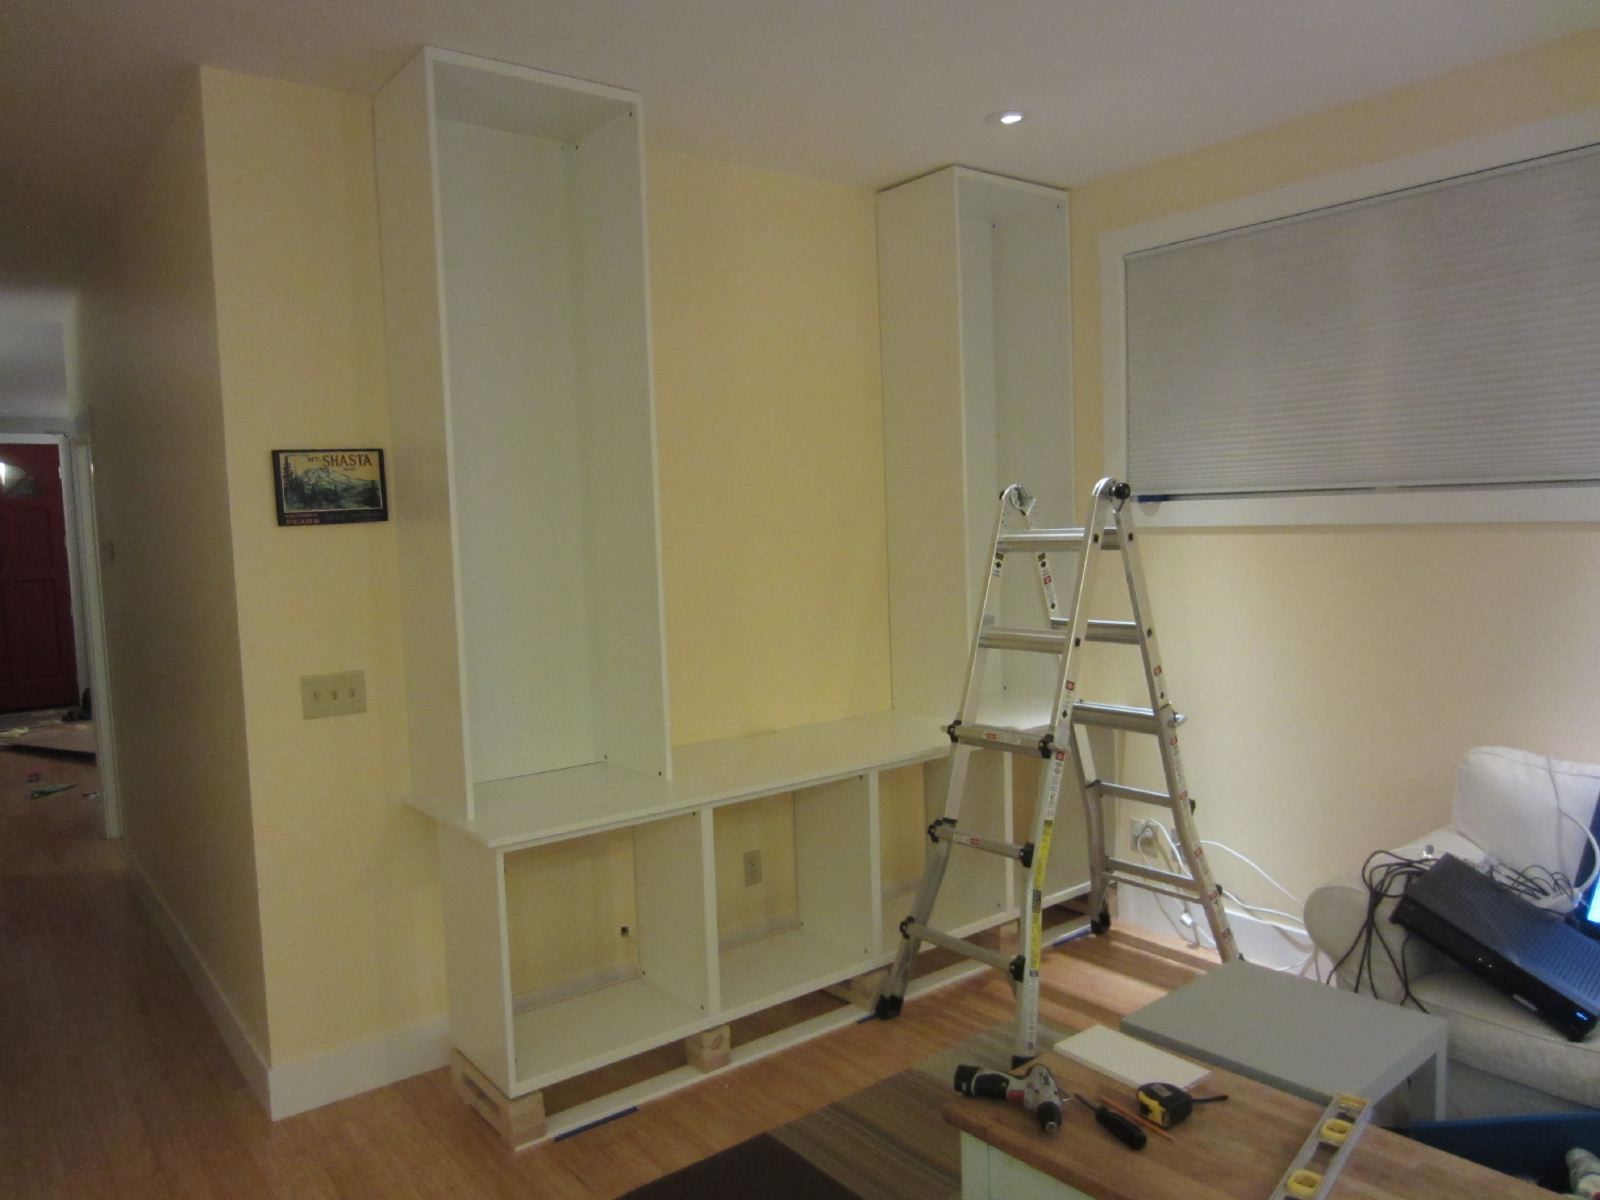
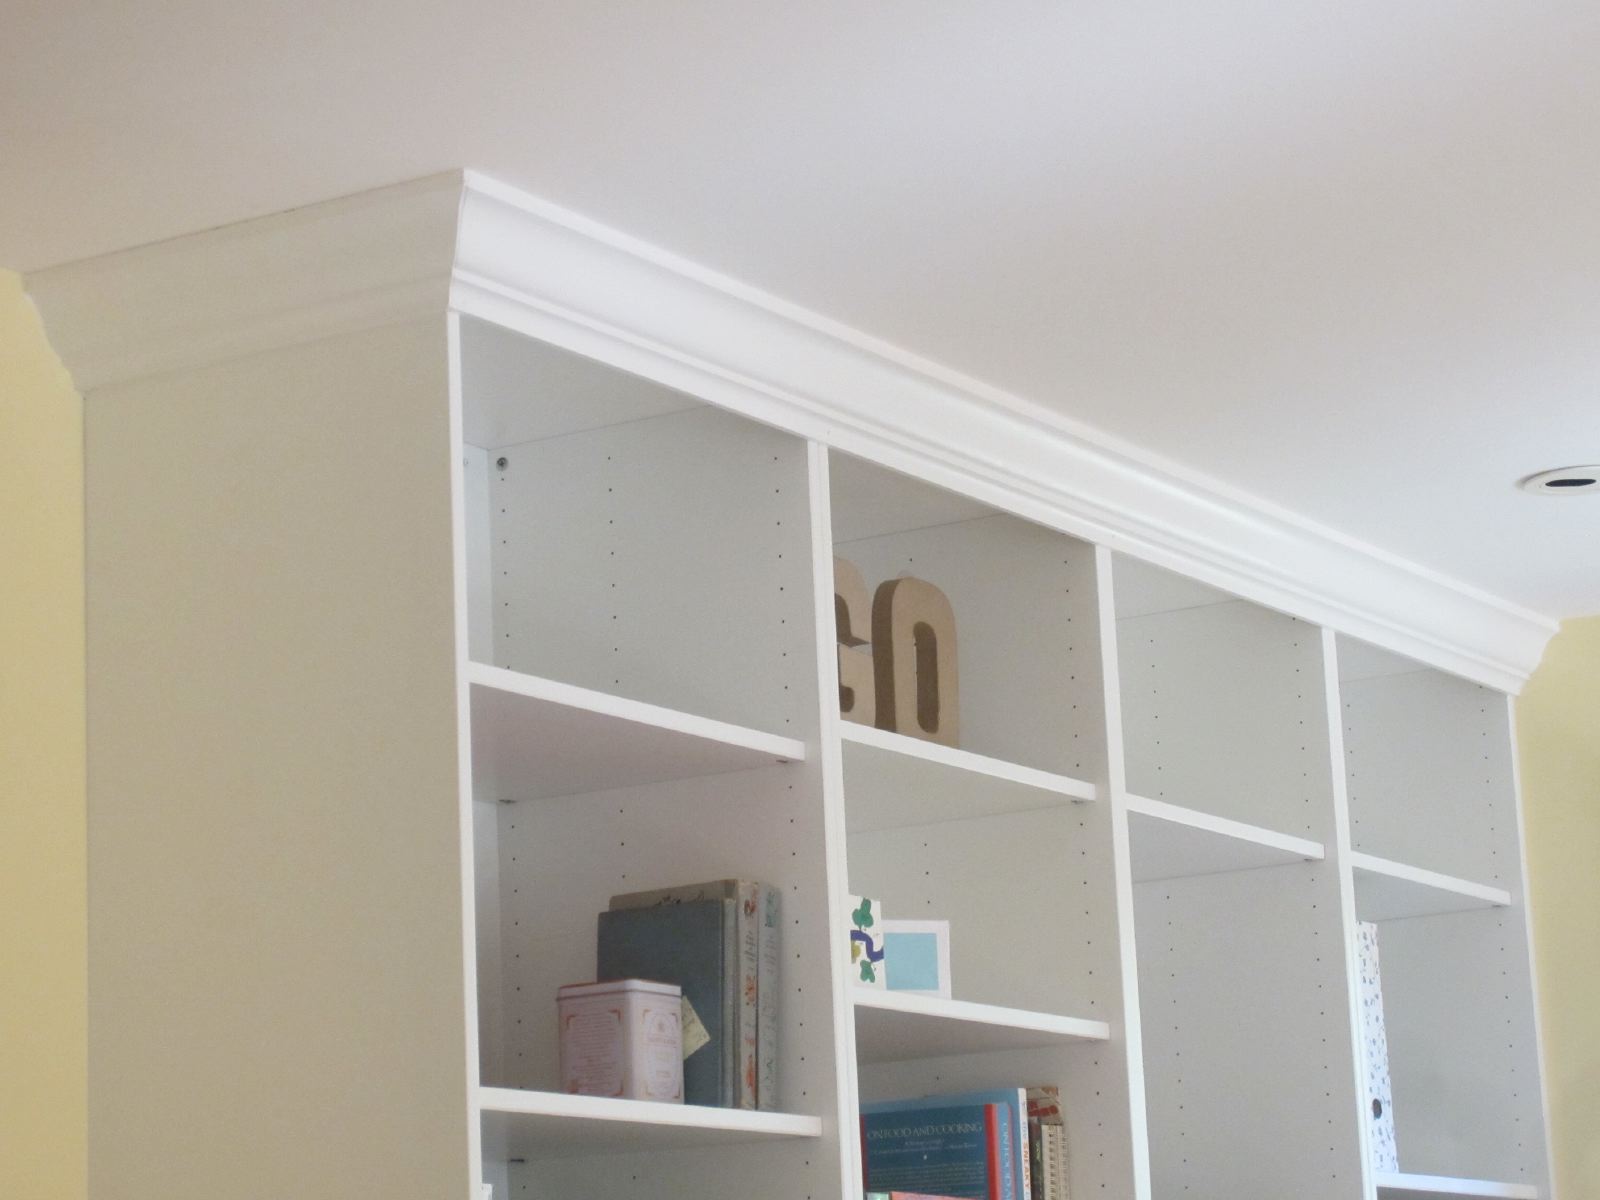
In the next photo, the countertop and tall side shelves are in place. Note the larger gap above the right side shelf. We eventually covered the uneven ceiling gap with crown molding.
The middle shelf that goes between the two side shelves weighs 92 lbs fully assembled (without shelves it was probably around 60 lbs). Chris had the idea of using a car jack to hold the shelf in place and to make the fine height adjustments needed to fit it perfectly in place when screwing the whole shelf together. We lifted the middle shelf onto a small side table sitting on the counter and then onto the jack.
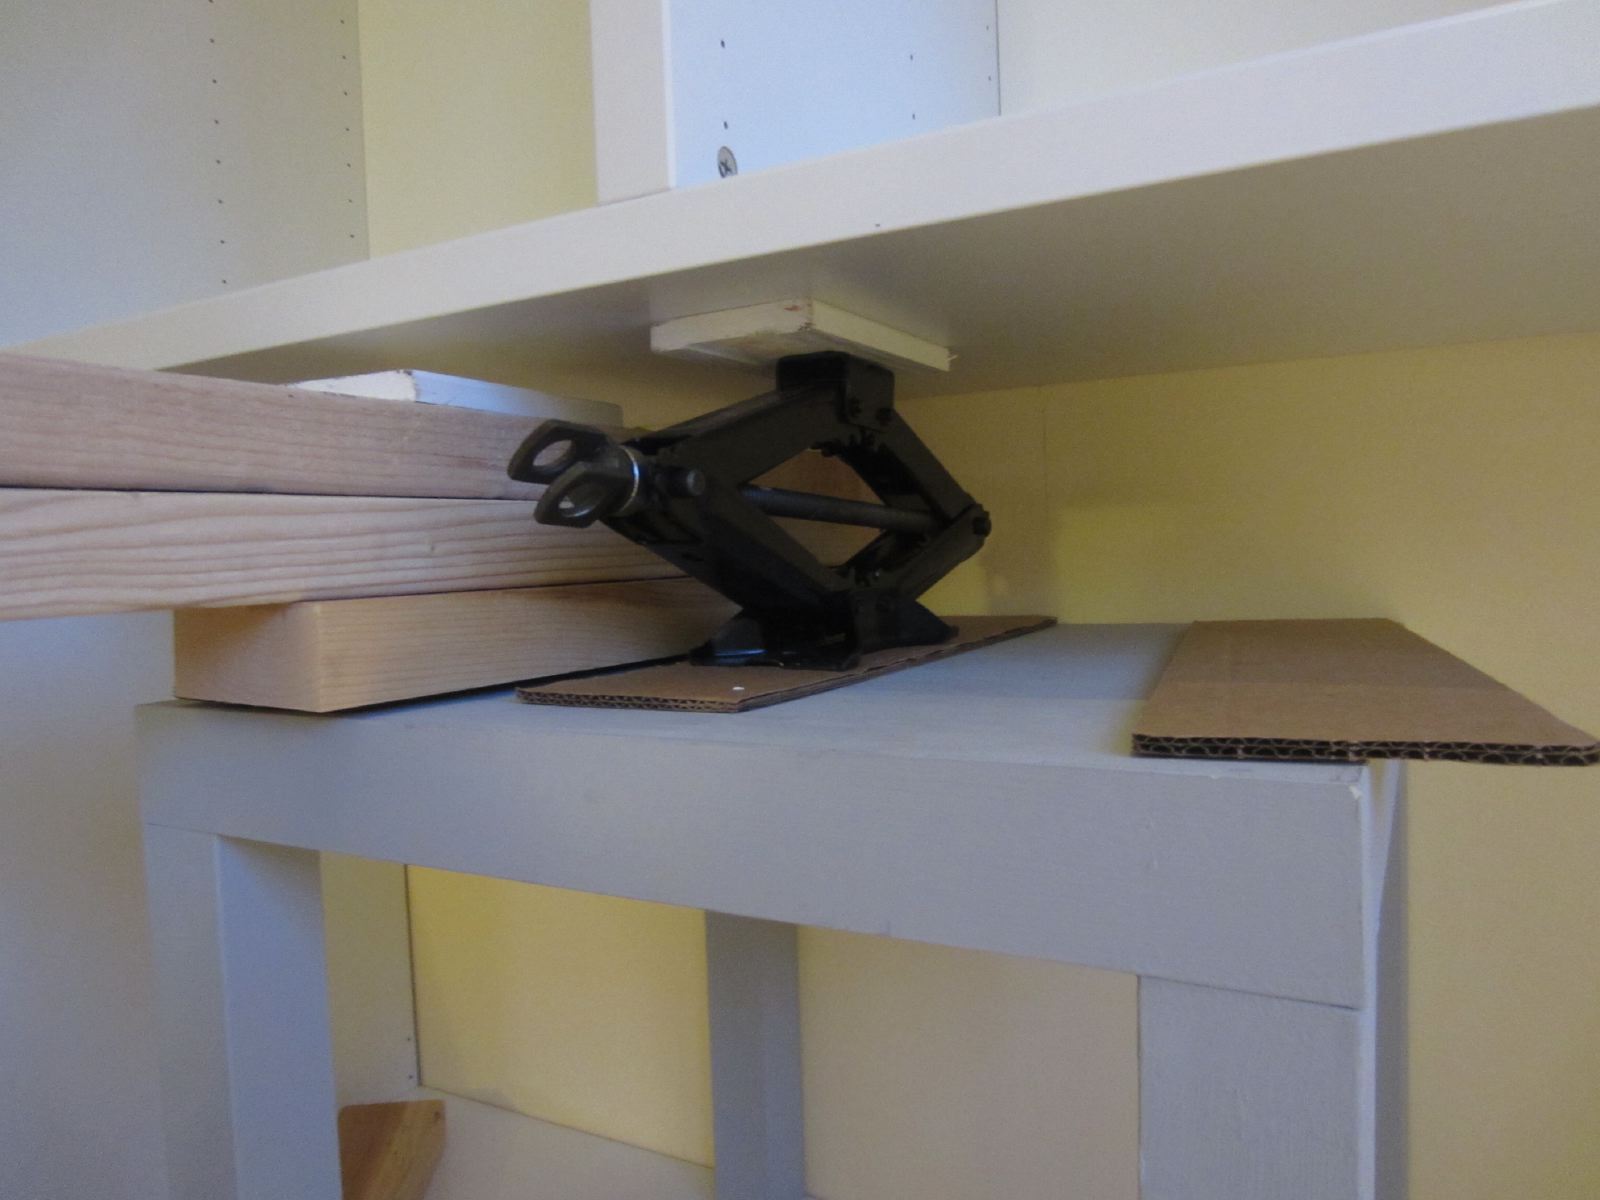
There are lots of screws holding this thing together as well as lots of screws holding the shelves to the wall. Chris also put the same wood strips behind the middle shelf so there would be more places to screw it into the wall. This is the basic skeleton of the shelf in place.

Here’s a view of the side so you can see how much the bottom shelves are pushed away from the wall to give the base shelving more of a “cabinet” look. An MDF panel was attached to the side of the bottom shelf to cover the gap.
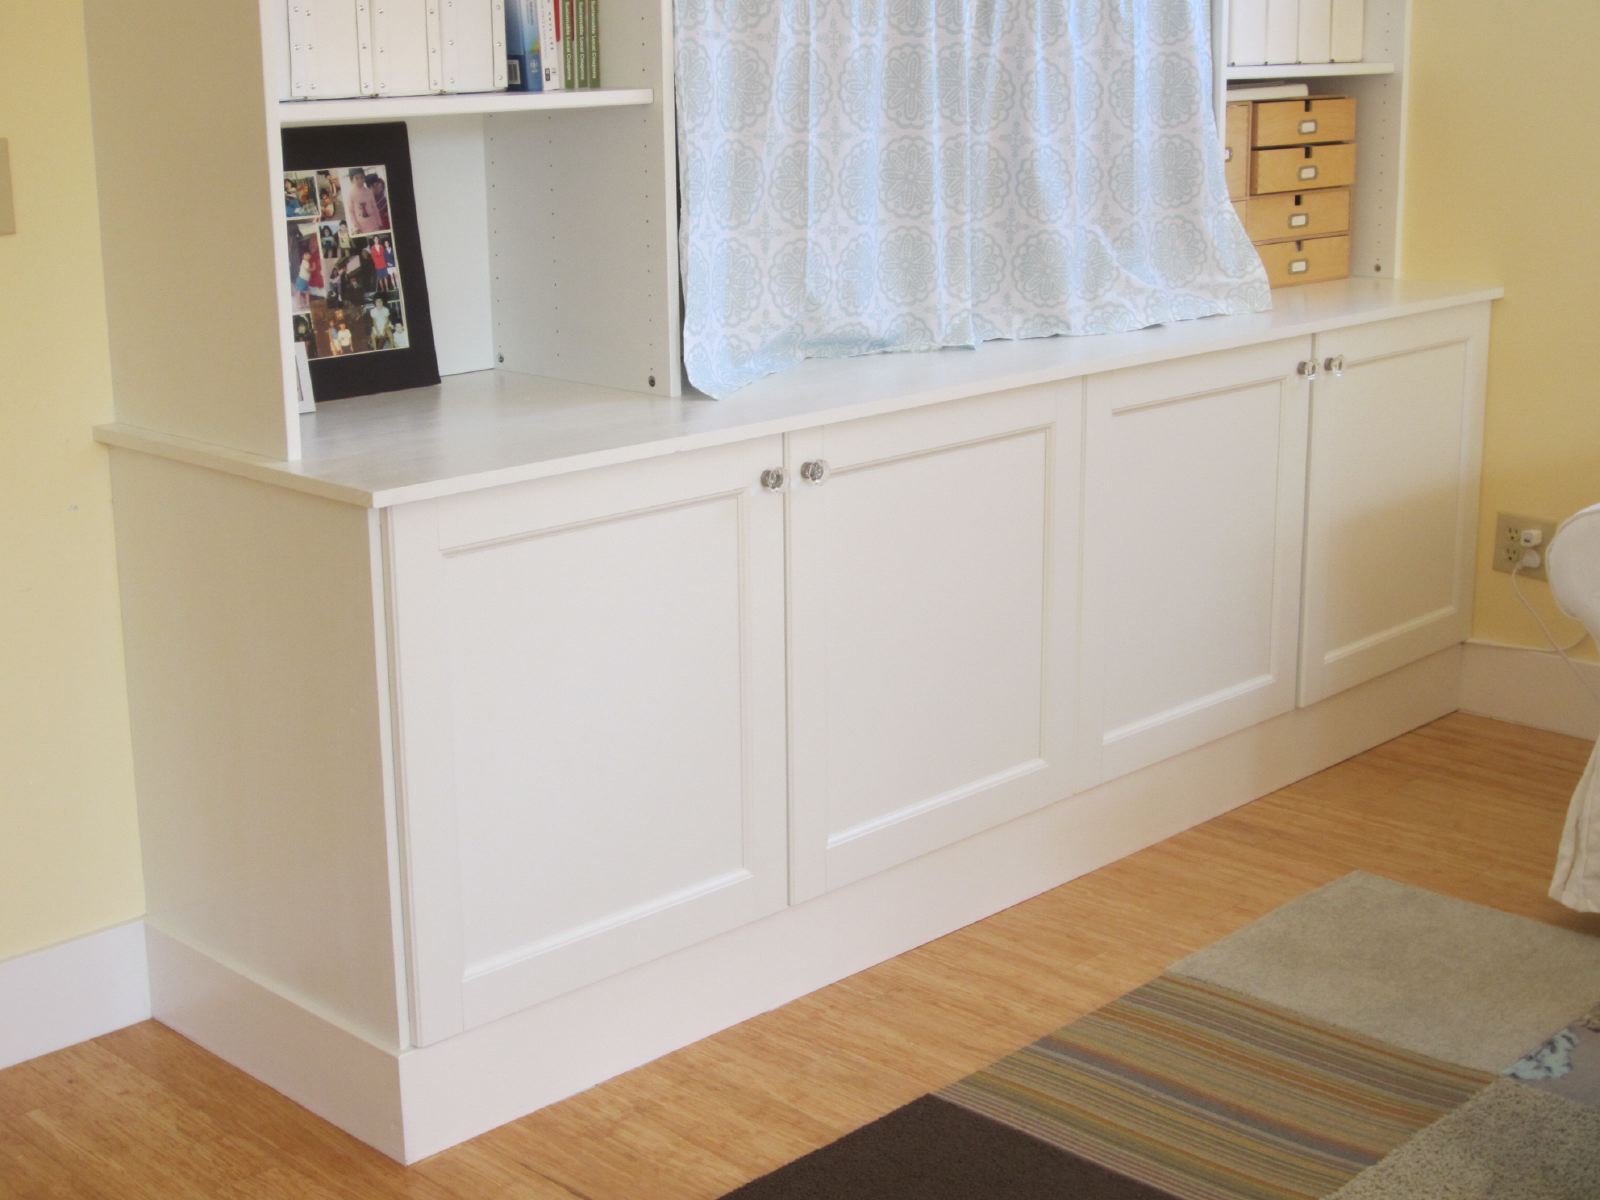
Here’s a picture of the bottom shelf with the side panel, doors, knobs and molding installed. We painted the countertop, side panel and molding with a white paint that we had color matched to the Besta shelves at Kelly-Moore (our local paint place).
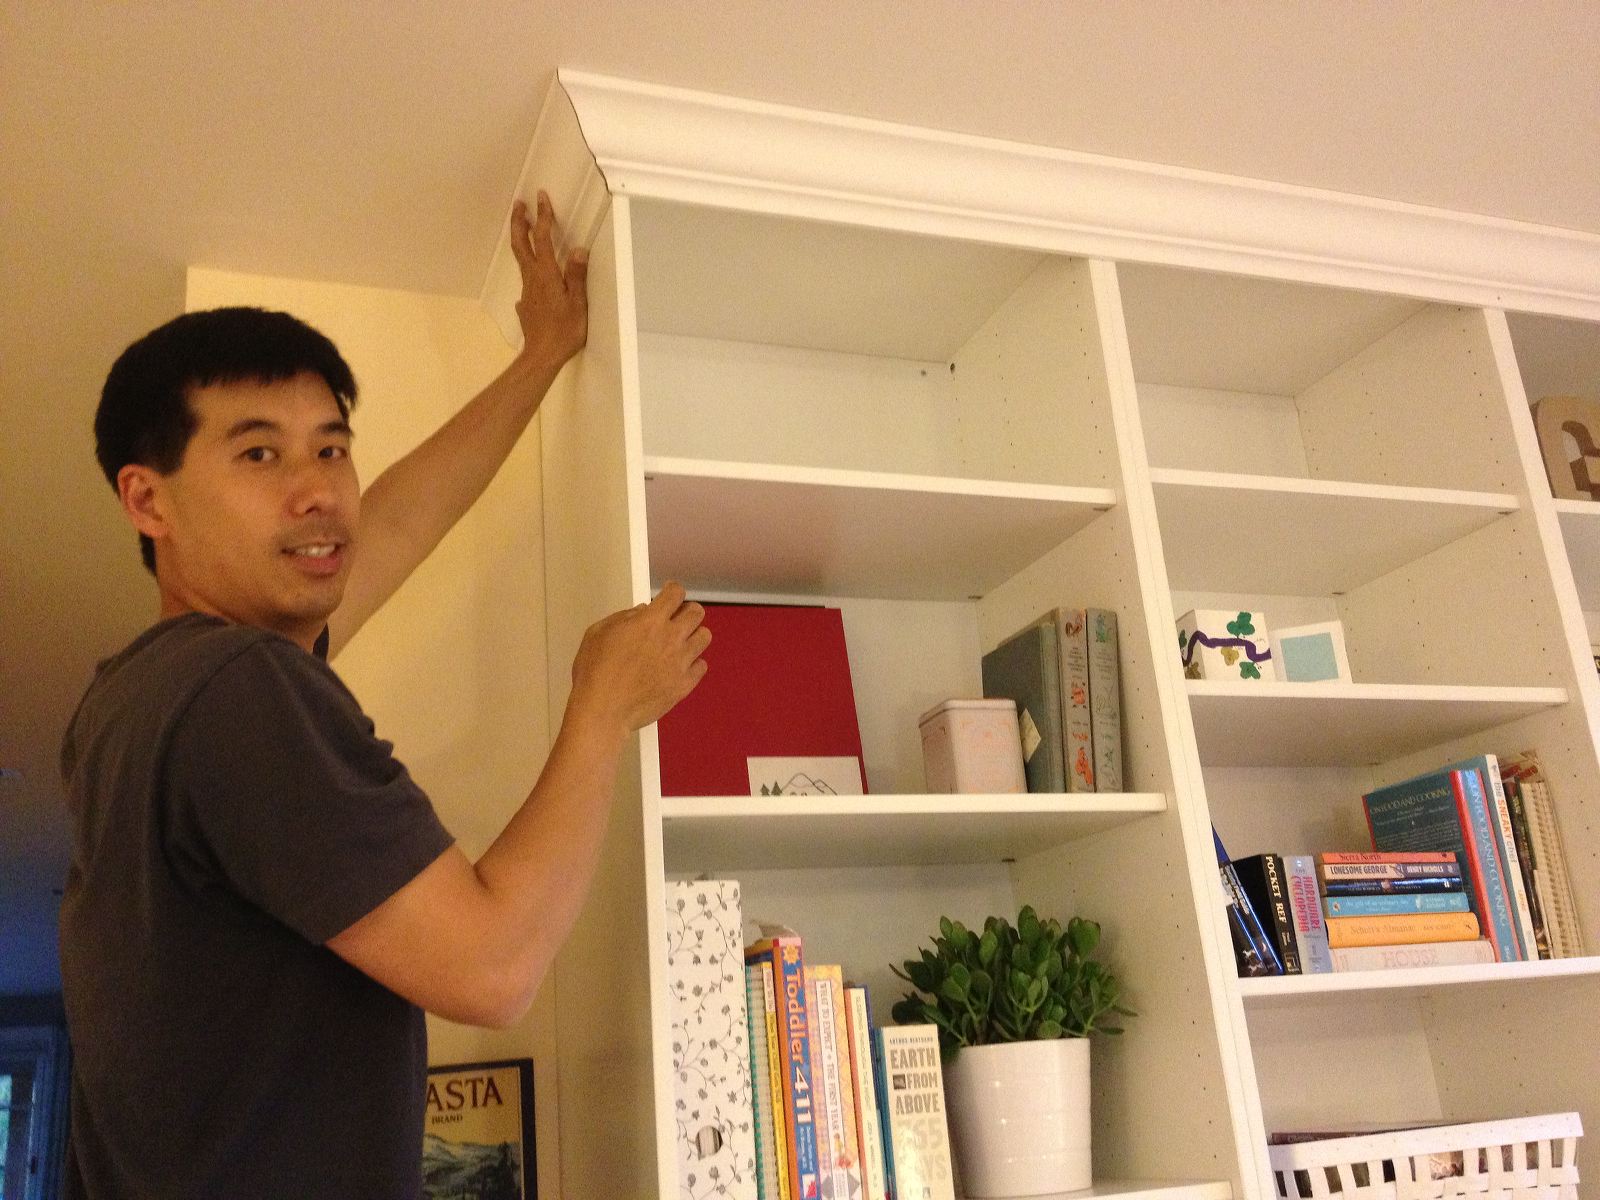
Chris also installed some crown molding at the top of the shelf, to cover the uneven gap at the top and to give the shelf a more built-in look.
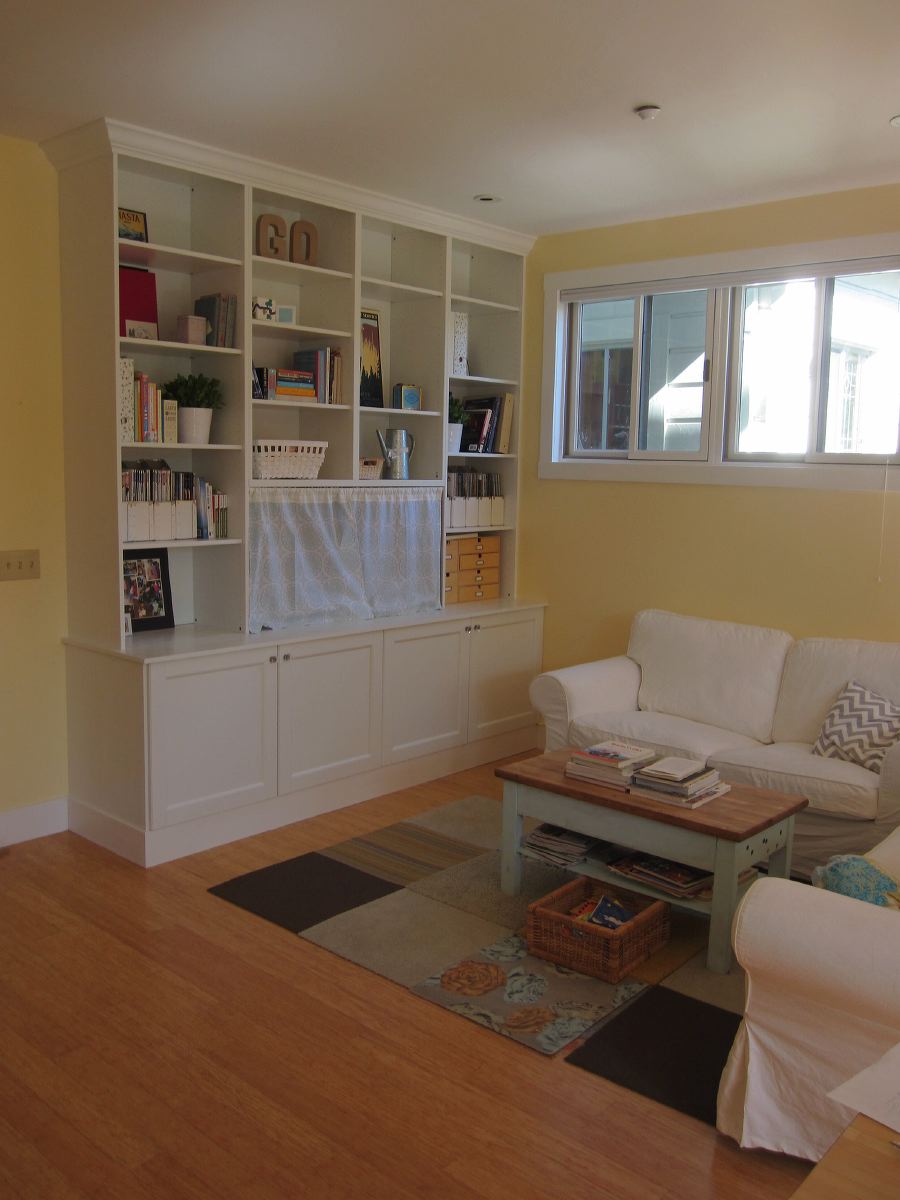
Below is the final product! Shirley sewed a curtain (using leftover fabric from the living room curtains) and installed a tension rod to cover the TV when it’s not in use (i.e., when we’re not watching HGTV). We’re liking both the aesthetics and the functionality of the curtain: even when it is pulled aside so we can watch TV, it still covers the ugly cable box but is thin enough that it lets the remote signal through.
A few more views of the finished product. A close-up of the crown molding.
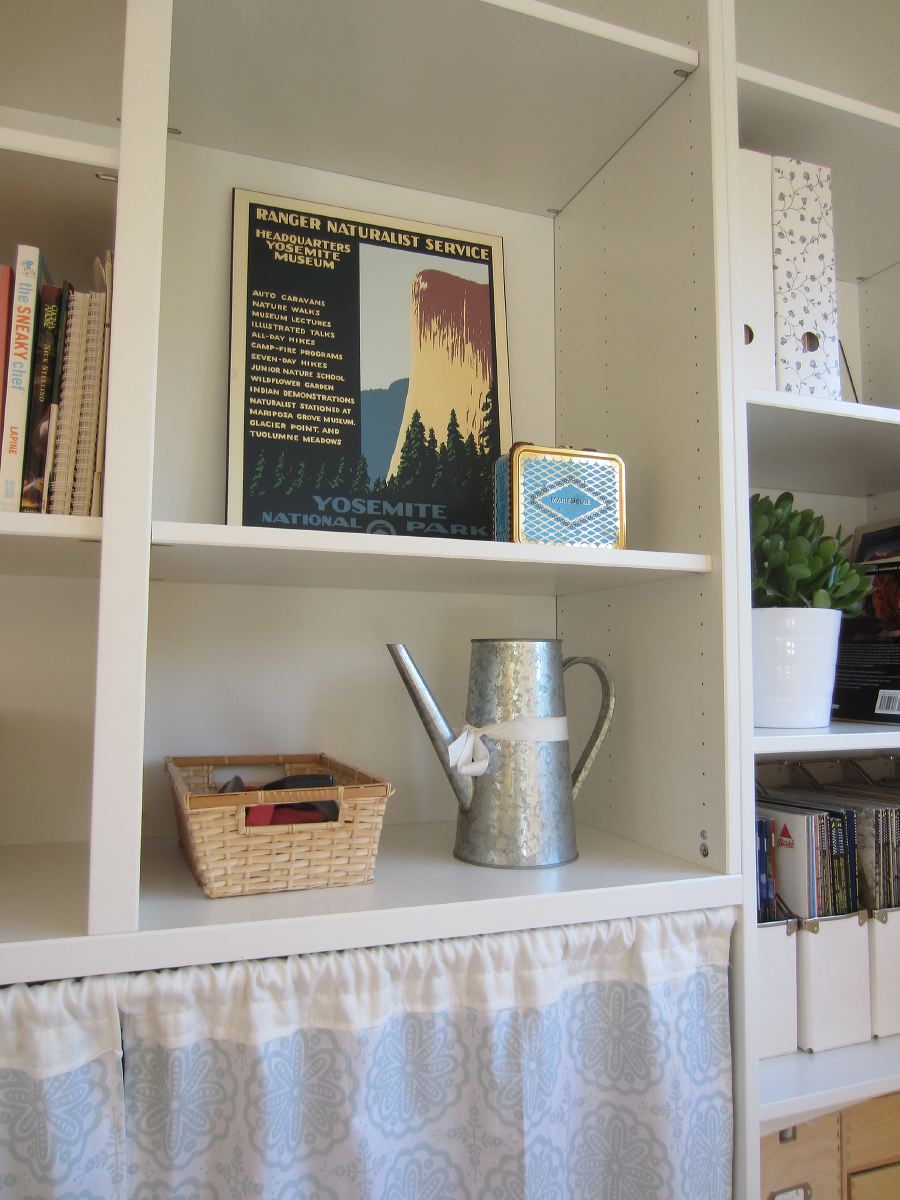
Shirley preliminarily threw some decorative elements onto the shelves.
Another view of the built-in. We’re very excited about how it turned out. Moving from the dark TV shelf to a bright white one really brightens up the room while also giving us a lot more storage (especially in the bottom cabinets, to where we moved the printer and other computer-related equipment from the guest room).
Total cost of this project was around $700, with the bulk of the cost coming from the IKEA shelves and doors. Here is the cost breakdown:
- IKEA Besta tall shelves 2 @ $85 = $170
- IKEA Besta bottom shelves 2 @ $74 = $148
- IKEA Besta middle shelf 1 @ $130 = $130
- IKEA Vassbo doors 4 @ $15 = $60
- IKEA total $508 + tax
- Baseboards ~$15
- Assorted wood (2x4s, 1x3s) ~$6
- 1×12 Pine boards for countertop 2 @ $23 = $46
- Crown molding $28
- Paint (for countertop, side panel, and molding) $20
- Glass Knobs
(4) $26
- TOTAL ~ $700 (including tax)
Looks really smart. We’ll done!
Looks great! Can you remember which paint color you used? Trying to find a white that matches the bestas. Thanks!
Thanks!
It wasn’t a stock color. I believe we just took a shelf to the paint store and had them match the color.
Looks great, minus the curtain. Why hide the tv?
The pictures look great and the after work is amazing. It looks really amazing with some nice color combinations. Thanks for sharing he blog.
How did you attach the mdf side panel? We are running into the problem of the bottom of the besta frame being hollow.