Once the winter rains in California subsided, our family wanted to ride our bikes more. Our current bike storage location is in the garage, but was inconvenient to get multiple bikes in and out of on a regular basis. Our large driveway/walkway on the side of our house seemed like a great location to store our bikes. However, we wanted to protect the bikes, both from the rain and the gaze of bike thieves.
Chris thought of a lightweight structure that had a roof sort of a carport for bikes, i.e. a bikeport. It’s not a full-blown bike shed because it’s not fully enclosed but it serves the same purpose. Here’s a view of the finished product. Total cost ~$142
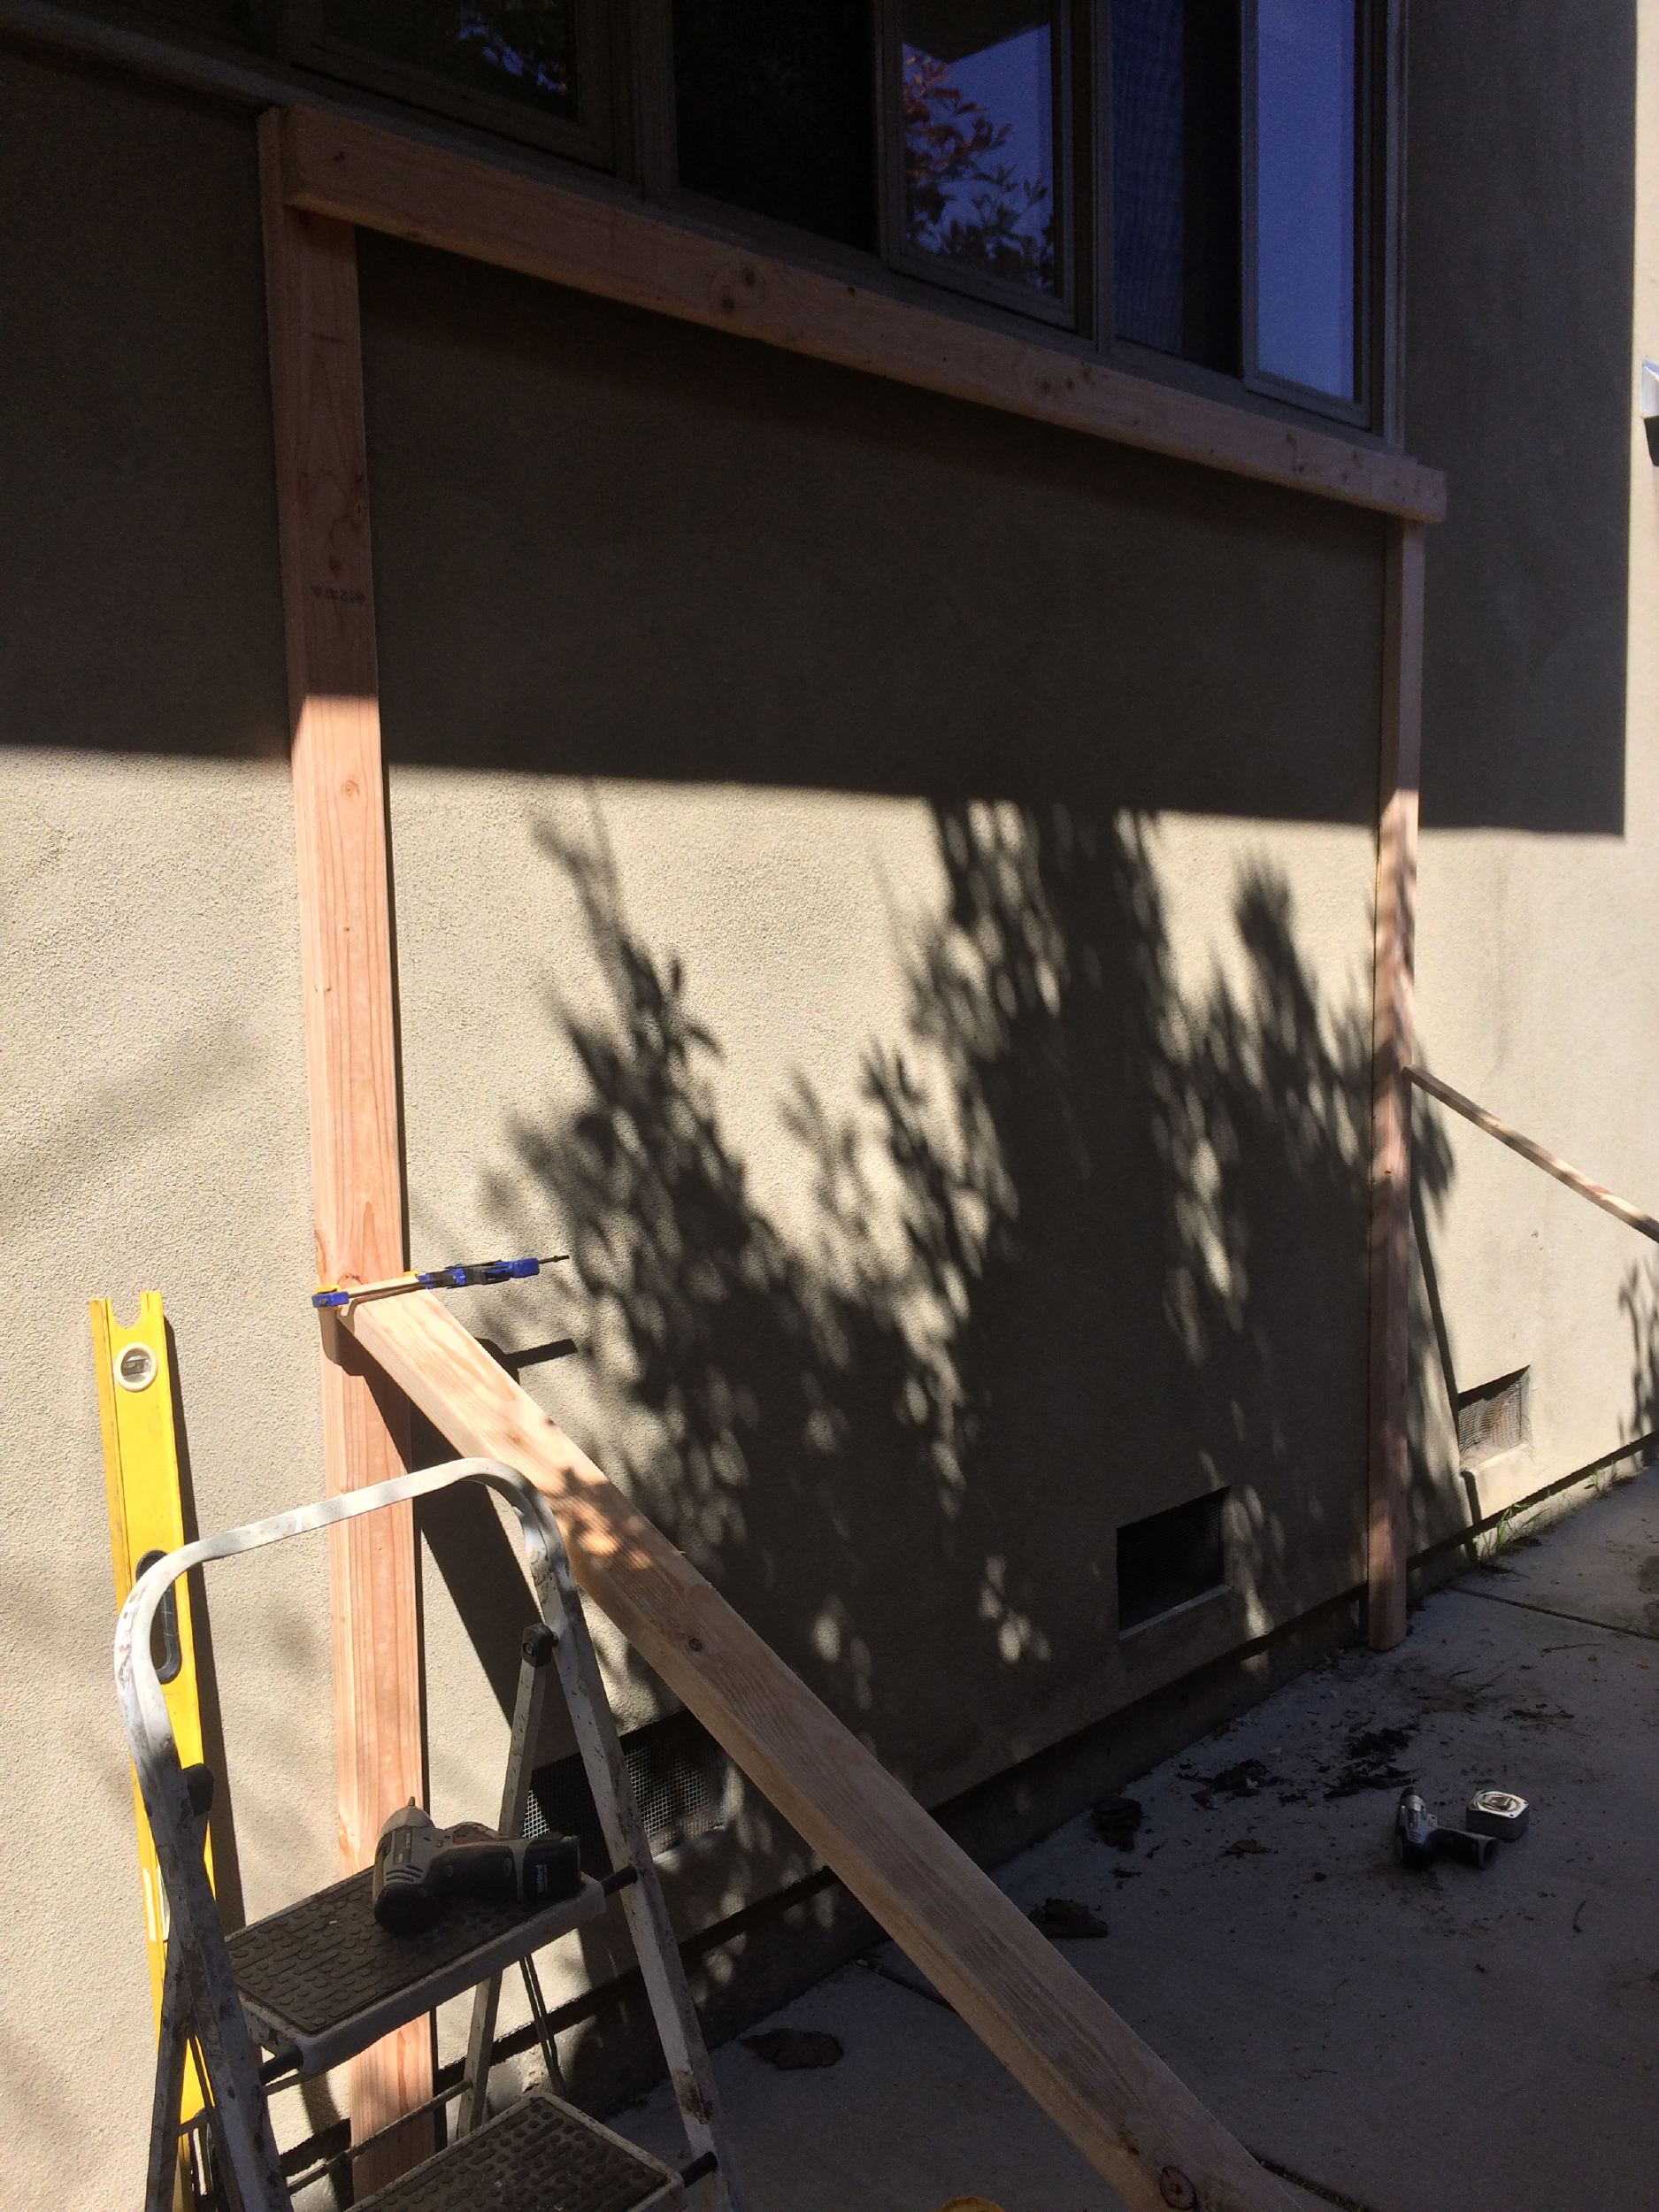
It’s made primarily out of inexpensive 2×4 lumber. In the picture below, 2 vertical 2x4s are connected with one horizontal ‘header’ beam. The bikeport is 8ft long as a result. The two diagonal board are there just to hold the vertical boards up while Chris screws the whole thing together.
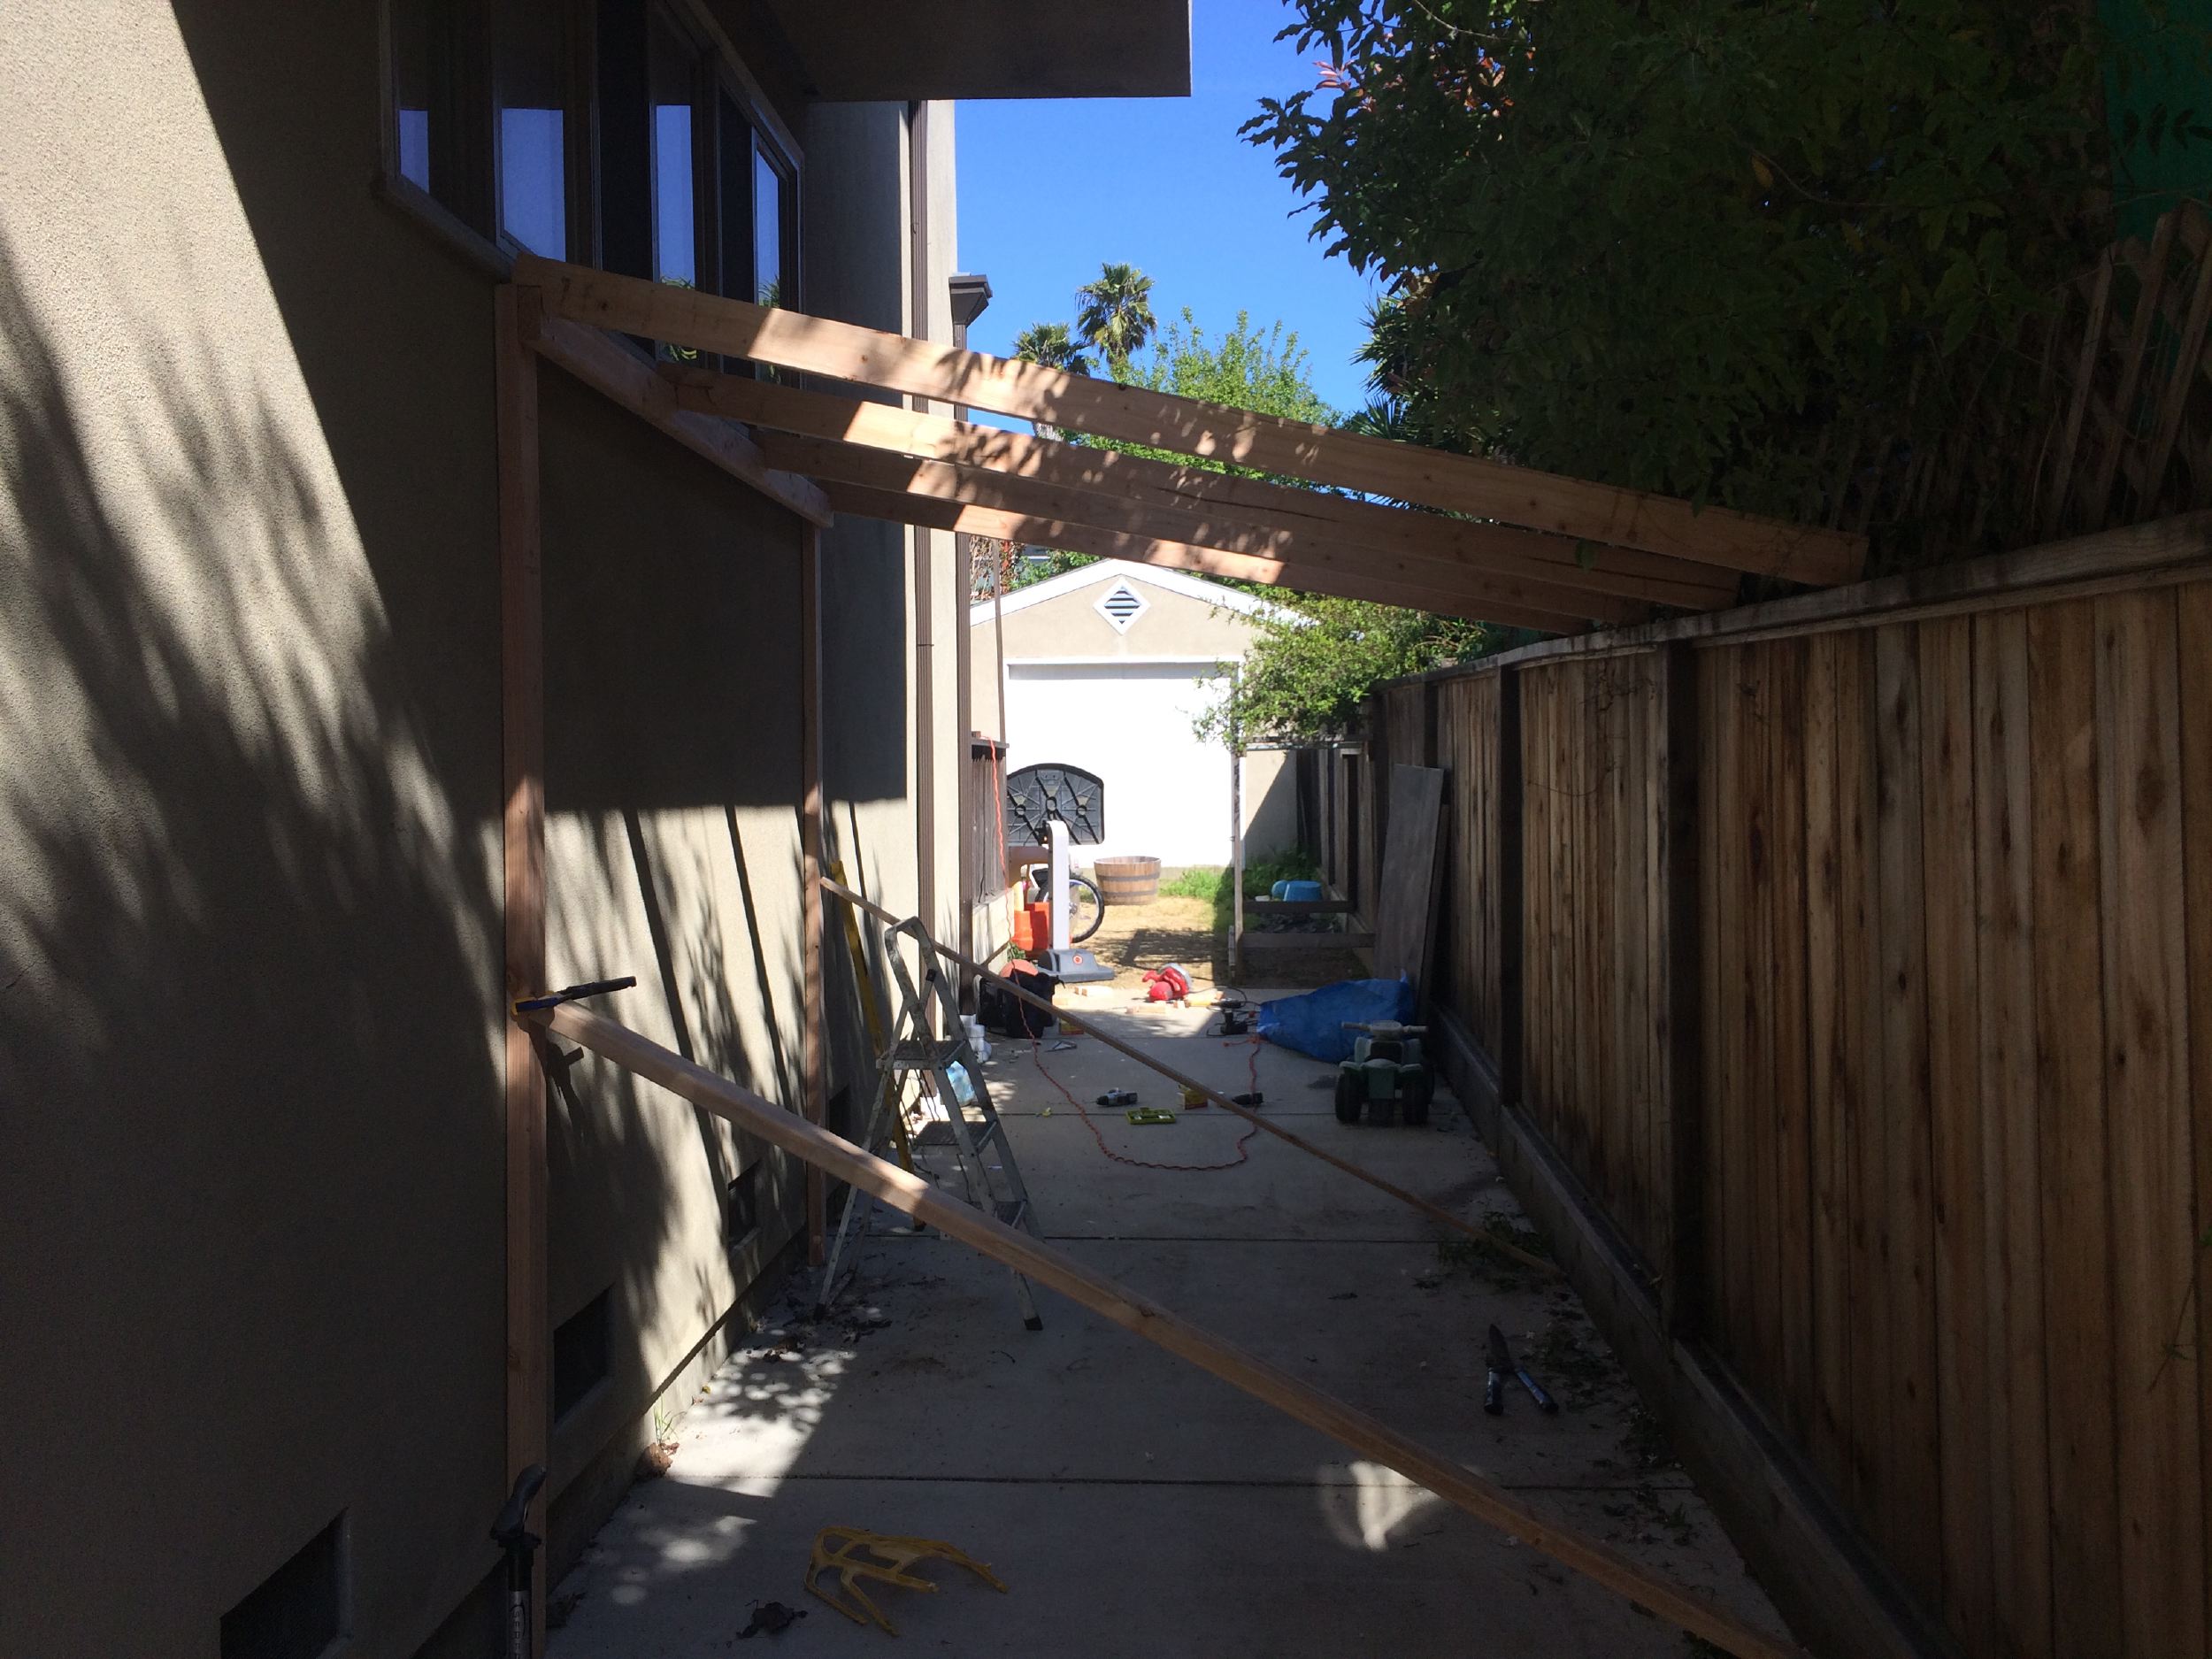
Then four roof rafters are used to span the width of the walkway. The roof rafters have a “birdsmouth cut” so that the diagonal rafter can sit cleanly on the header. They are also screwed into the top of the fence.
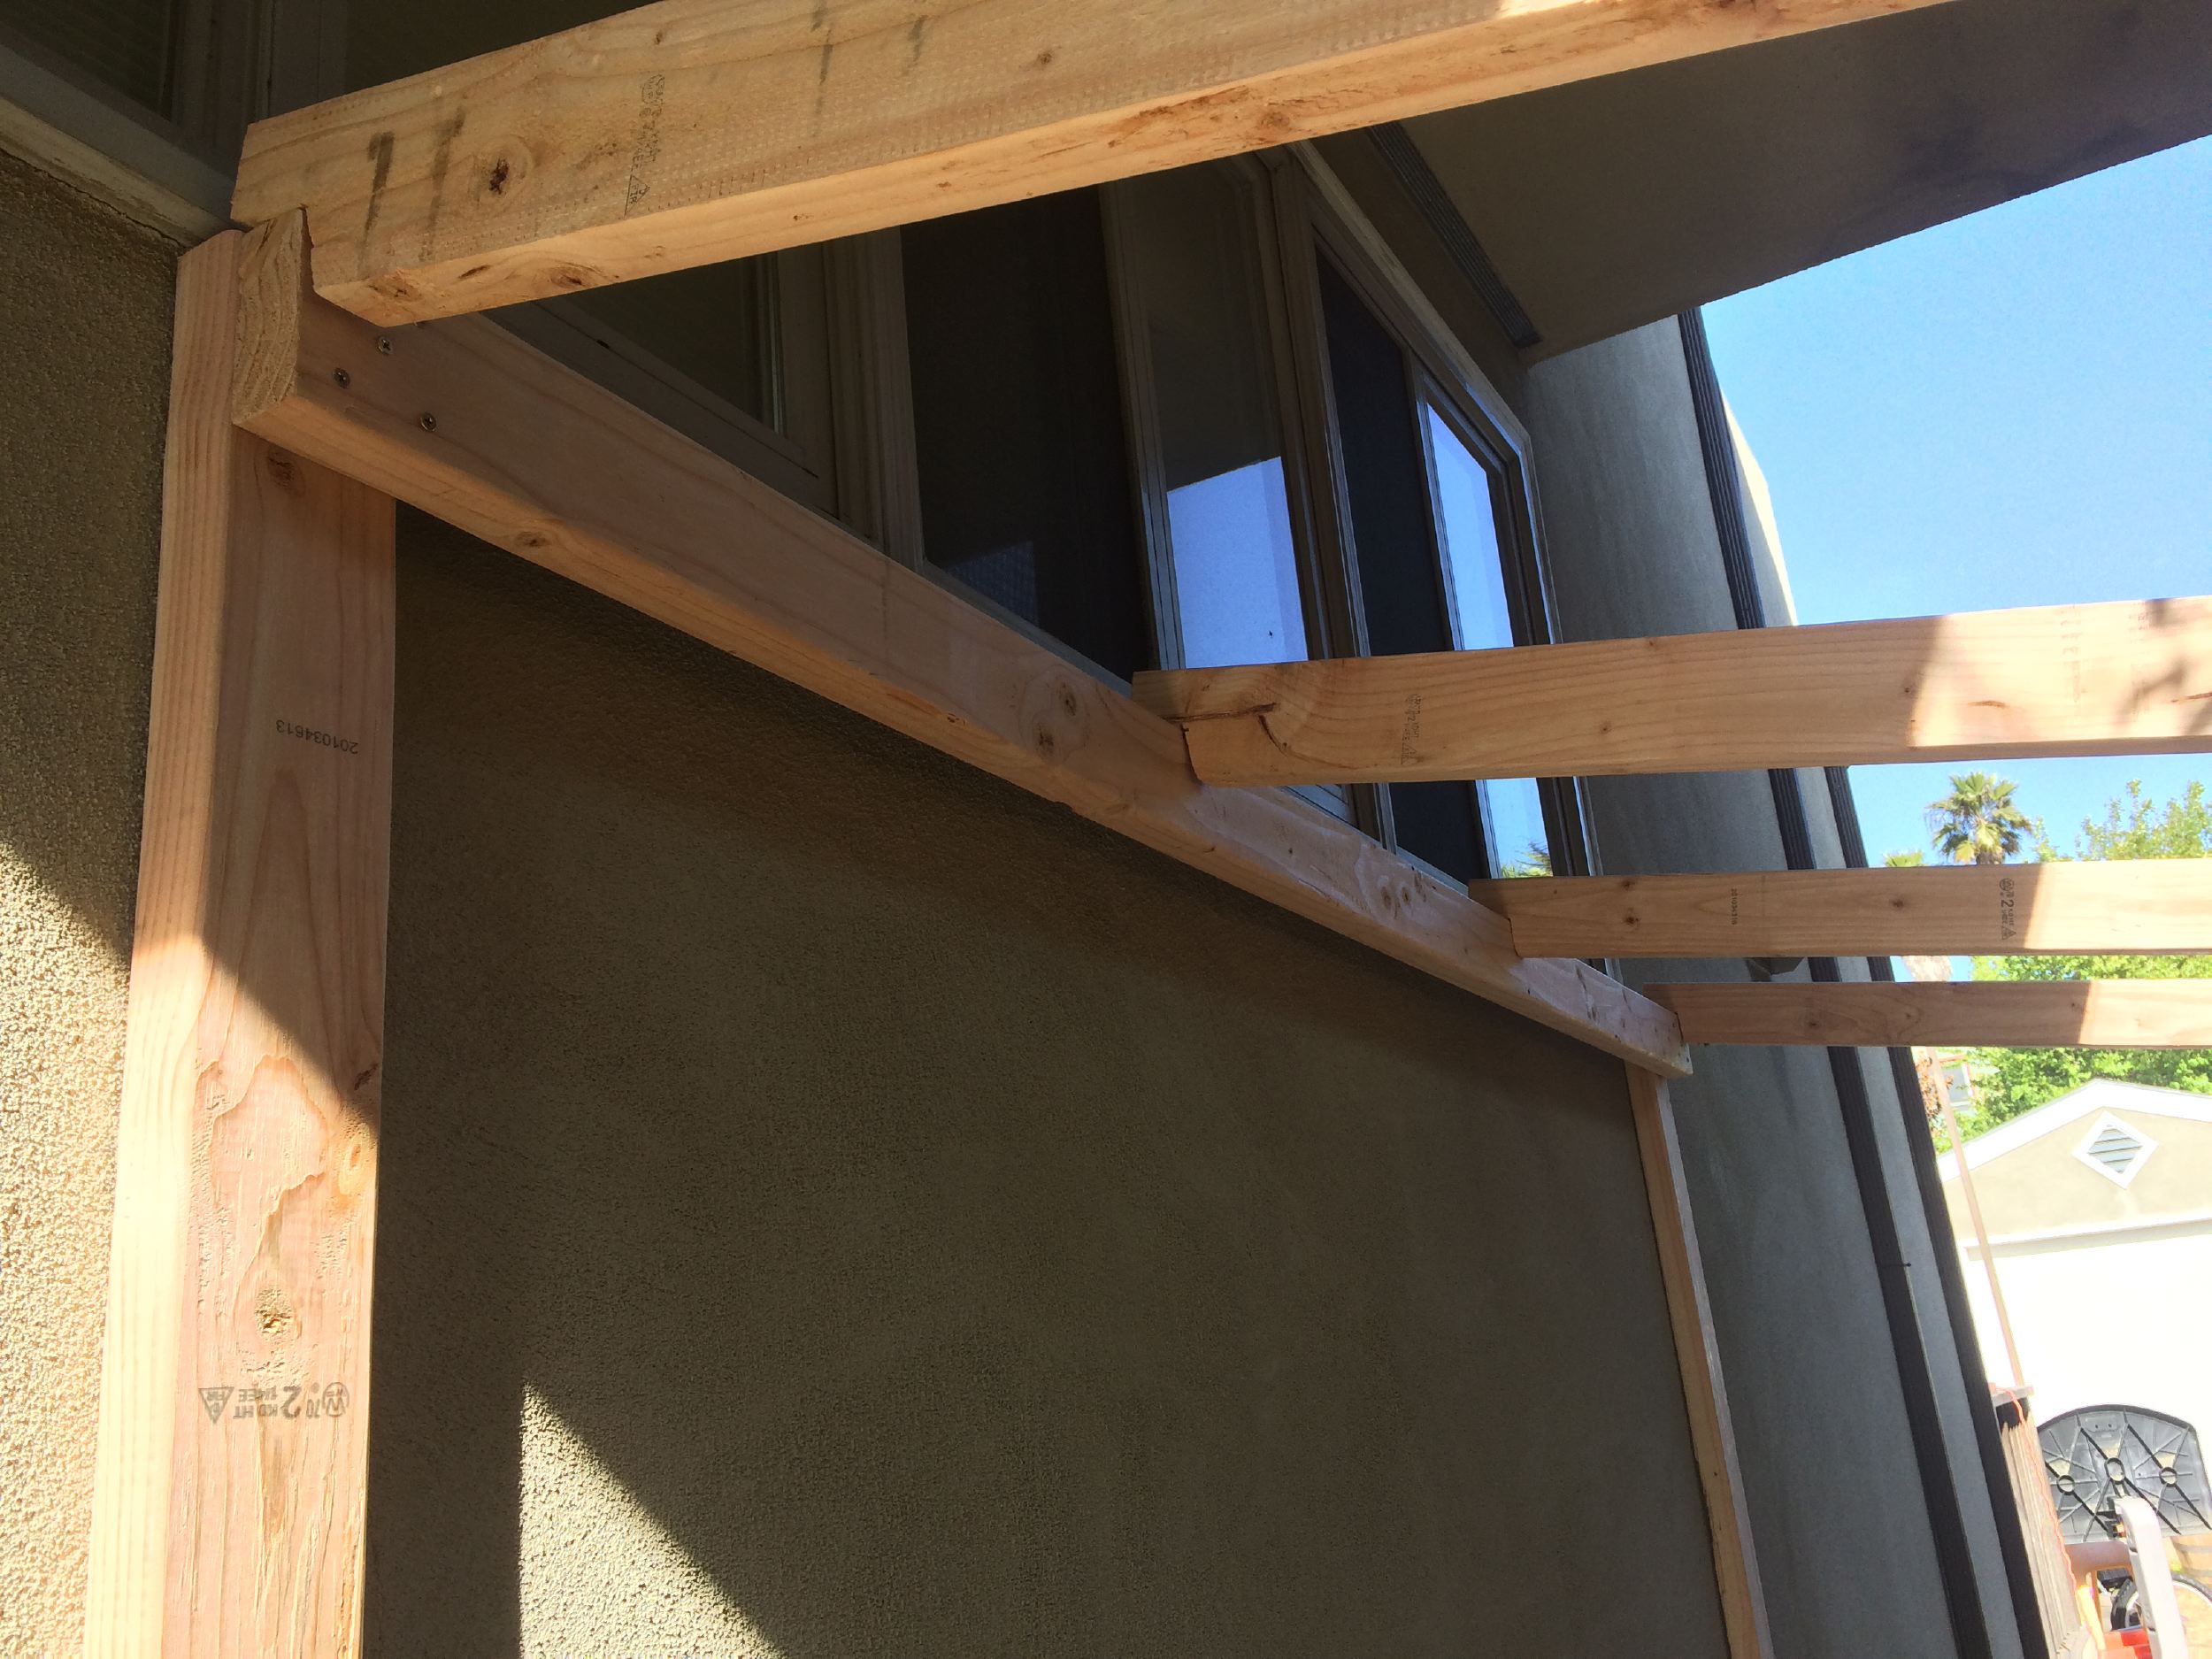
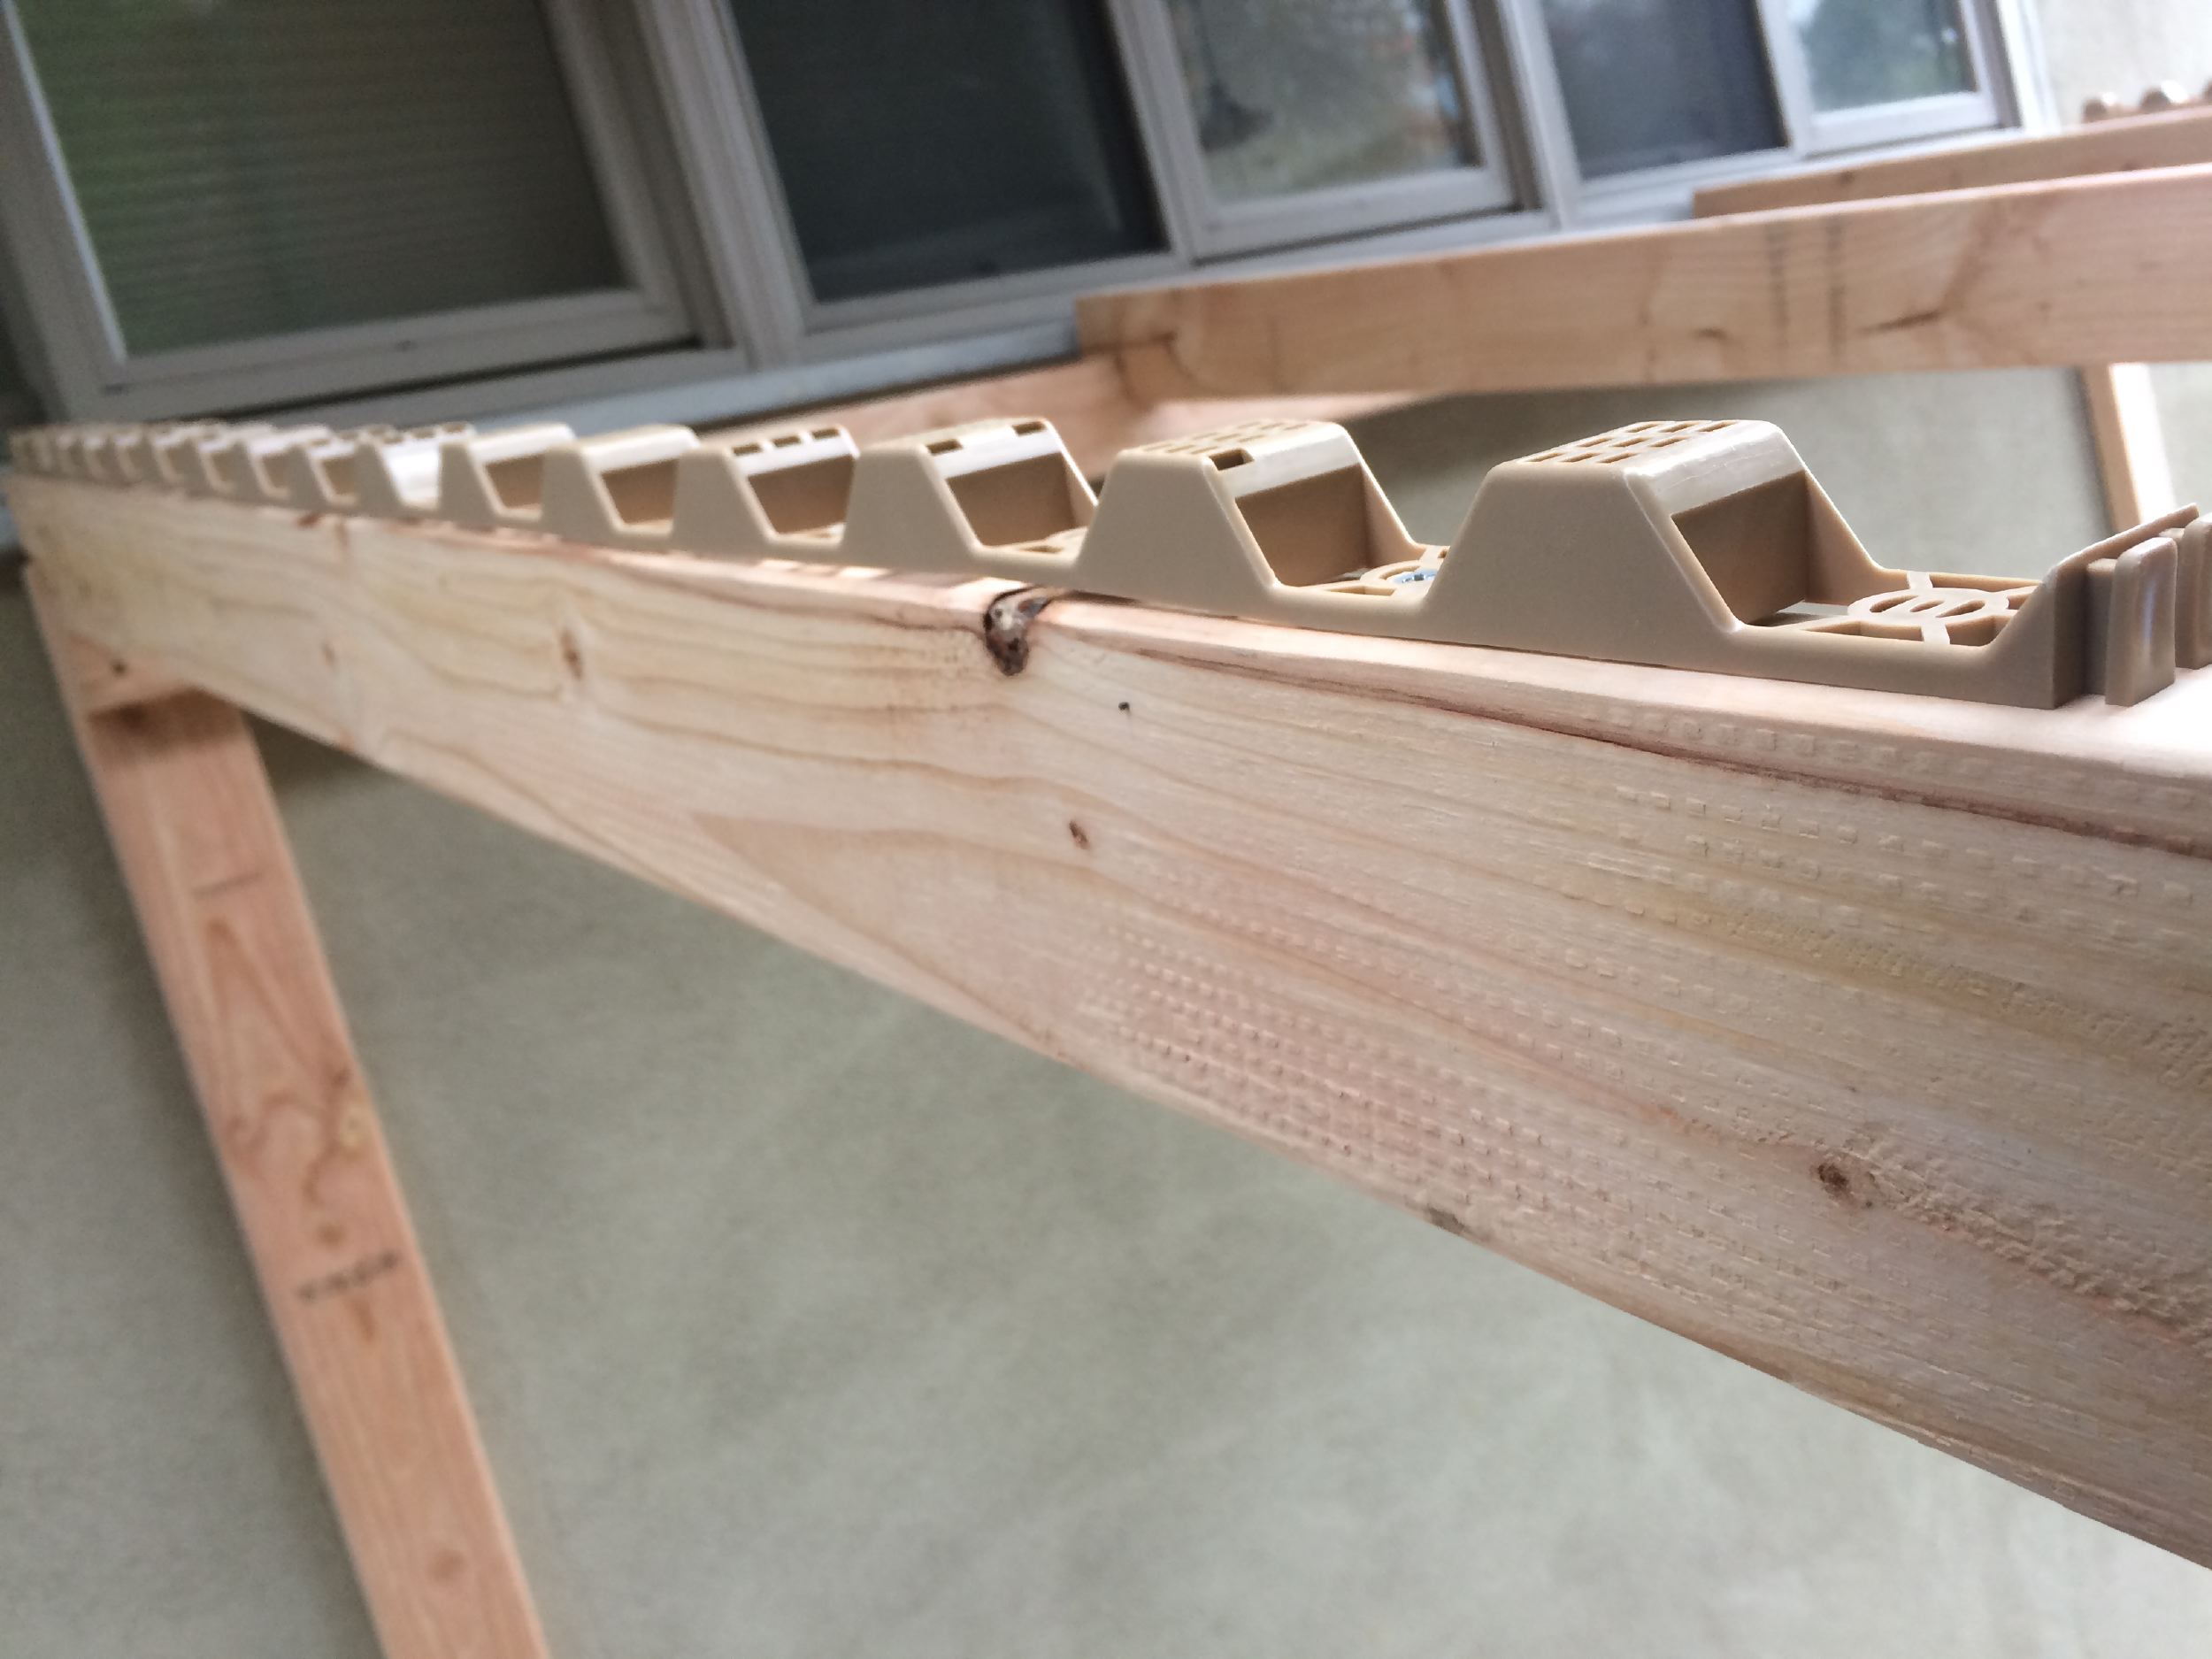
A closer view of the birdsmouth cut on the rafters.
We used suntuff clear polycarbonate corrugated roofing to cover the bikeport. The clear panels are very light (~4lbs each) and strong. Here is a closeup of the brackets to support the panels. I oriented the corrugations the opposite way from one would expect, just because we didn’t want the water to shed into the neighbors yard and also we could get away with fewer roof rafters.
Here is a view with some bikes and the installed panels on the roof. We installed two more 2×4 pieces horizontally between the vertical posts to hold the bike hooks which hold the front wheels. The higher one holds the front wheel of the adult bikes, while the lower one holds the wheel of the kid bikes. The hook is screwed into the 2×4 and sticks out horizontally and it holds onto the front bike wheel to hang the bike vertically.

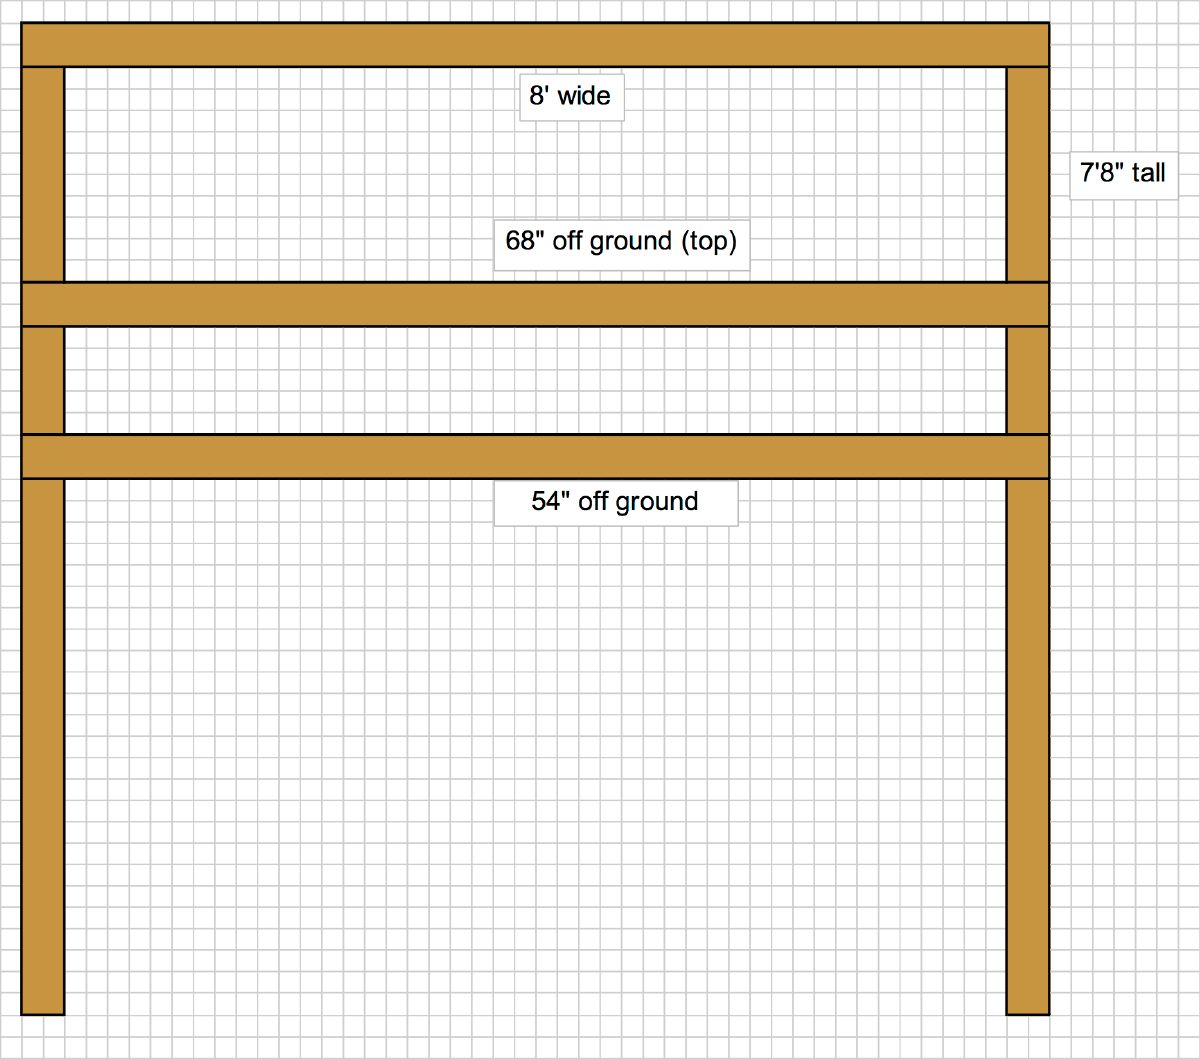
Here is a drawing of the basic frame against the house. Very simple. 2 vertical 2x4s cut slightly to fit beneath the window and 3 horizontal 2x4s, top one is a header for attaching the rafters and the bottom two for holding the bikes and also provide additional lateral stability. Screw the perpendicular 2x4s together with multiple screws in a square pattern to prevent rotation of the joint.
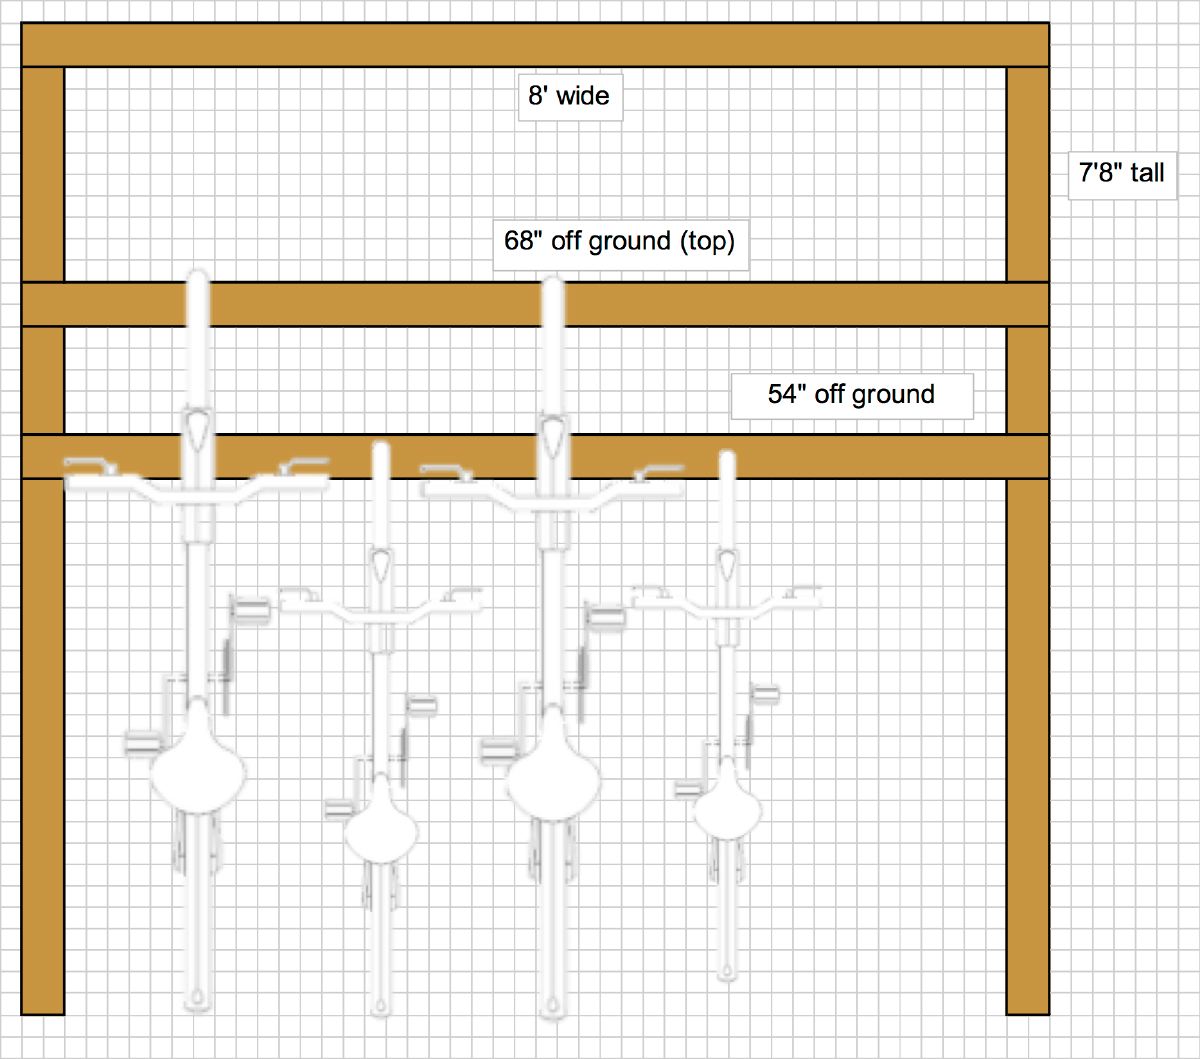
Another diagram with the bikes included. We alternated adult and kids bikes as the handlebars won’t interfere much when we hang and remove the bikes from the shed.
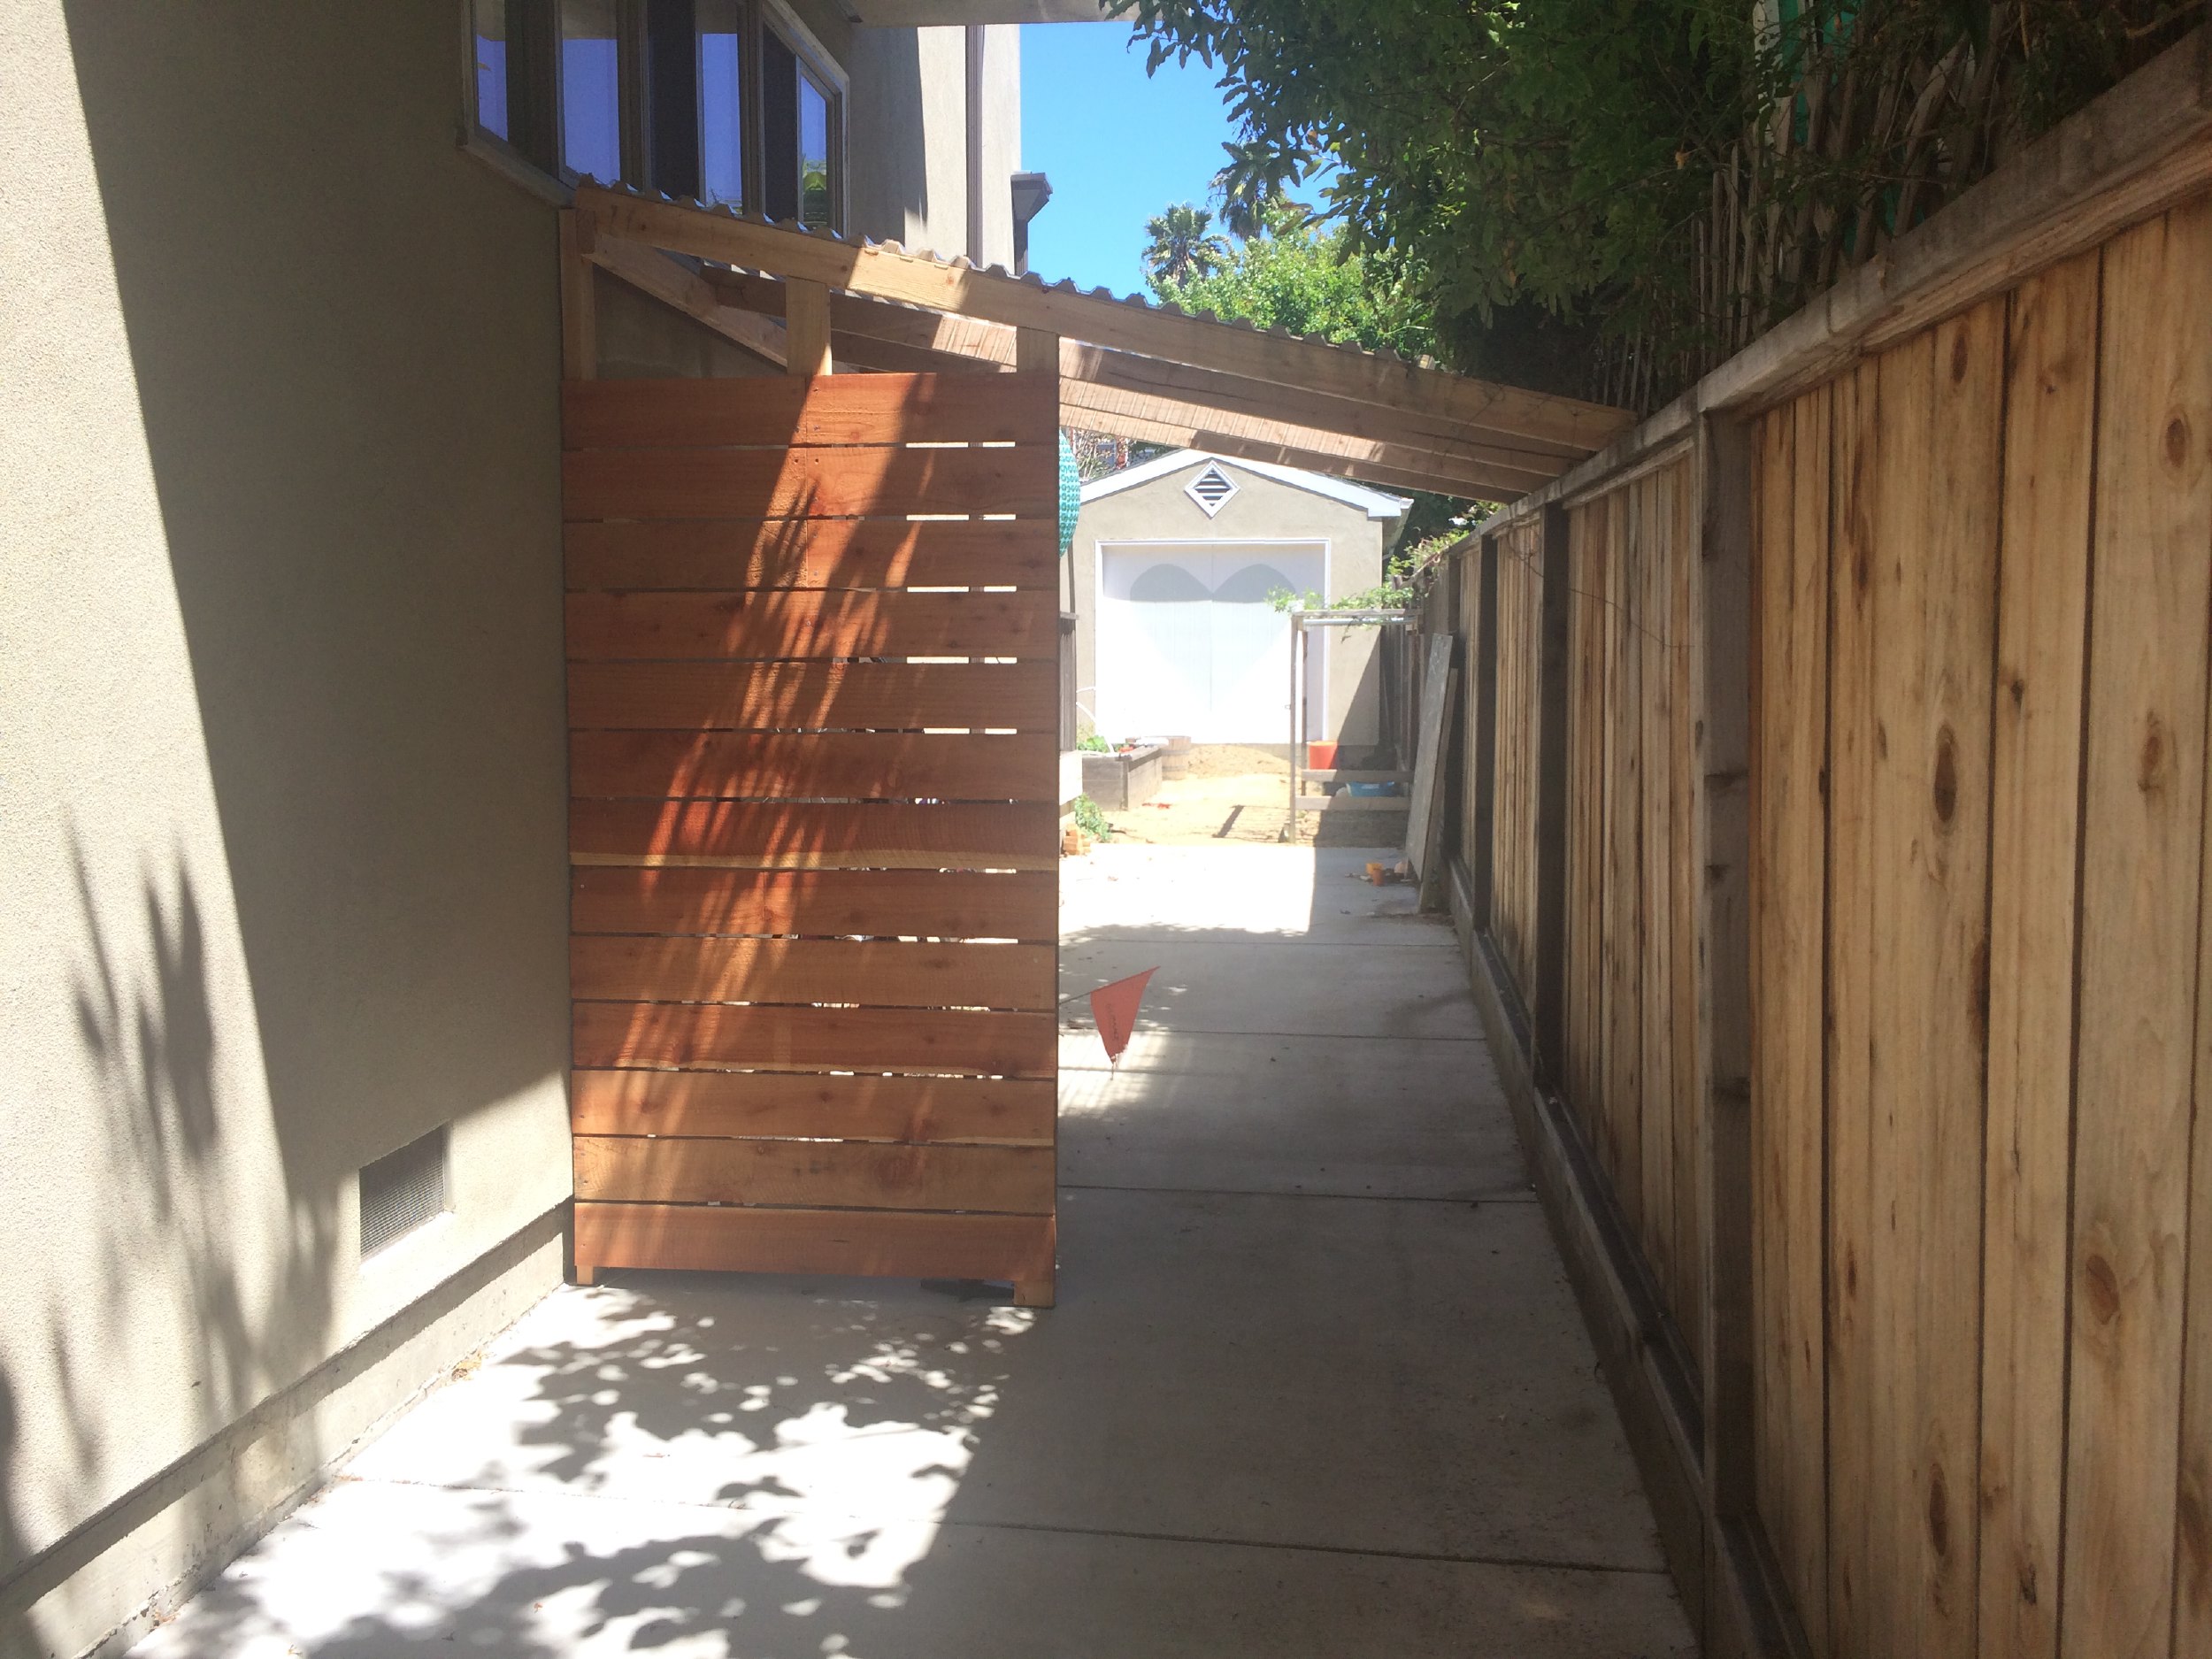
To prevent a view of the bikes from the street, we added a redwood privacy screen

Here’s a diagram of the bike hanging in the bikeport. You can see the rafters are attached (with screws) to the top of the fence which provides all the stability the shed needs.

A final diagram with the privacy panels attached.

There’s only one wall, so it really can’t be called a shed. Here’s a view from the back side and towards the redwood gate.
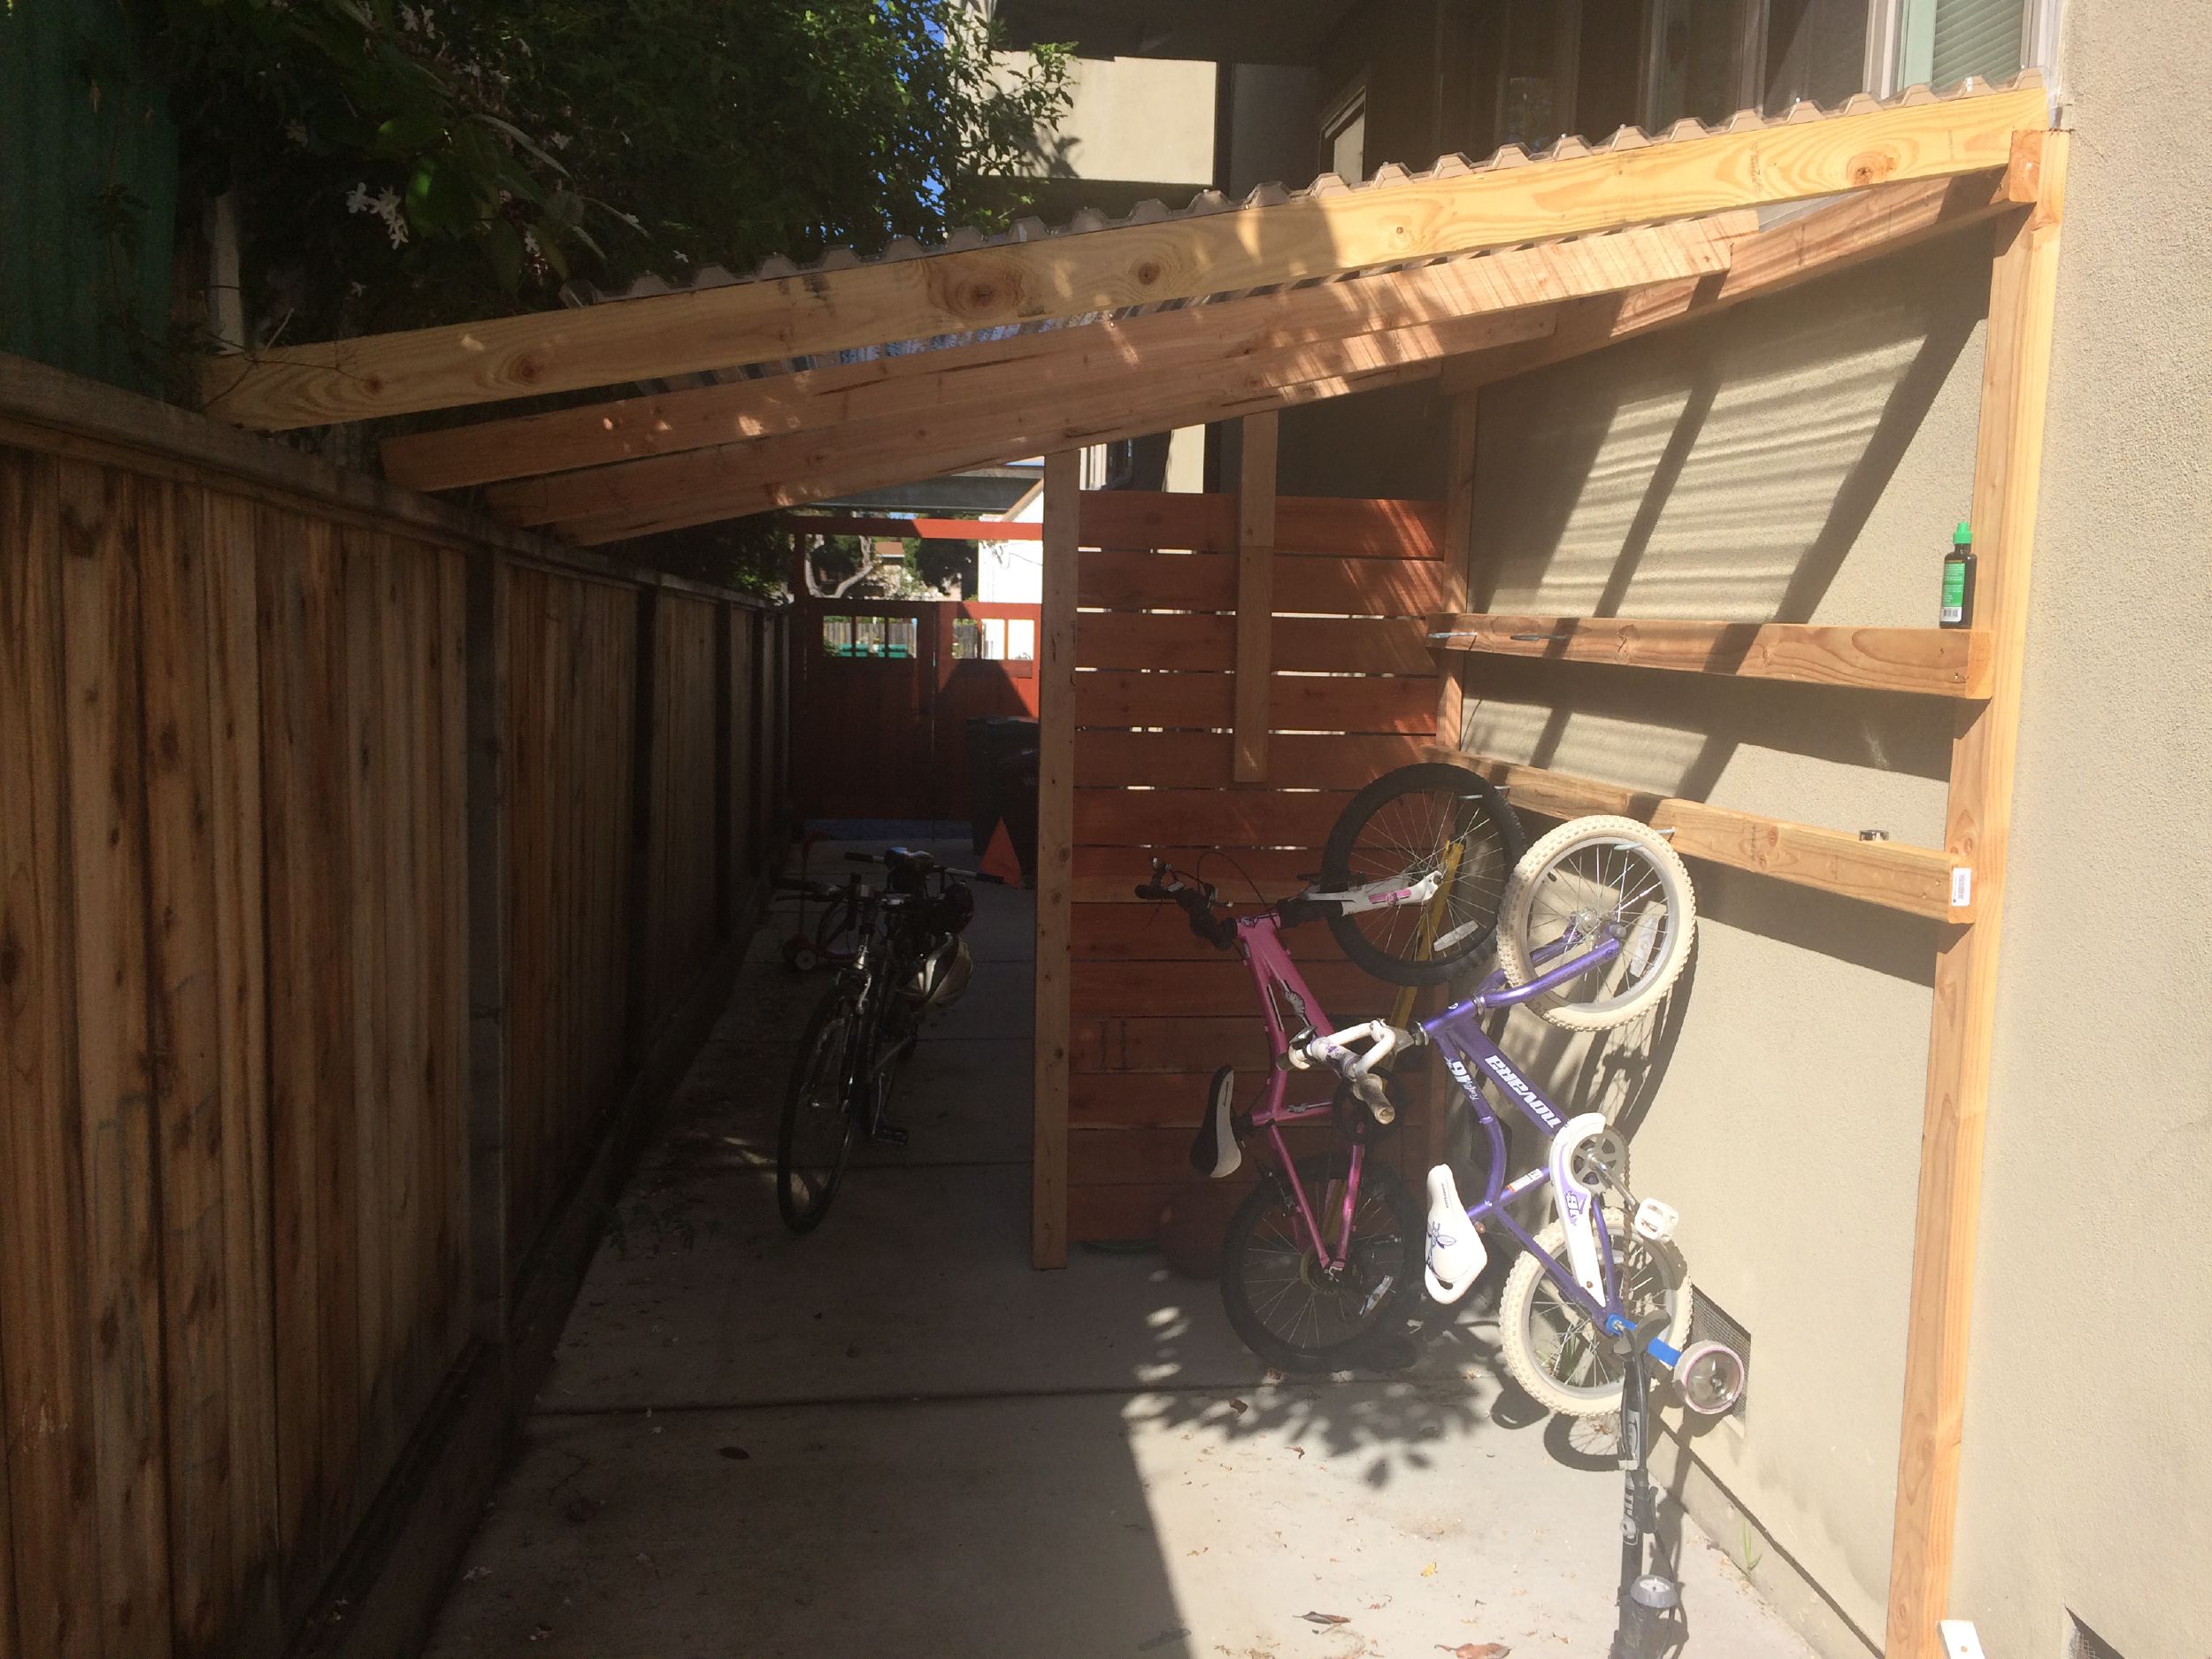
And here is the finished view of the bikeport. Very clean and stylish!
The final cost for the bikeport was $142
10 – 2x4s . . . . . . . . . . . . . . . . . . . . . . . . . . . . . . . . . . . . . . . . . . . . . . . . . . . . . . . . . . $27
3 Suntuf panels . . . . . . . . . . . . . . . . . . . . . . . . . . . . . . . . . . . . . . . . . . . . . . . . . . . $67
12 Suntuf horizontal closure strips . . . . . . . . . . . . . . . . . . . . . . . . . . . . . .$11
4 bike hooks . . . . . . . . . . . . . . . . . . . . . . . . . . . . . . . . . . . . . . . . . . . . . . . . . . . . . . .$12
8 redwood fence boards . . . . . . . . . . . . . . . . . . . . . . . . . . . . . . . . . . . . . . . . . .$25
Total . . . . . . . . . . . . . . . . . . . . . . . . . . . . . . . . . . . . . . . . . . . . . . . . . . . . . . . . .$142
The bikeport took about 6 hours to plan and construct (including a trip to Home Depot). It’s much more convenient to have the bikes out and more accessible and as a result, we’ve been biking alot more and doing more errands by bike. It looks great on the side of the house and is super functional too.
Hi – we are looking for a similar solution along our driveway fence in front of our garage (also in California so mild winter). I am wondering – are you still using your bike shed?
Did you figure out a way to lock the bikes up?