When we moved into our house in 2010, we installed an IKEA kitchen (see post here on the kitchen installation). We had always intended to paint the kitchen cabinets to a light greenish/blue color (Sherwin Williams Sea Salt), as evidenced in that 2010 blog post.
“Our plan is to paint them at some point in the future.”
In 2013, Shirley eventually issued an ultimatum to Chris to paint the cabinets soon or else it would be “outsourced”, i.e. hire someone to do it for us. Chris isn’t much of an outsourcer so he sprung into action to paint the cabinets the summer of 2014 (it’s been a little bit of a delay in getting the photos together and finalizing this blog post). Anyway, here is the final result showing the painted kitchen cabinets. The rest of the post will talk about the process that went into painting the cabinet doors and drawer fronts.
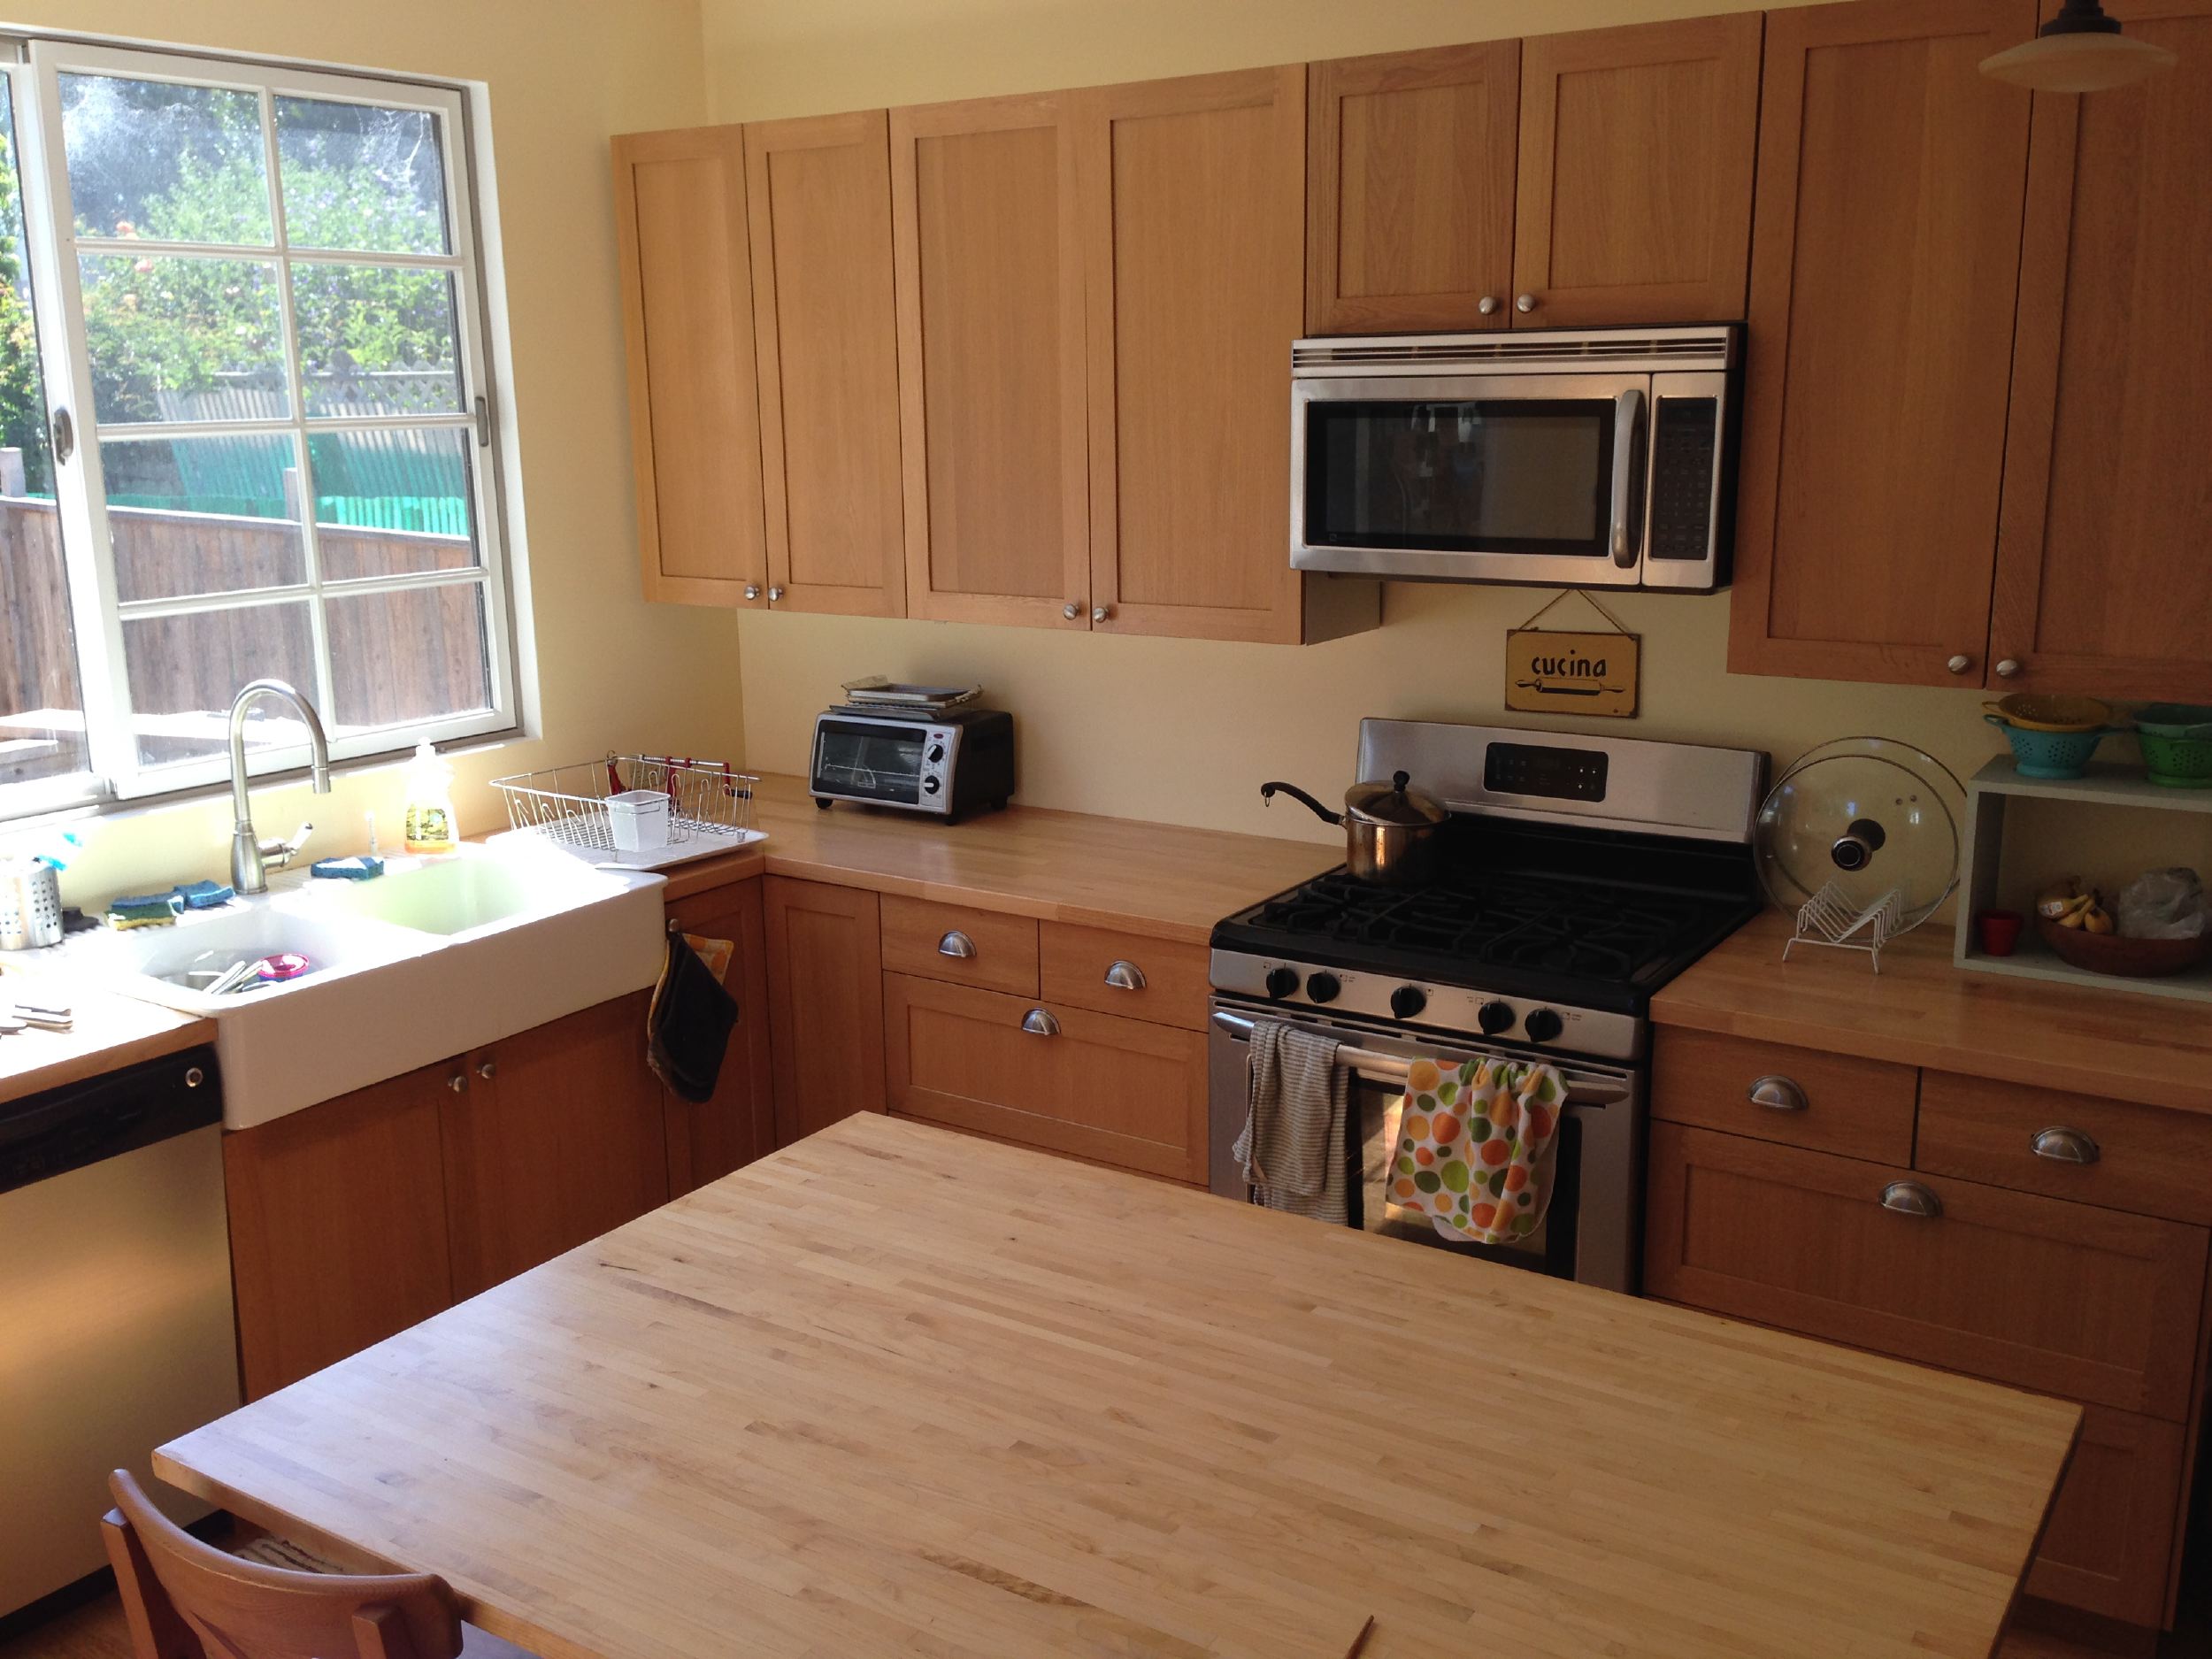
Here is a photo of the “before”, with the oak wood colored Tidaholm cabinet doors. We liked the shaker style of that style of cabinet doors.
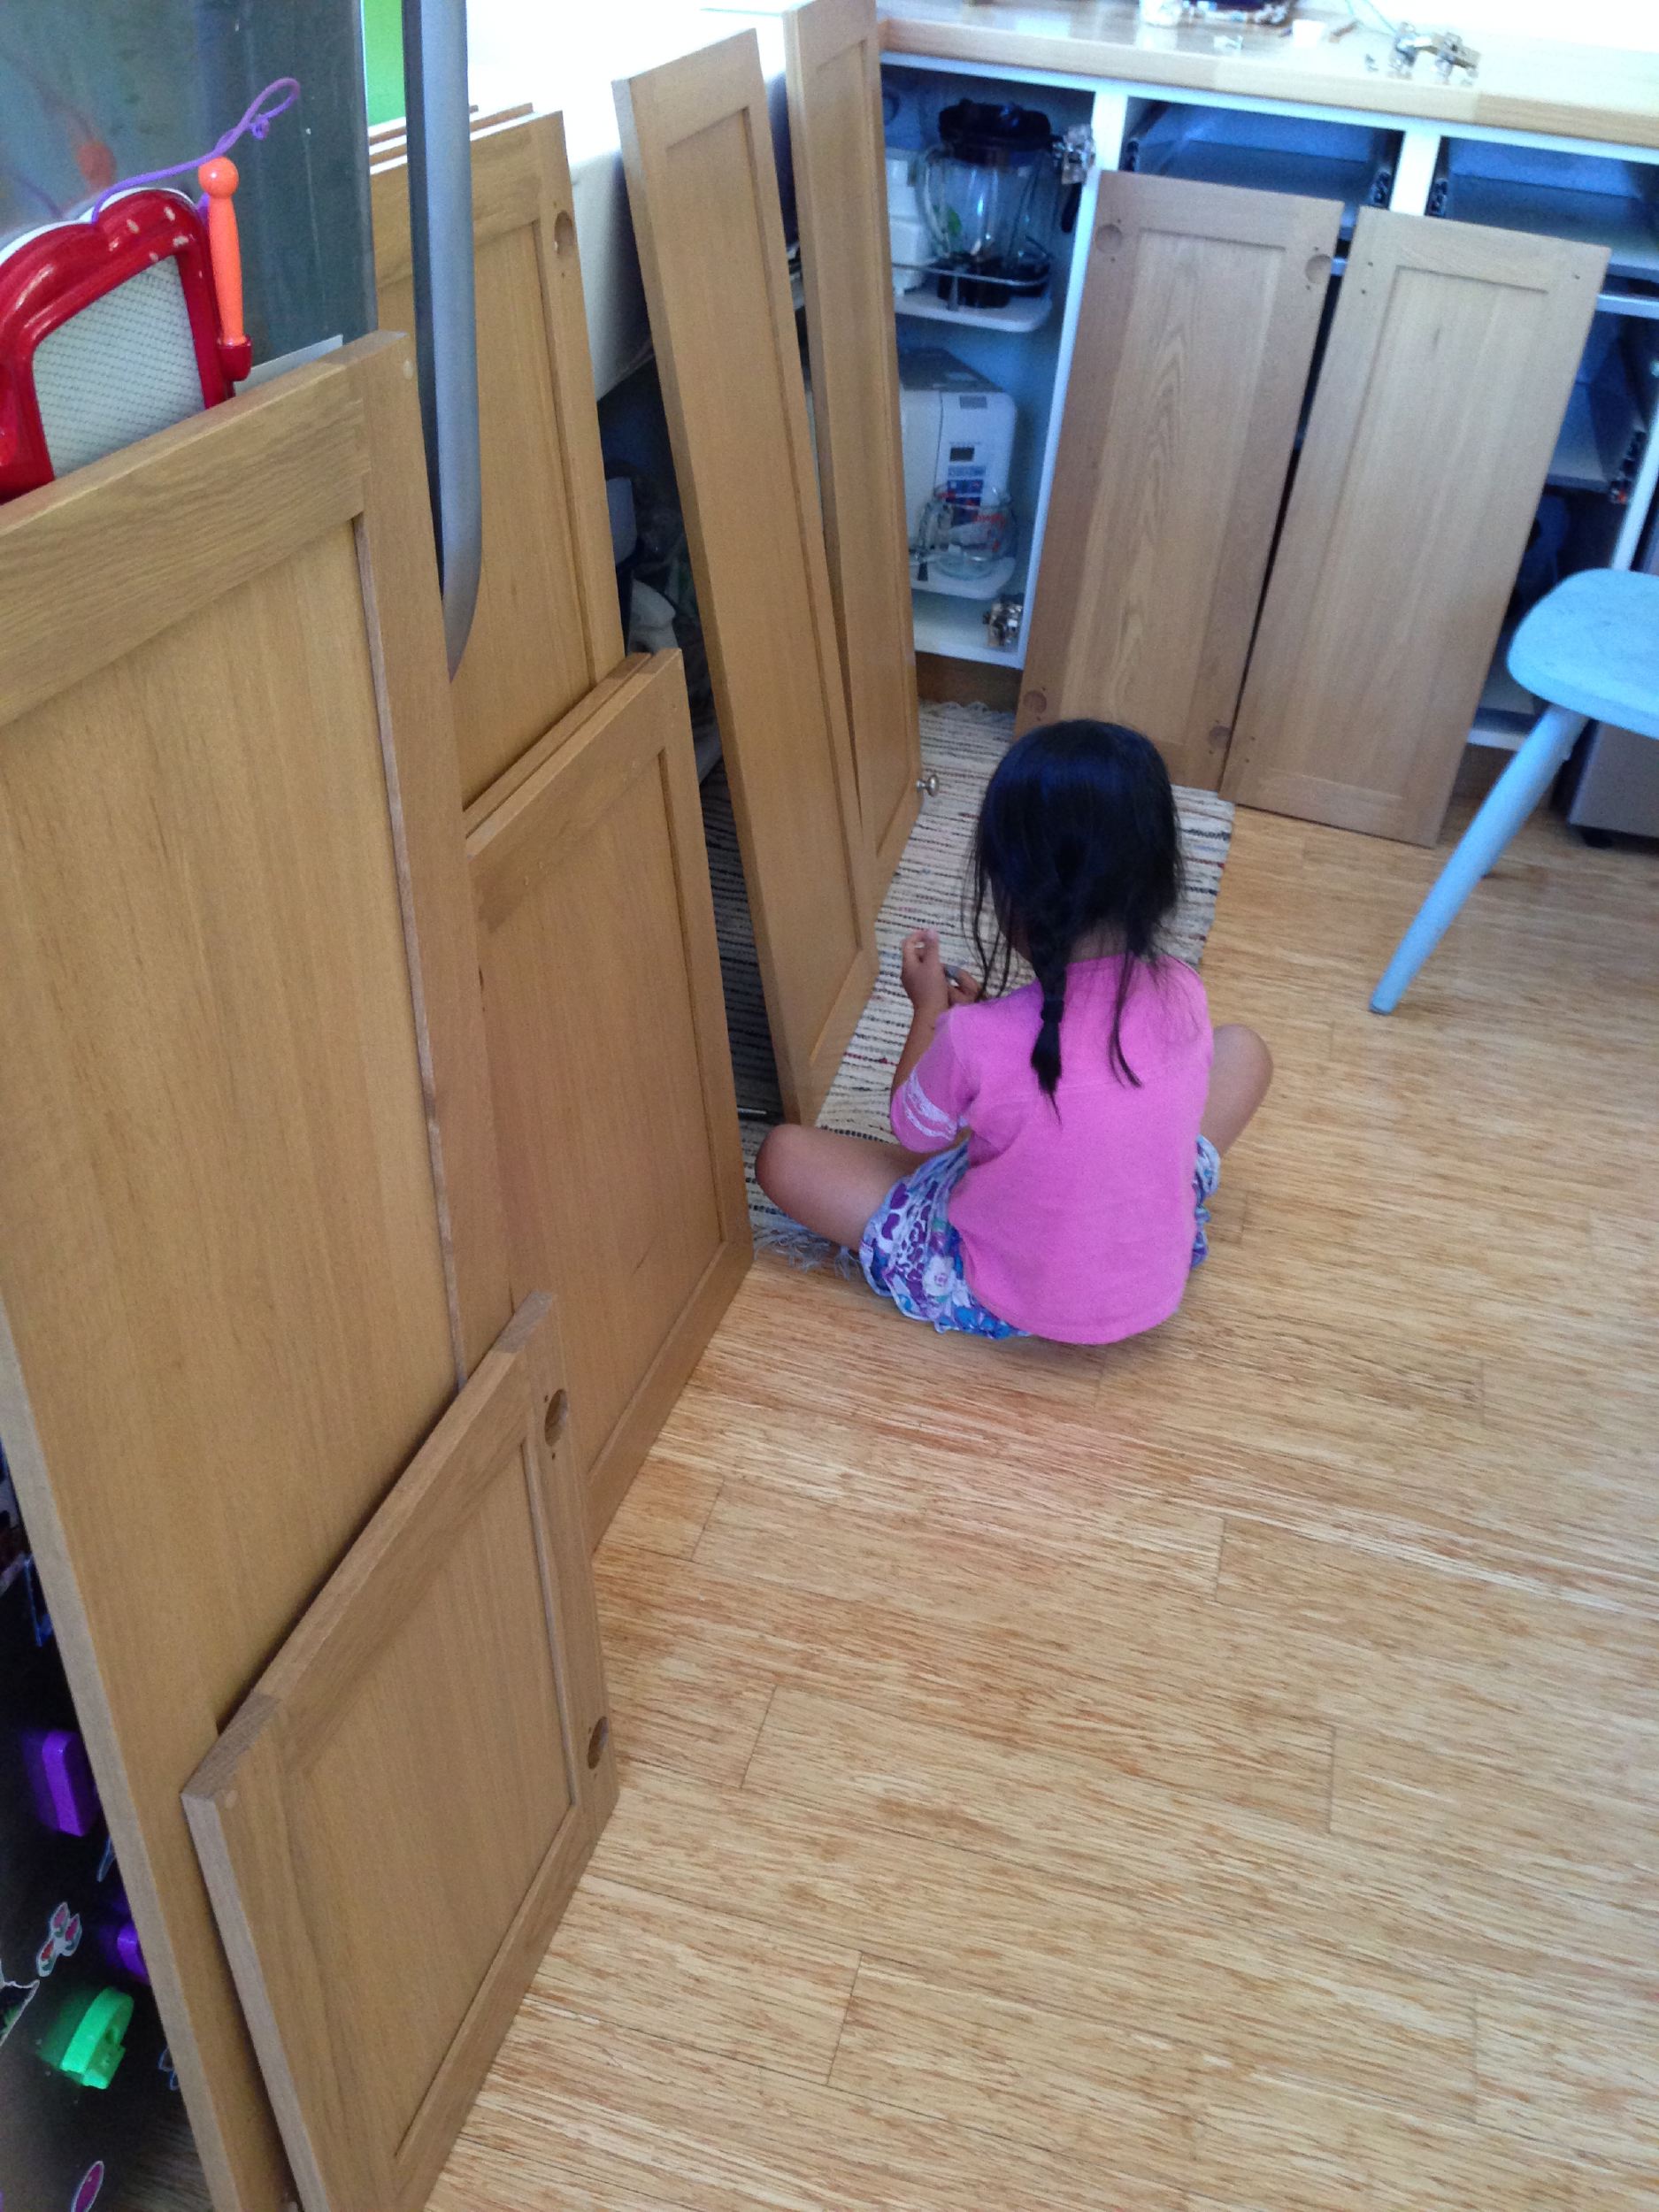
Here is our daughter helping to uninstall all the doors and remove the hinges and knob hardware.
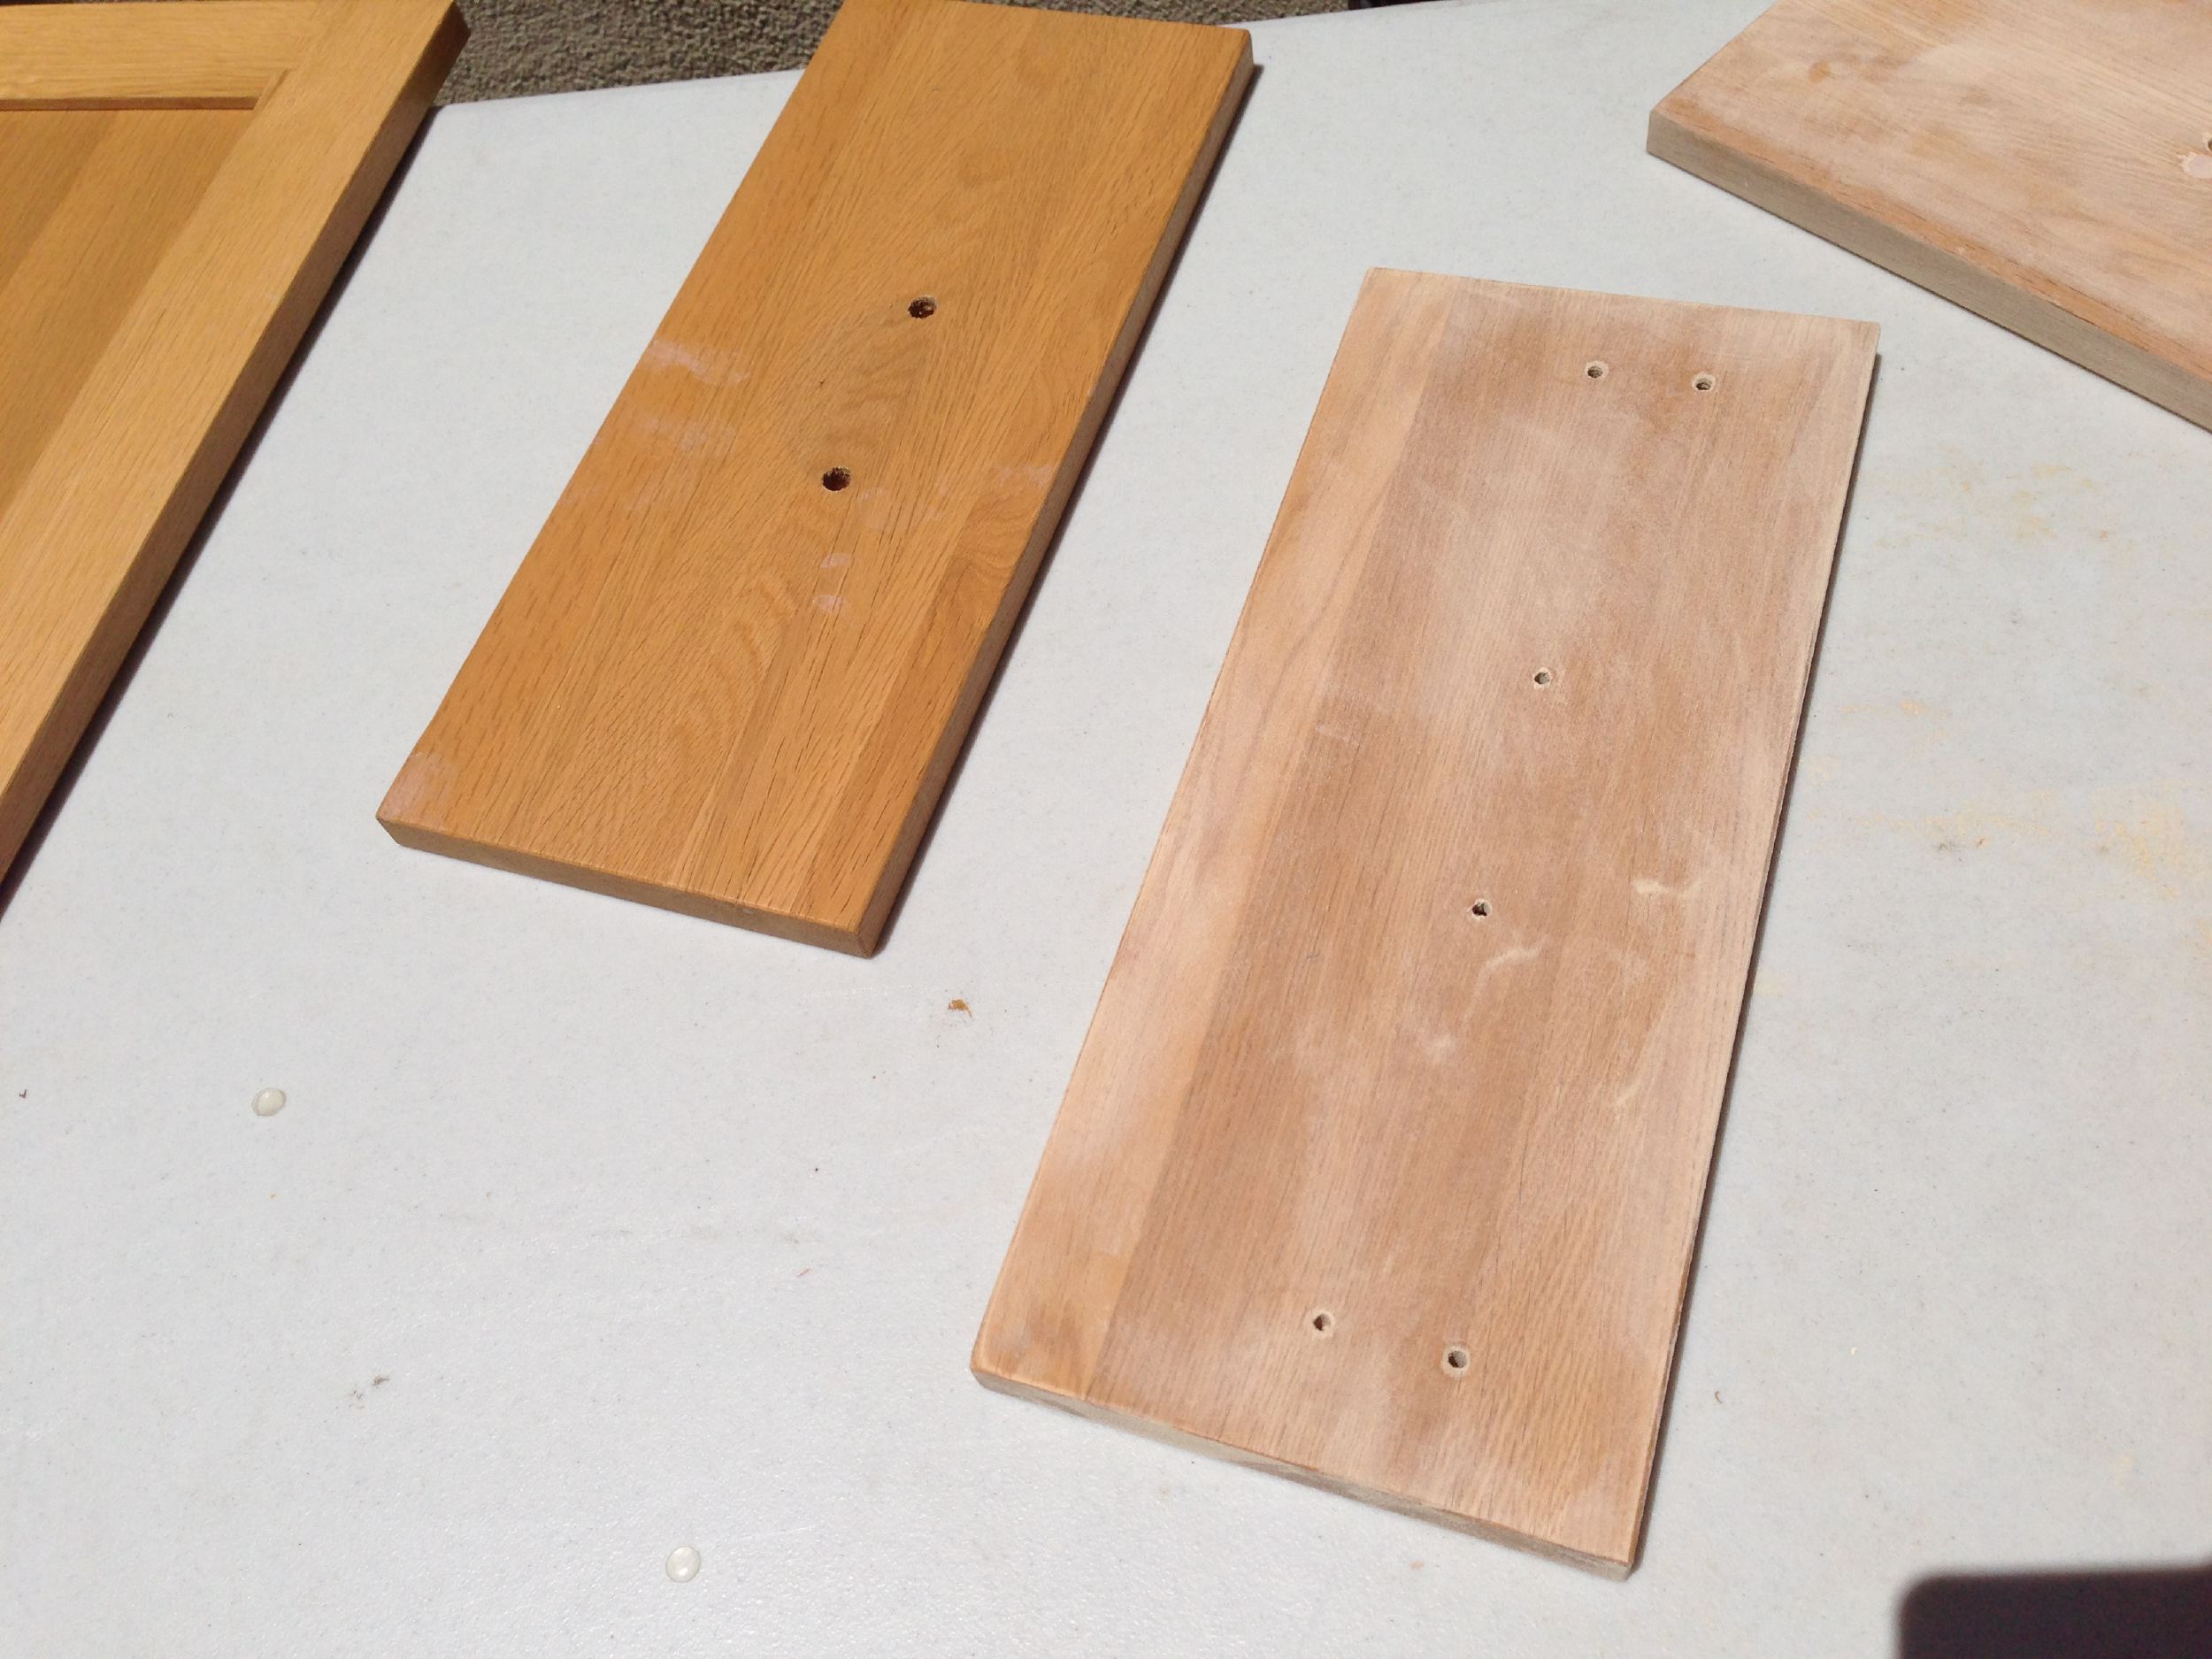
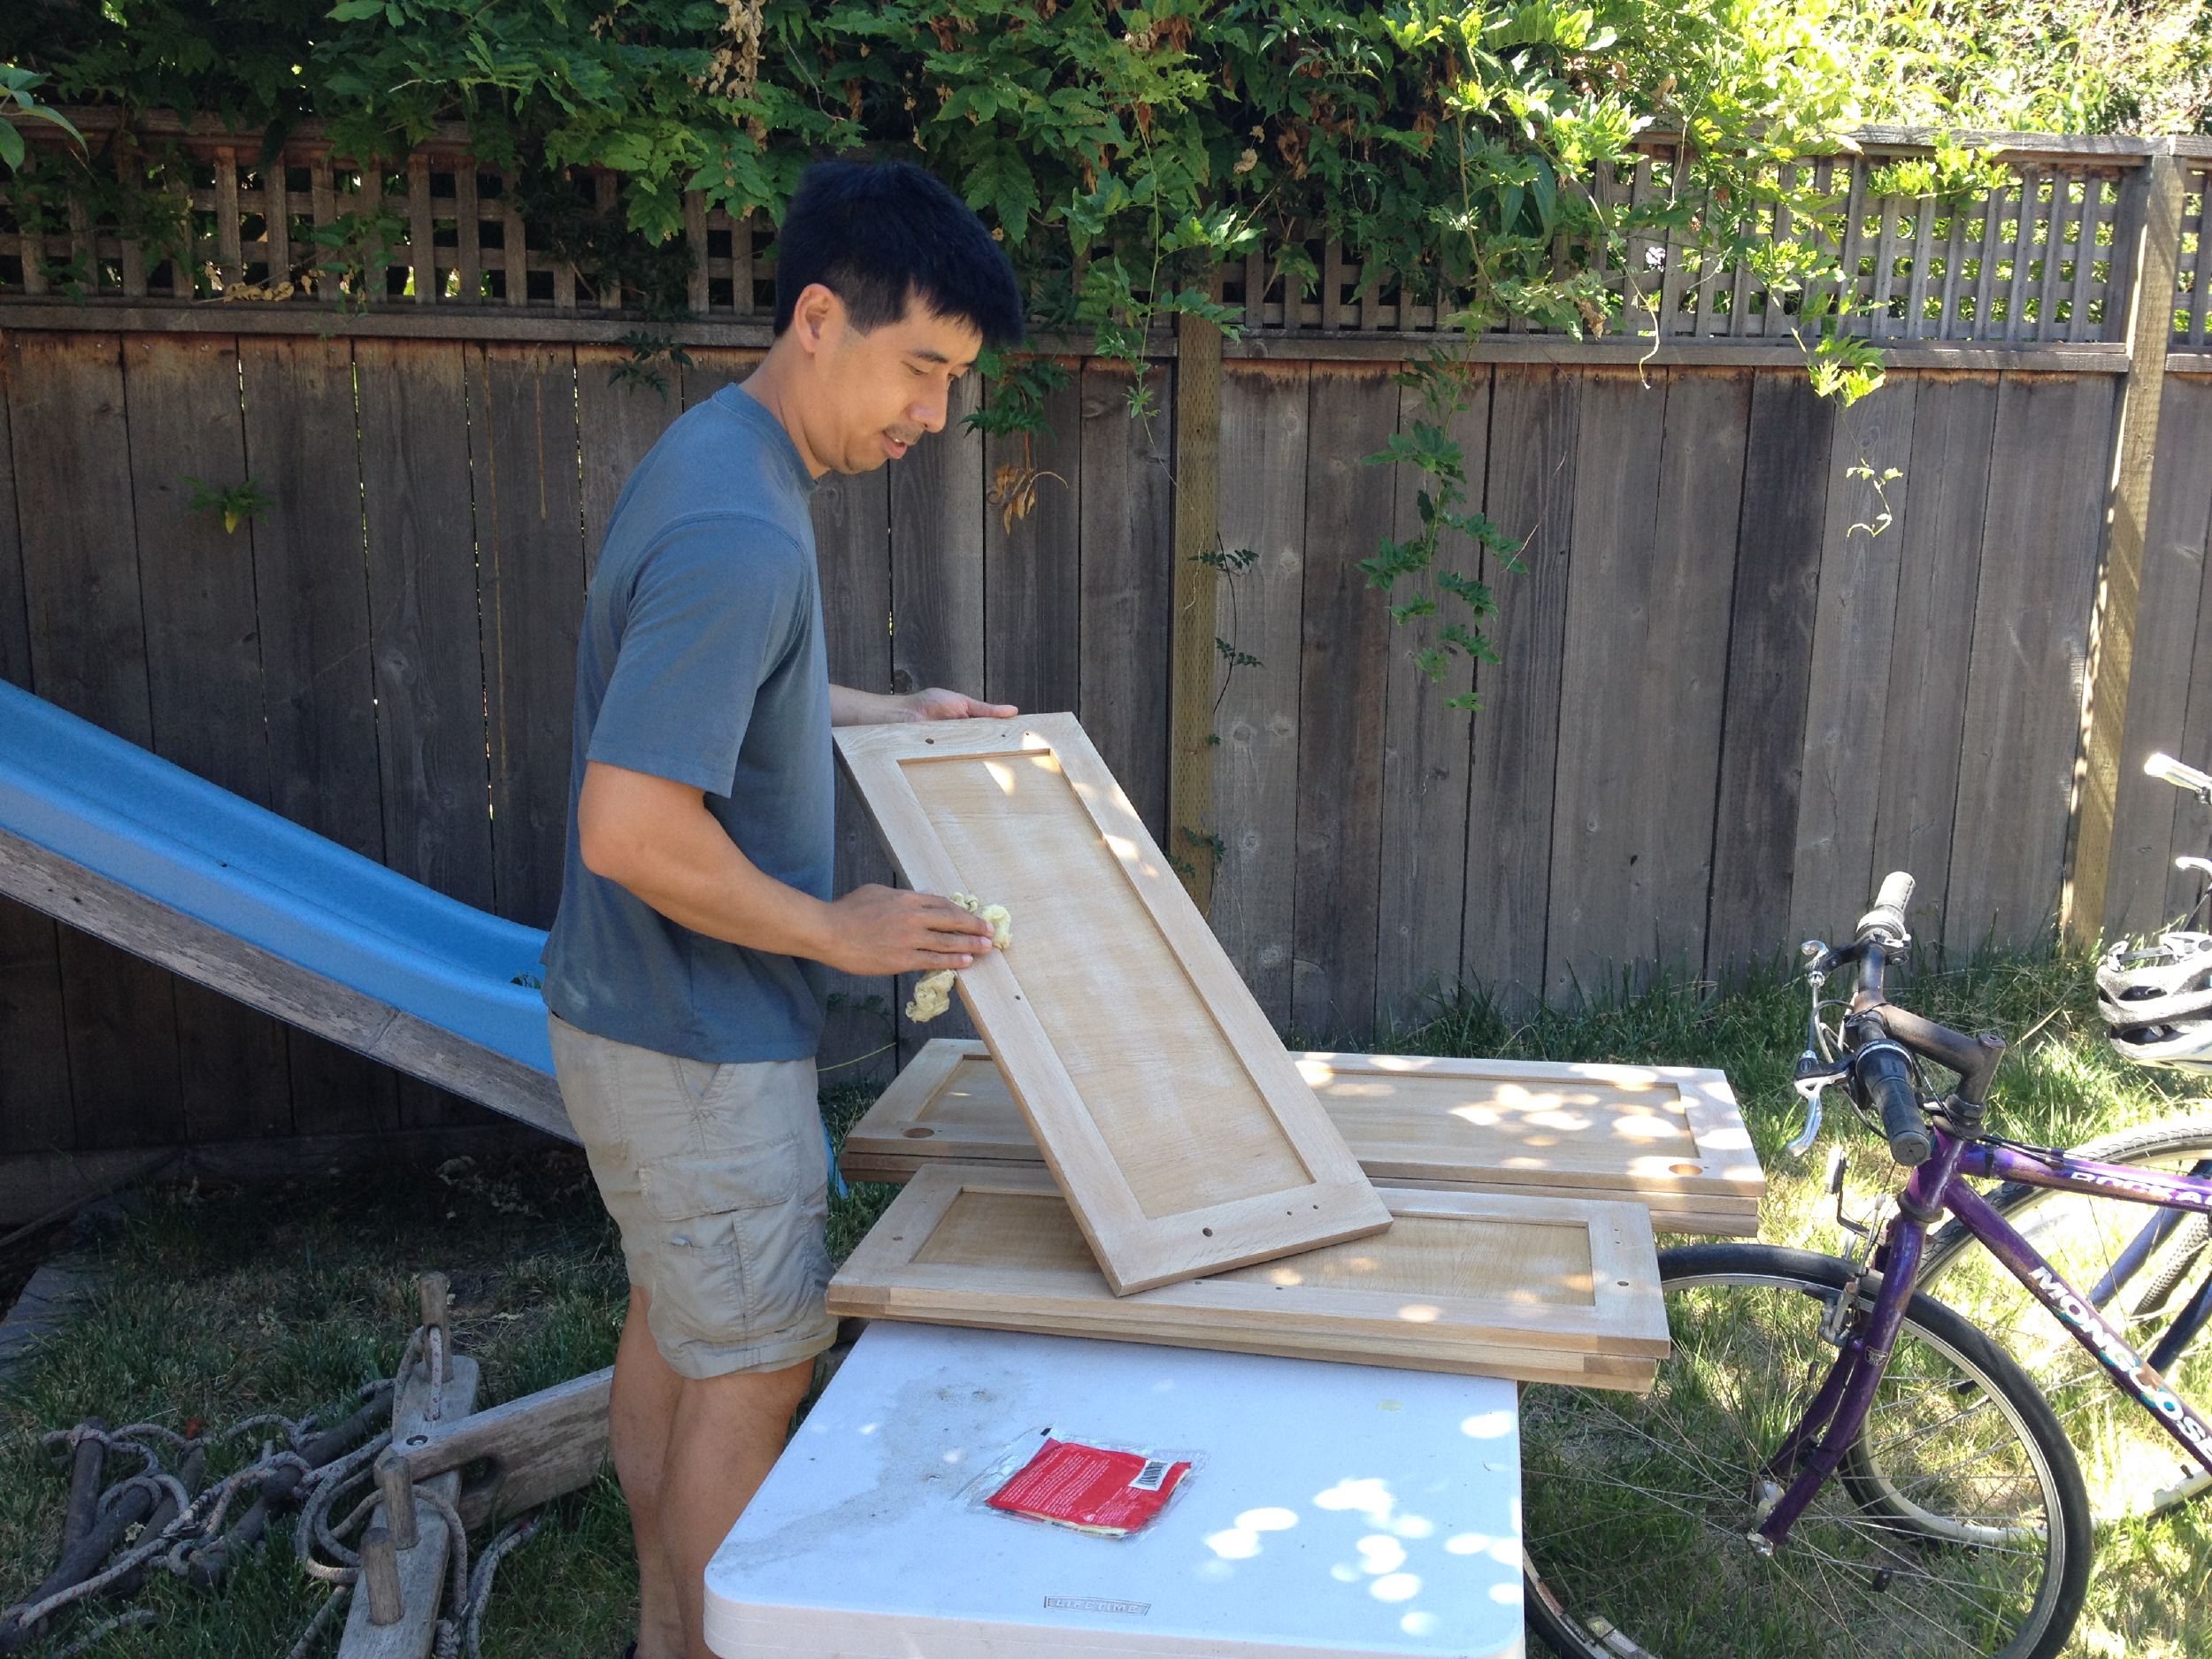
The door and drawers have a shiny coating which I sanded using an orbital sander to roughen up the surface. It wasn’t necessary to entirely remove the sealer to bare wood, just roughen it enough for the primer to stick.
I decided to spray the cabinets so I created a painting booth on the driveway using 2x4s, 2x2s and 1x2s and plastic sheeting to contain all the paint and overspray. However, the day that I was planning to paint was super windy and the driveway was acting like a little wind tunnel.

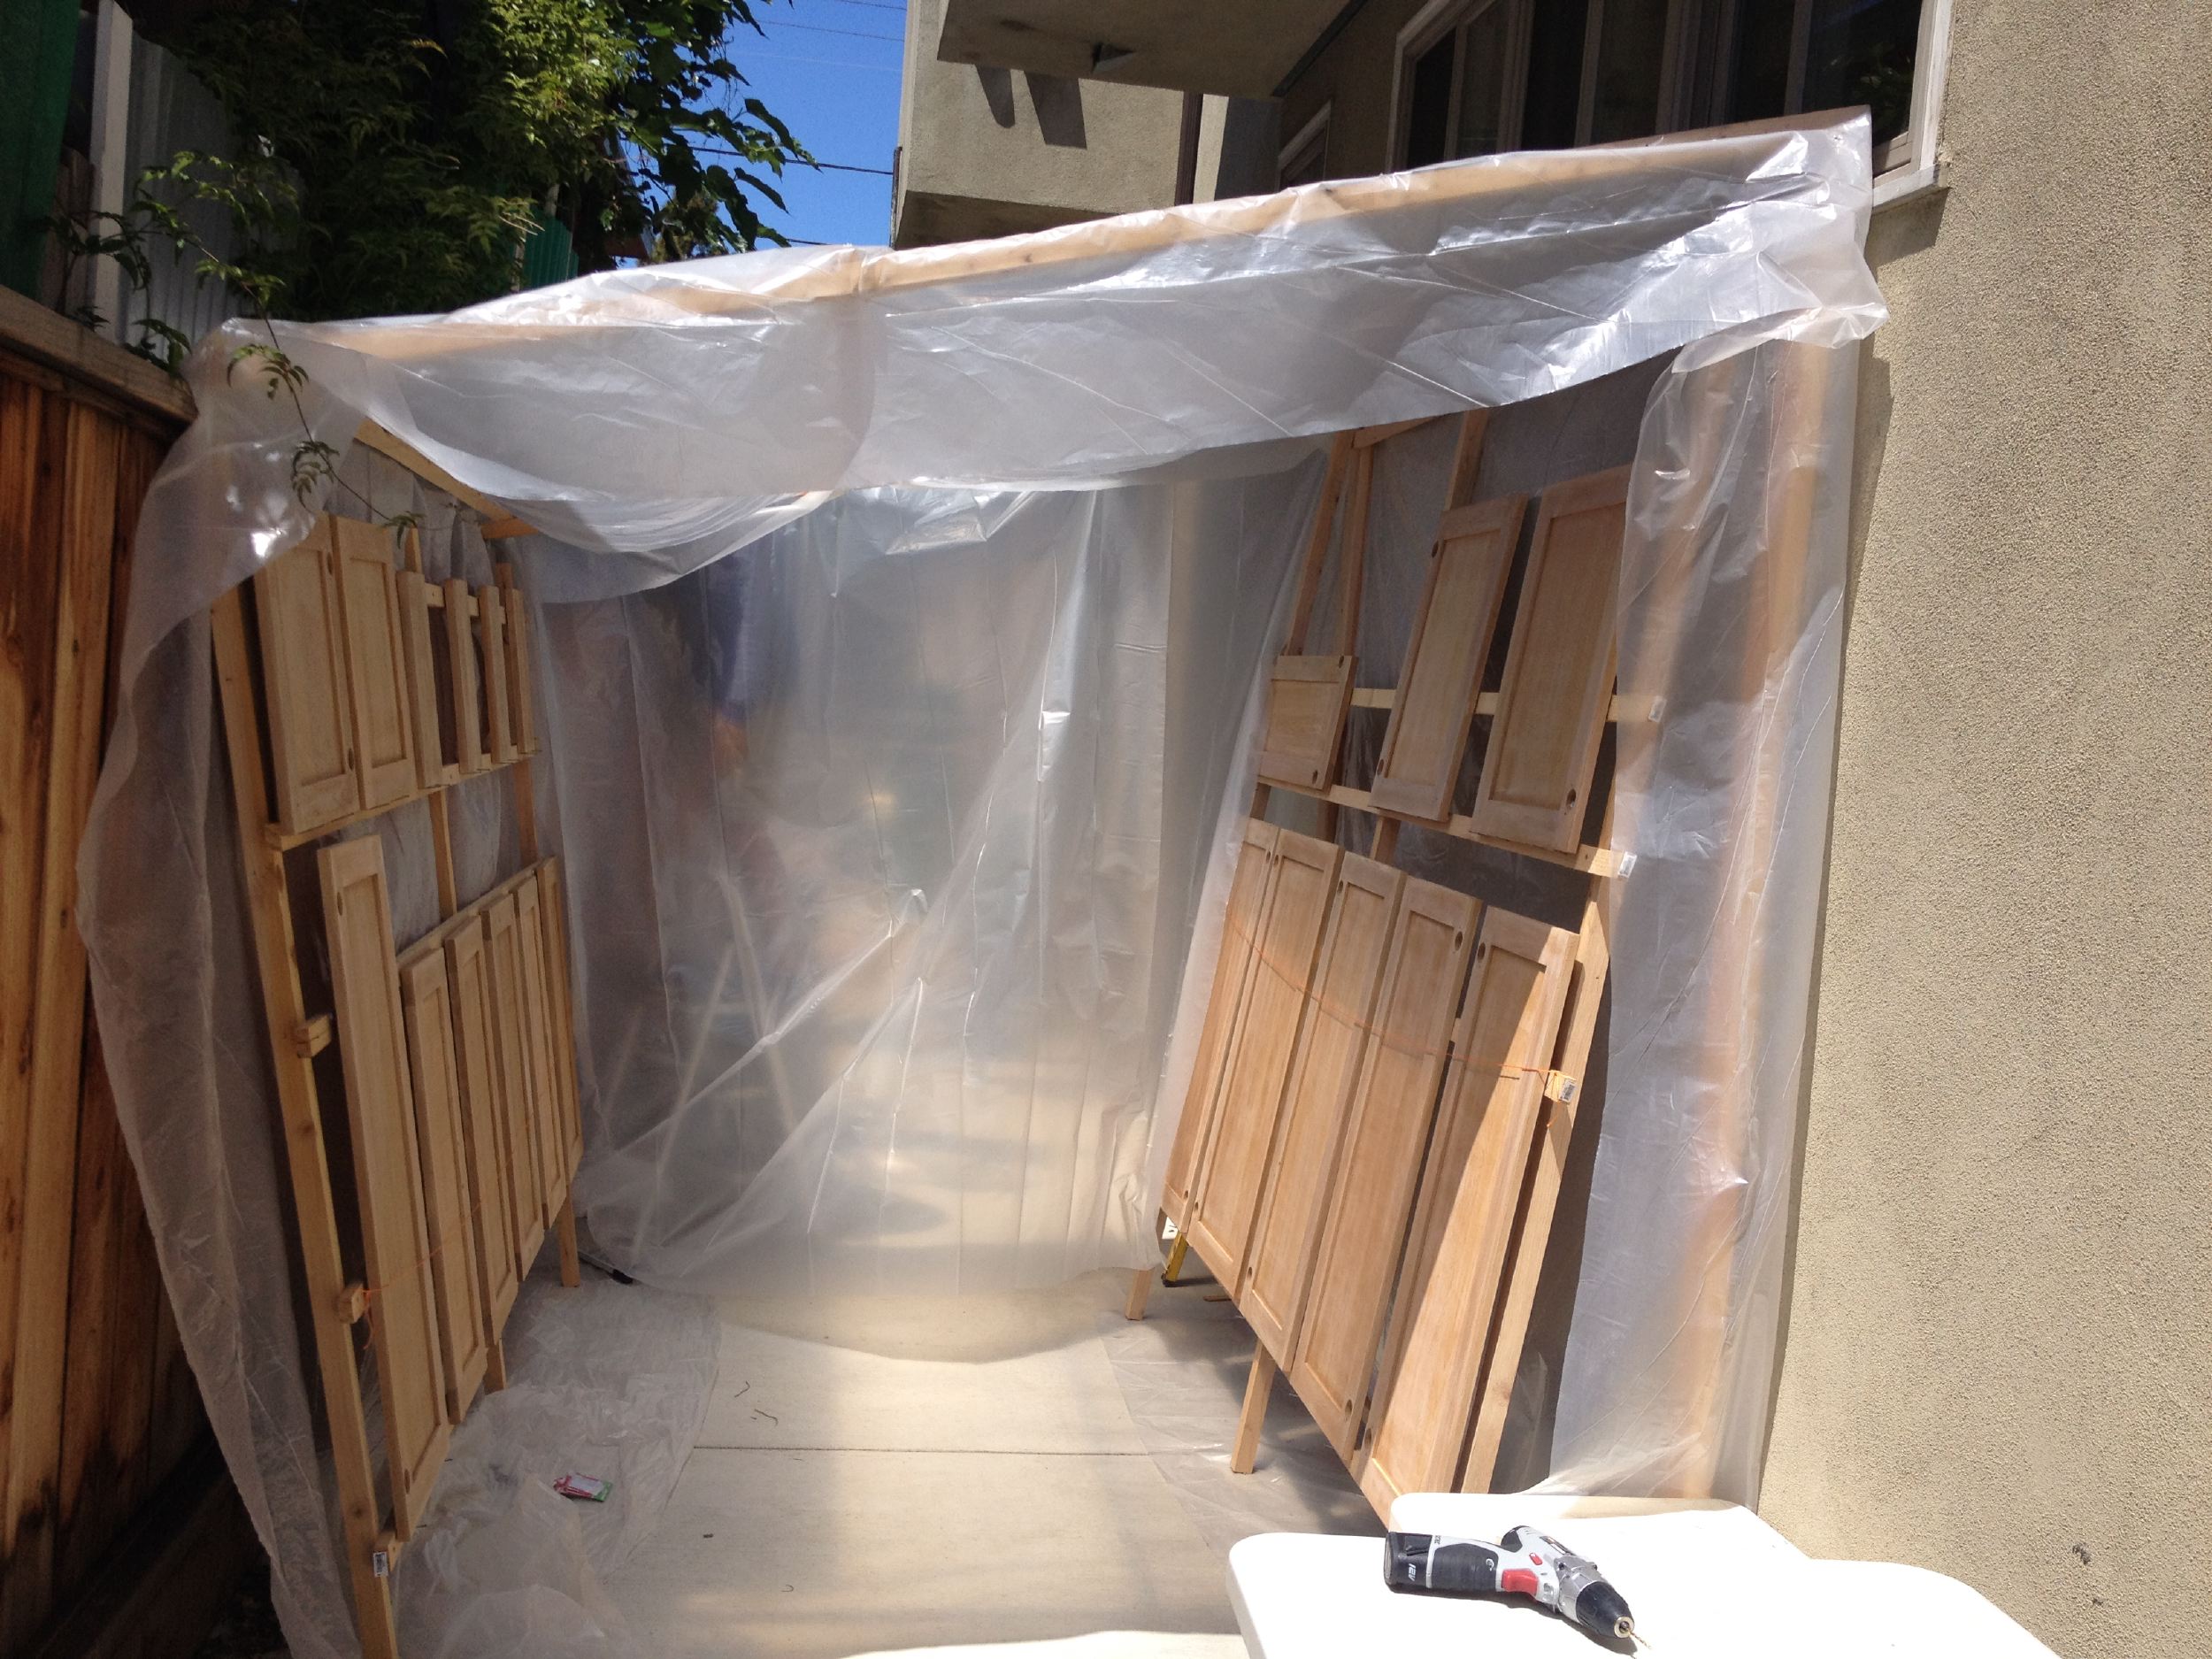
Instead, I decided to clean out a section of the garage so I could paint inside. I still put up the plastic sheeting to keep the overspray from getting all over everything else in the garage.

I rubbed each of the doors and drawers fronts with microfiber cloth and then a tack cloth to remove any loose dust or material so the primer will stick well.
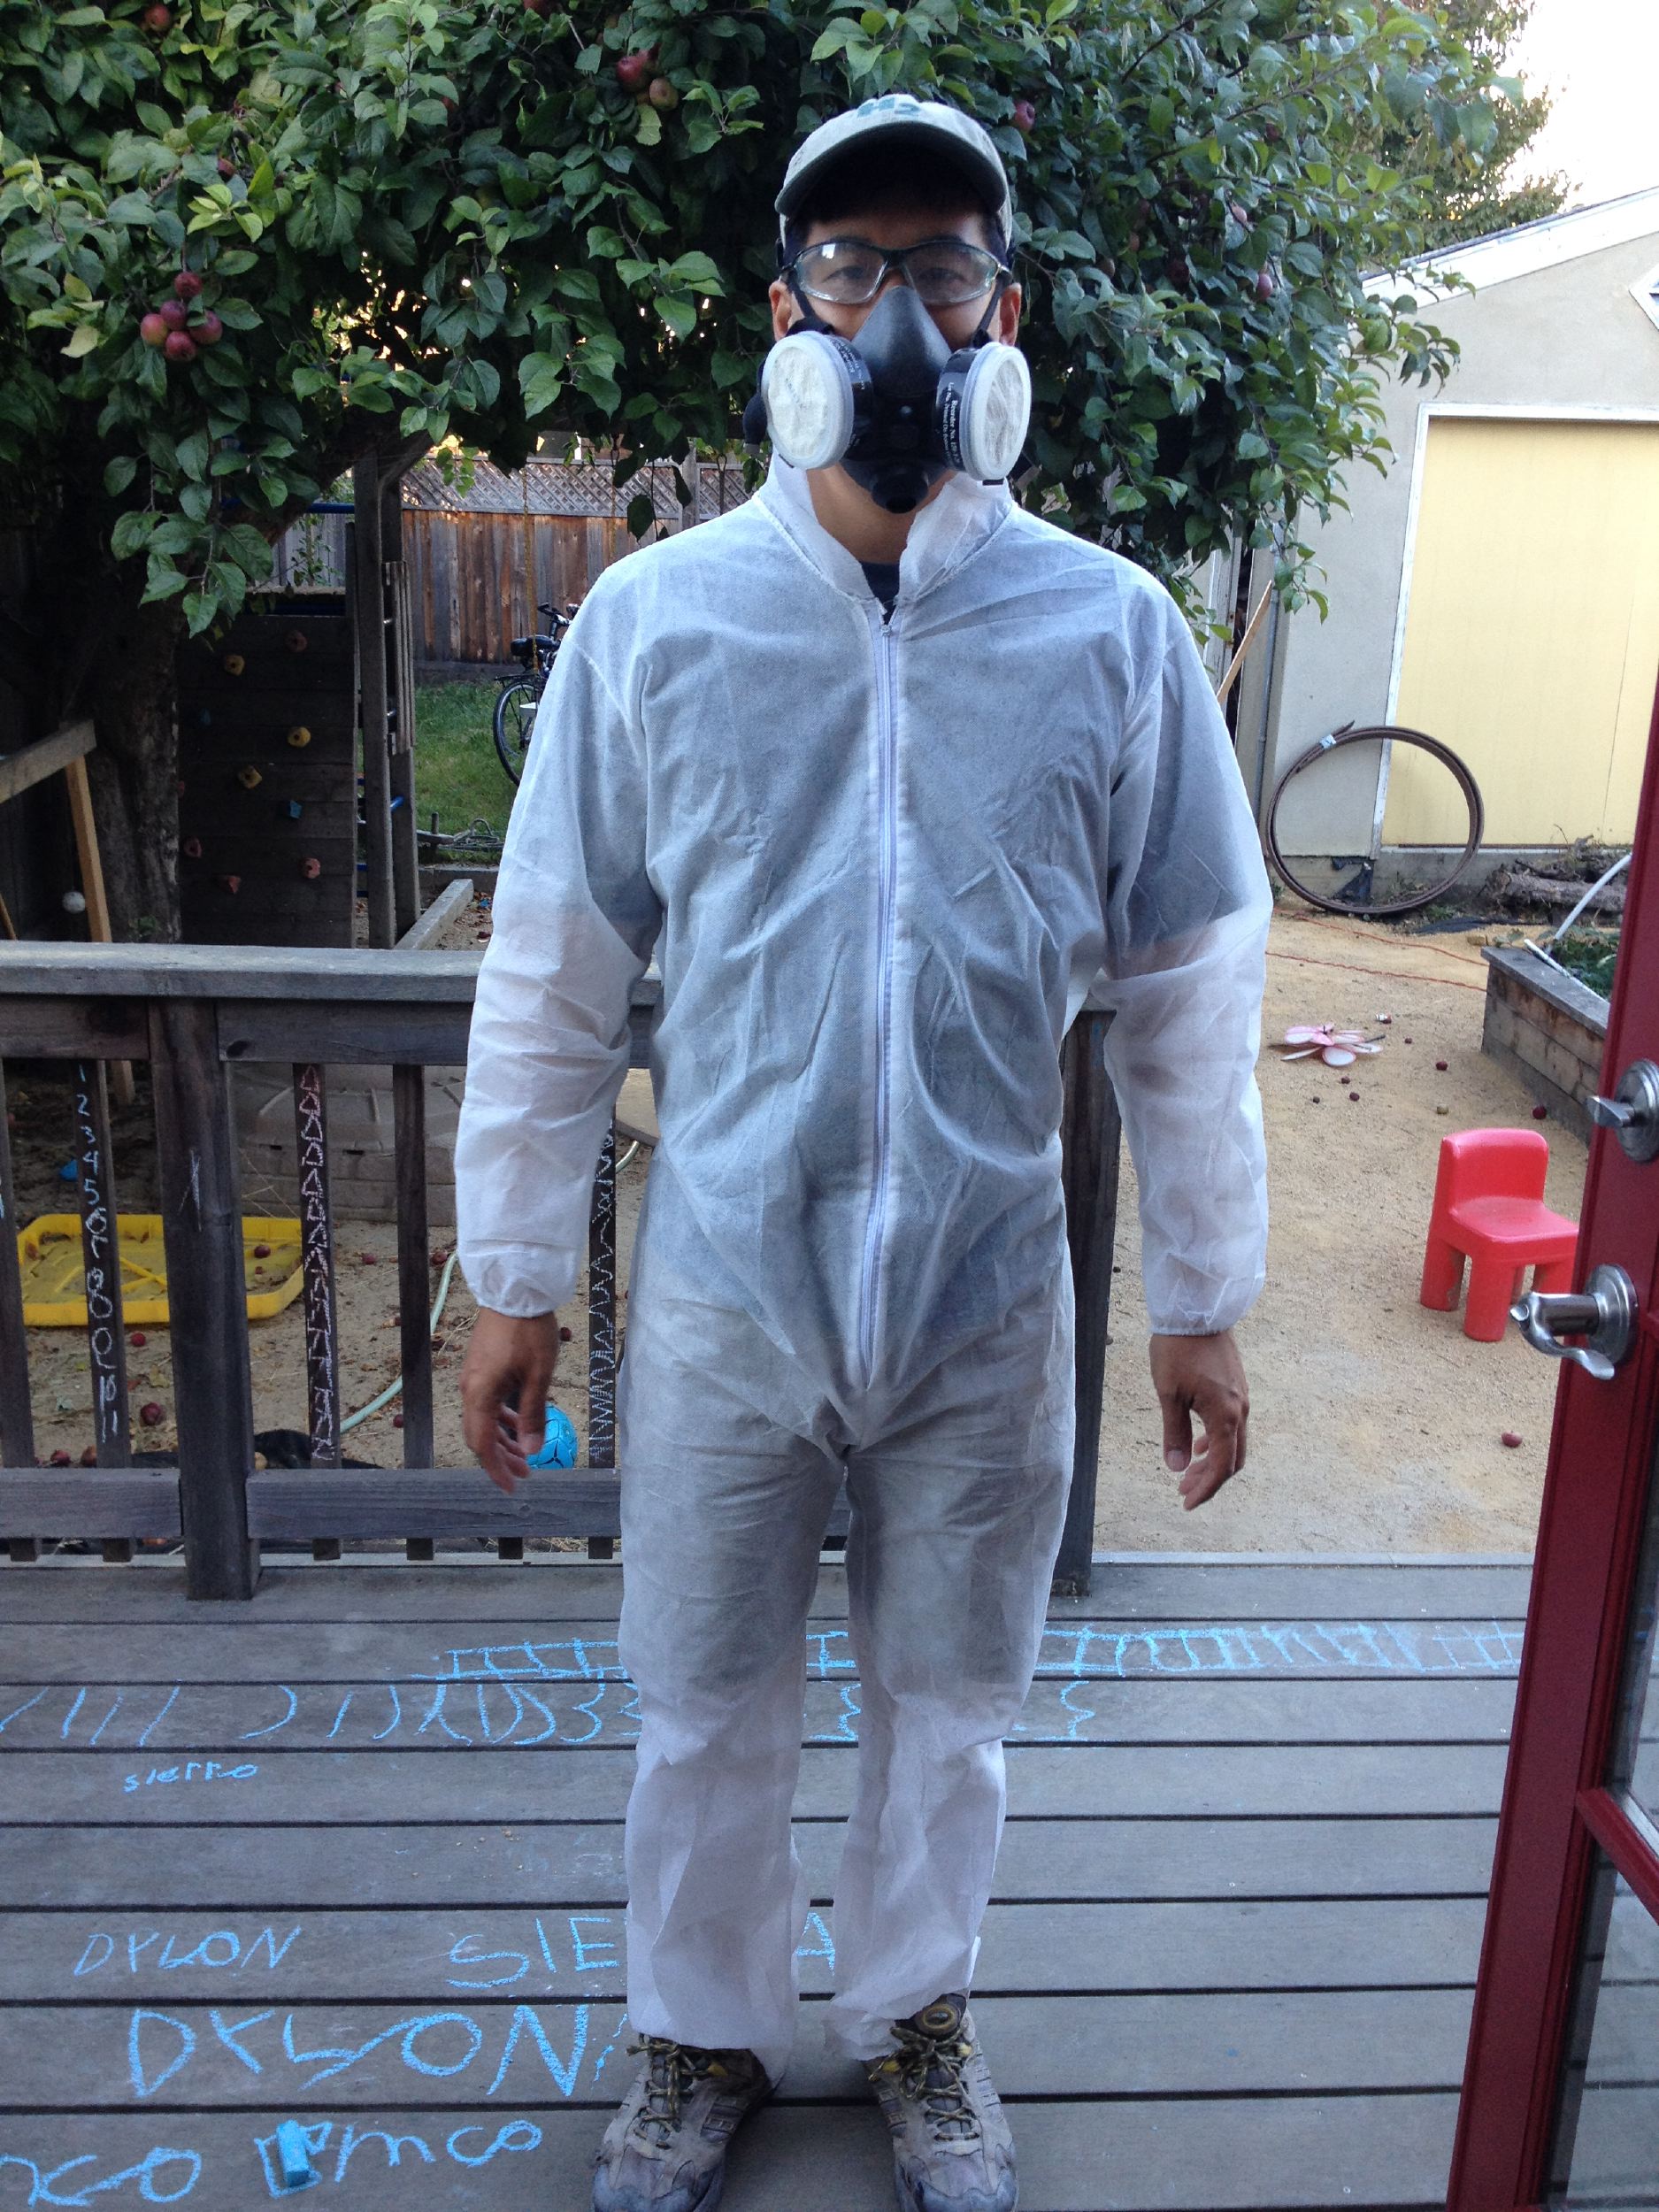
I suited up for being in the painting booth. The hat, respirator, glasses and tyvek suit were used to keep the pain out of my hair, lungs, eyes, and off my clothes.
I used a small paint sprayer called a Critter siphon gun, which is a very inexpensive craft sprayer. It hooks up to an air compressor (we already own one) and uses mason jars to store the paint that will be sprayed.
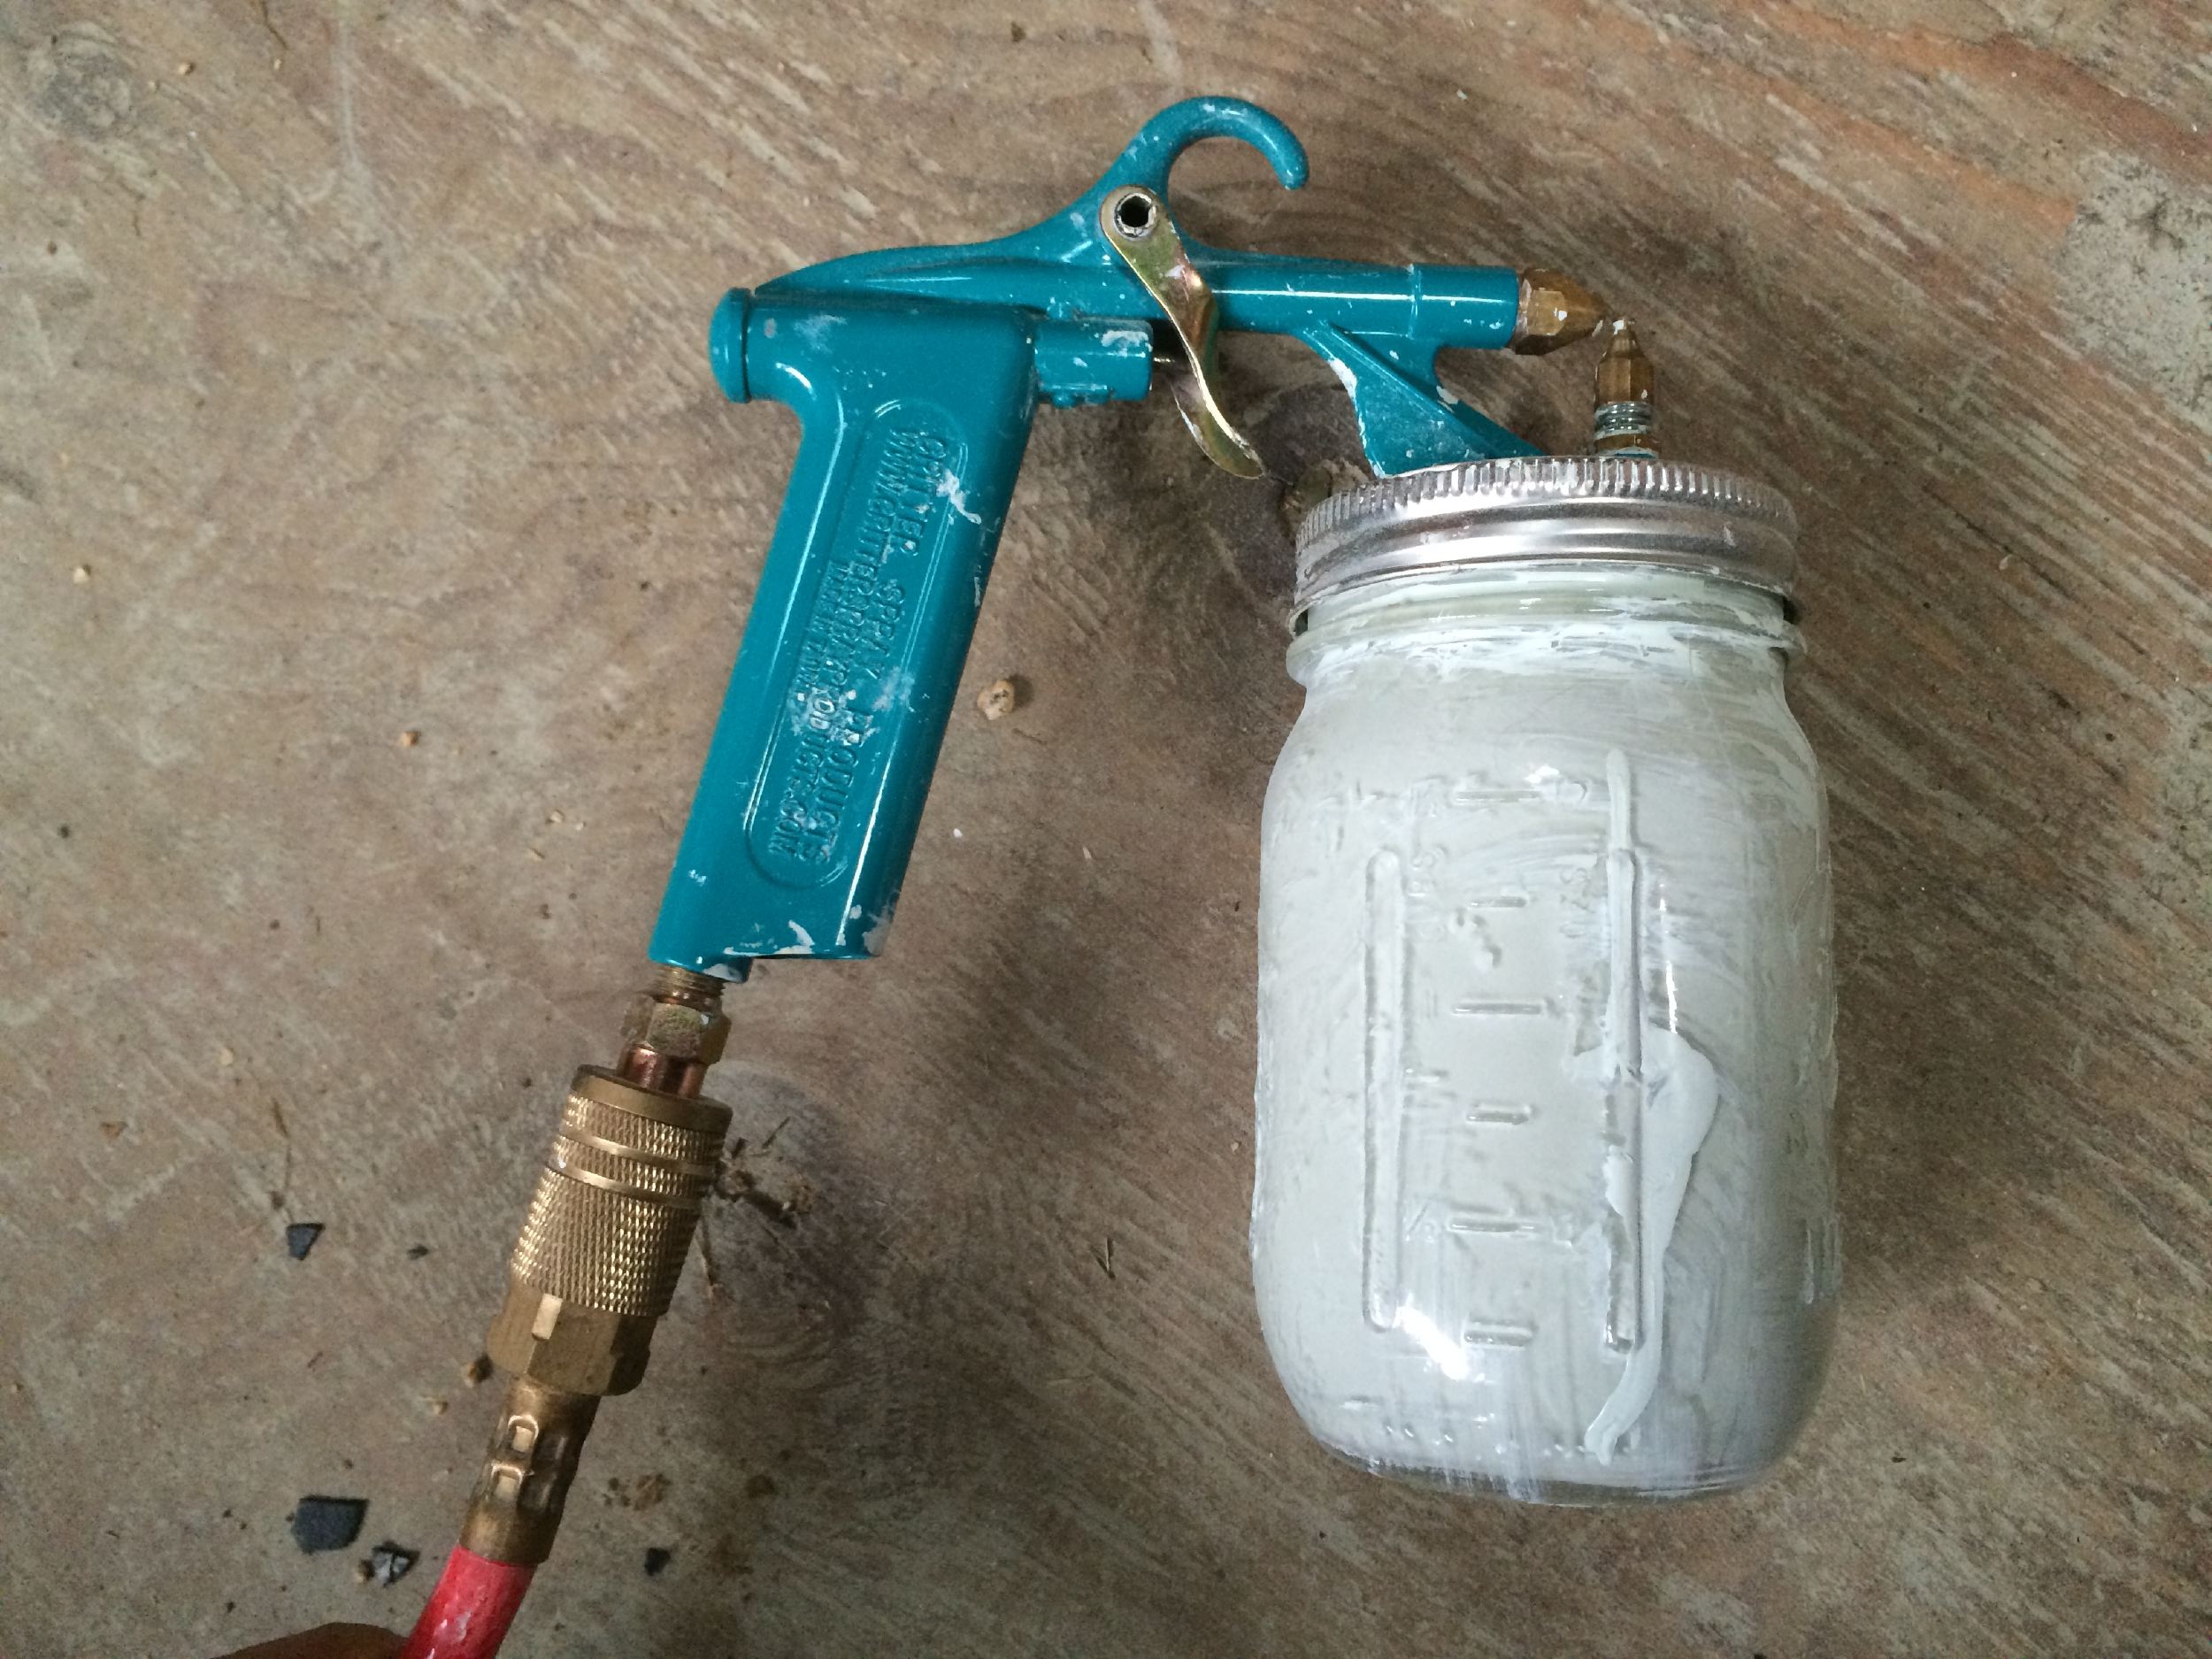
When you pull the trigger, it opens the valve and a spray of air is shot out of the horizontal nozzle. There’s also a vertical nozzle sticking straight up from the lid of the mason jar. The stream of air out of the horizontal nozzle creates a low pressure region above the vertical nozzle which “sucks” the paint up a straw and out the nozzle where it gets entrained into the air stream and is sprayed along with air. It creates a circular spray pattern about 2 inches in diameter when you hold it about 1 foot away from the painting surface.

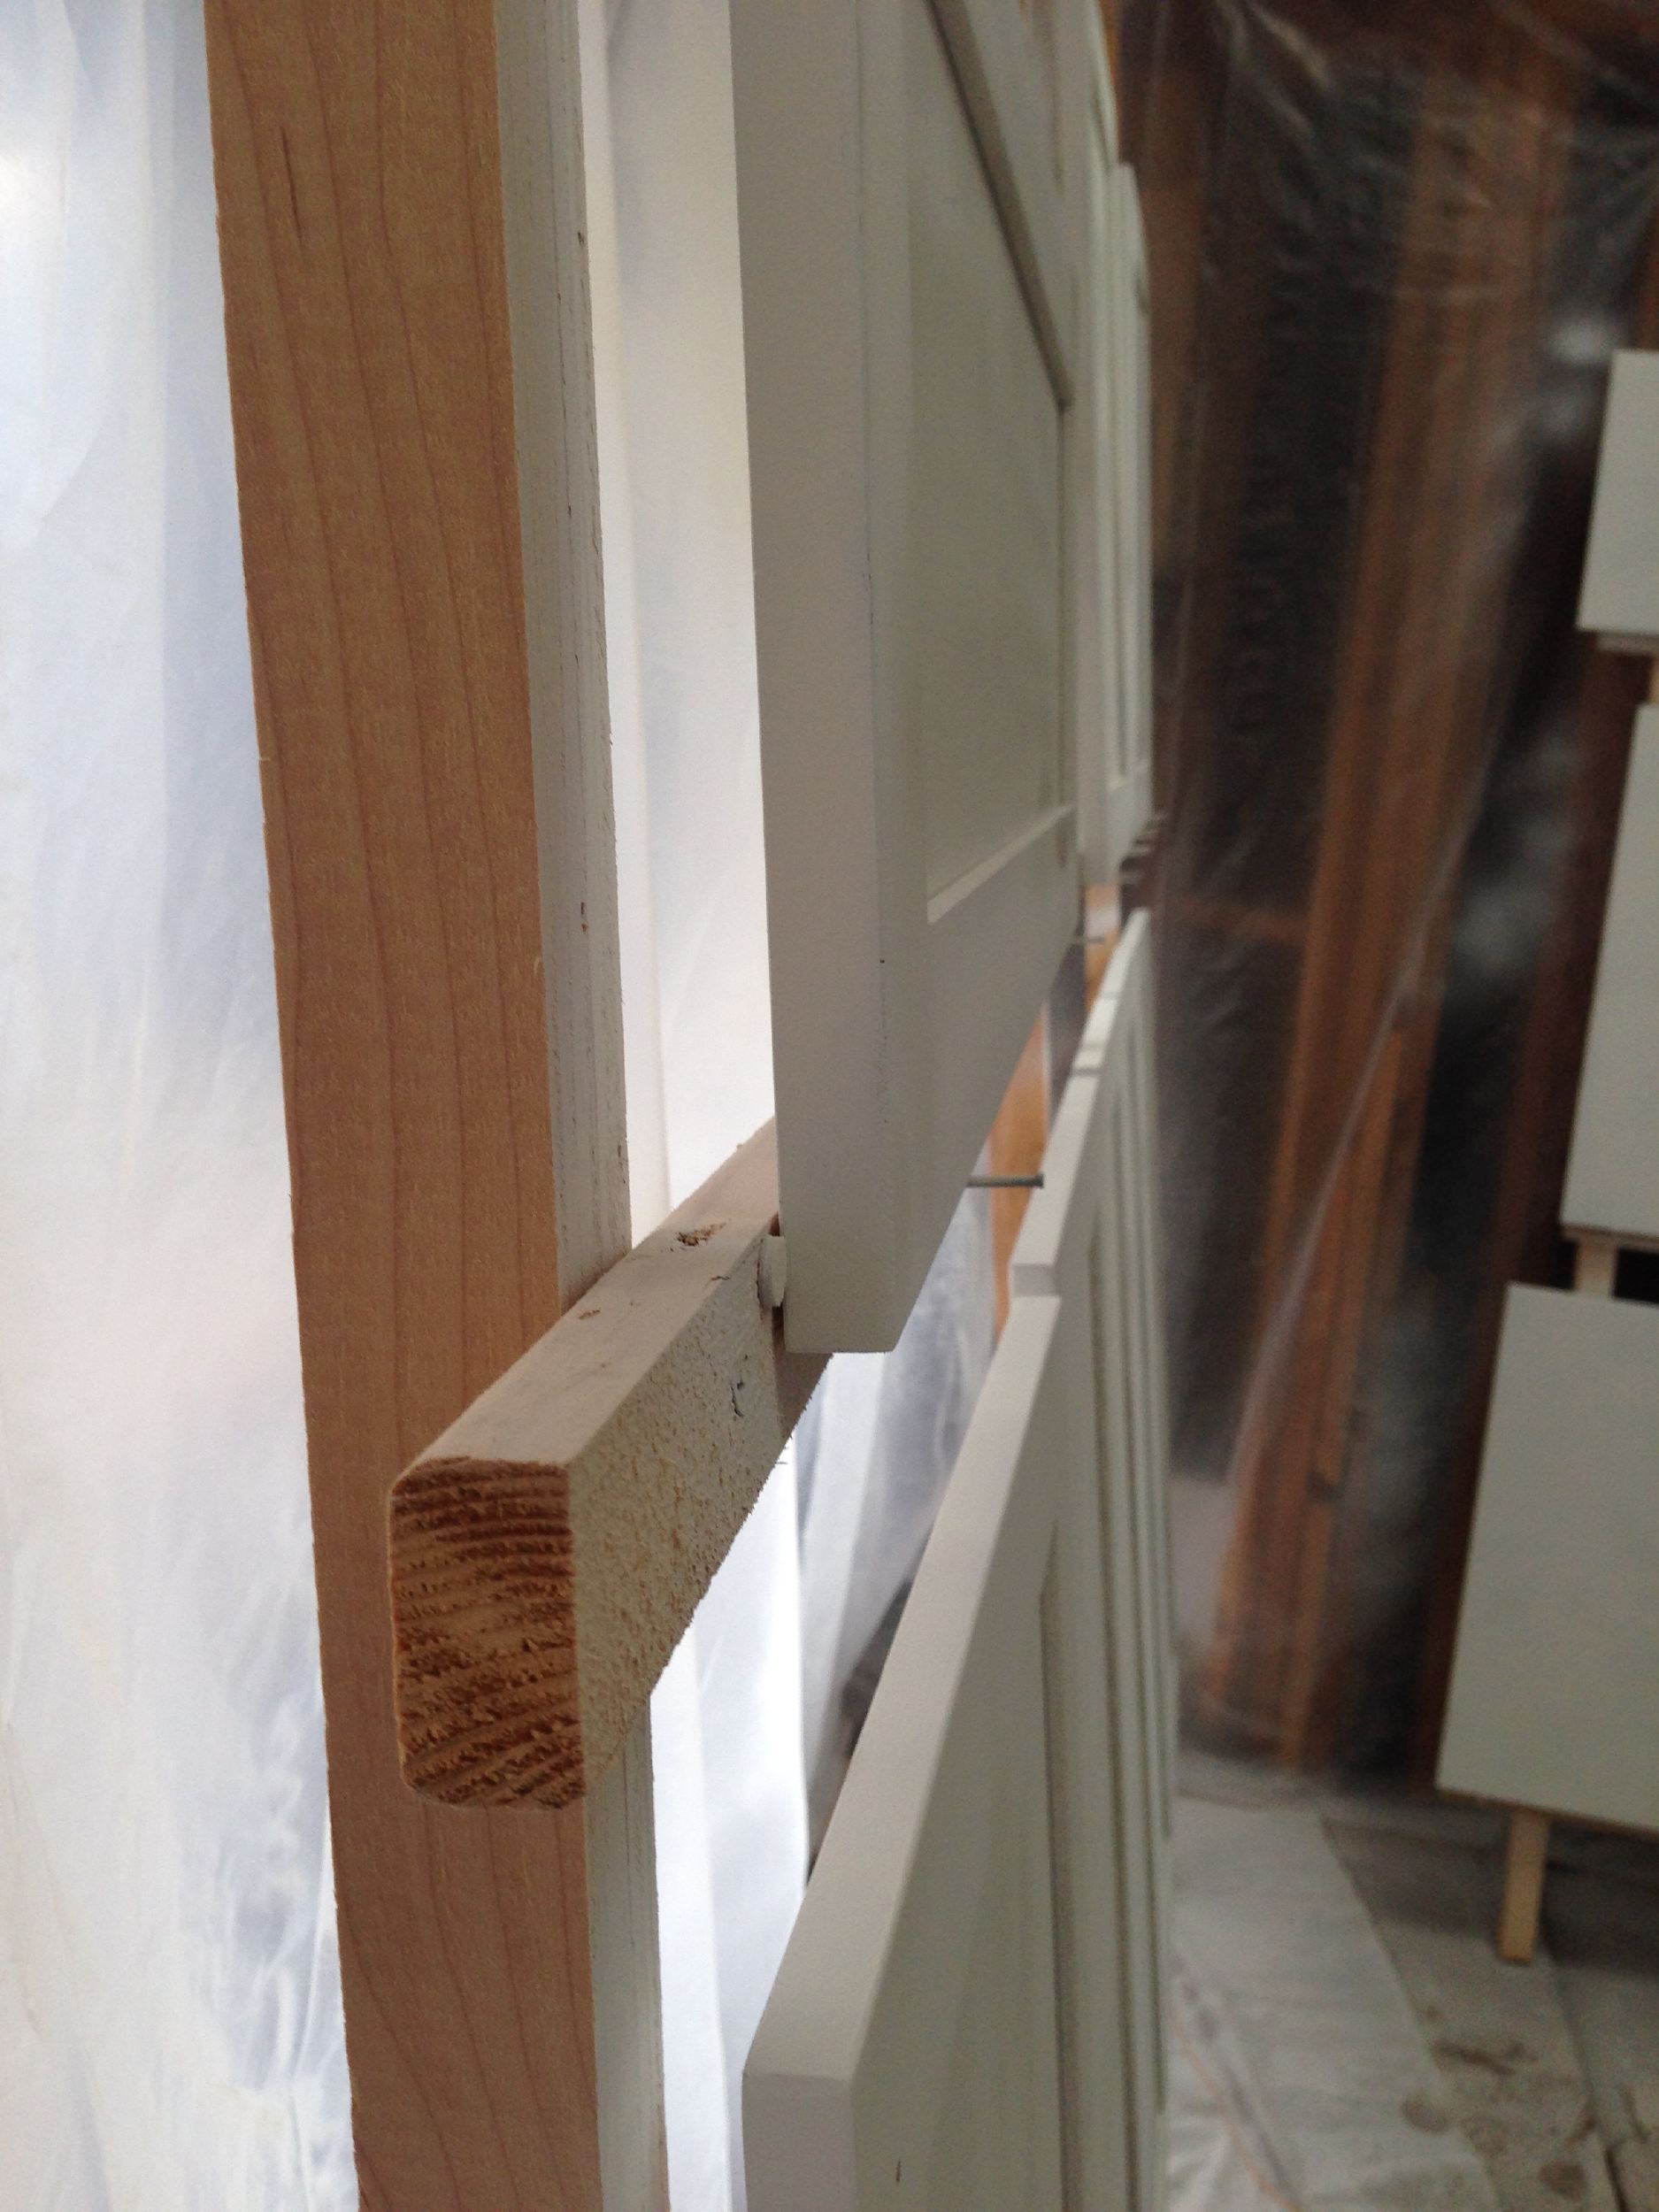
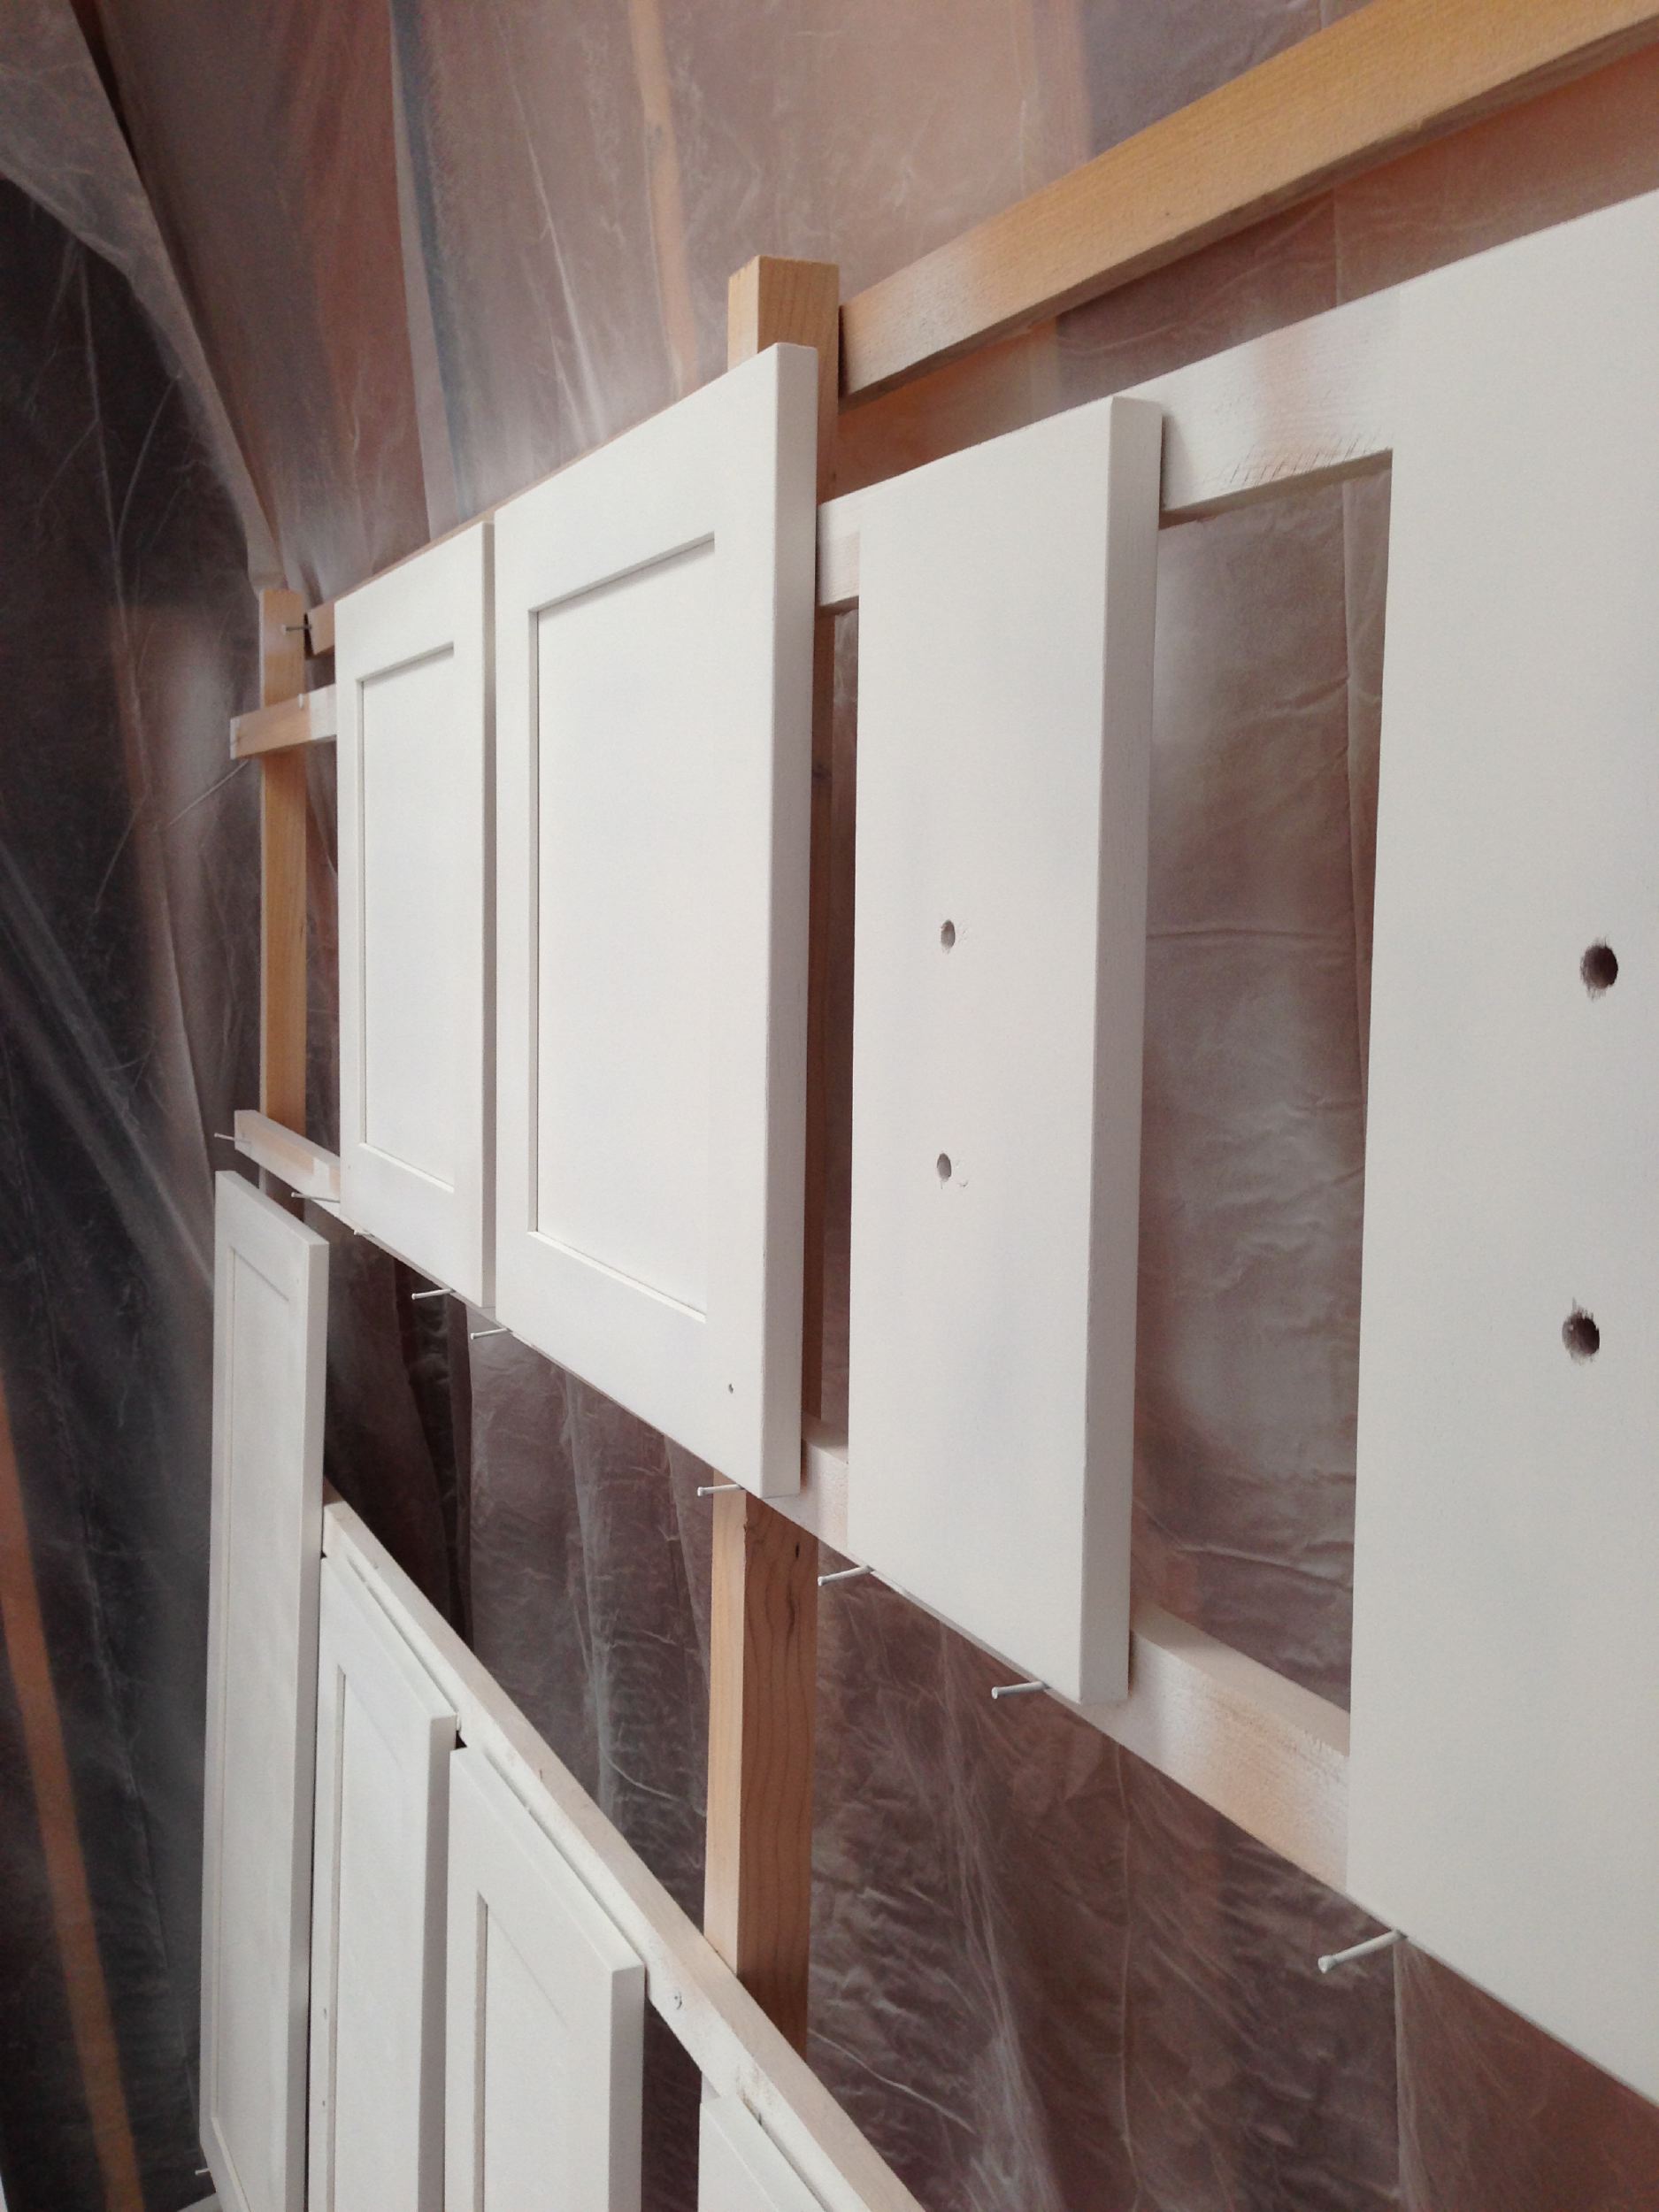
We used Zinsser BIN Primer which is an alcohol based, shellac primer that can stick to the roughened surface of the doors and drawers. The doors and drawers are put on a stand built out of 1x2s and nails as door stands so that everything can be sprayed easily.
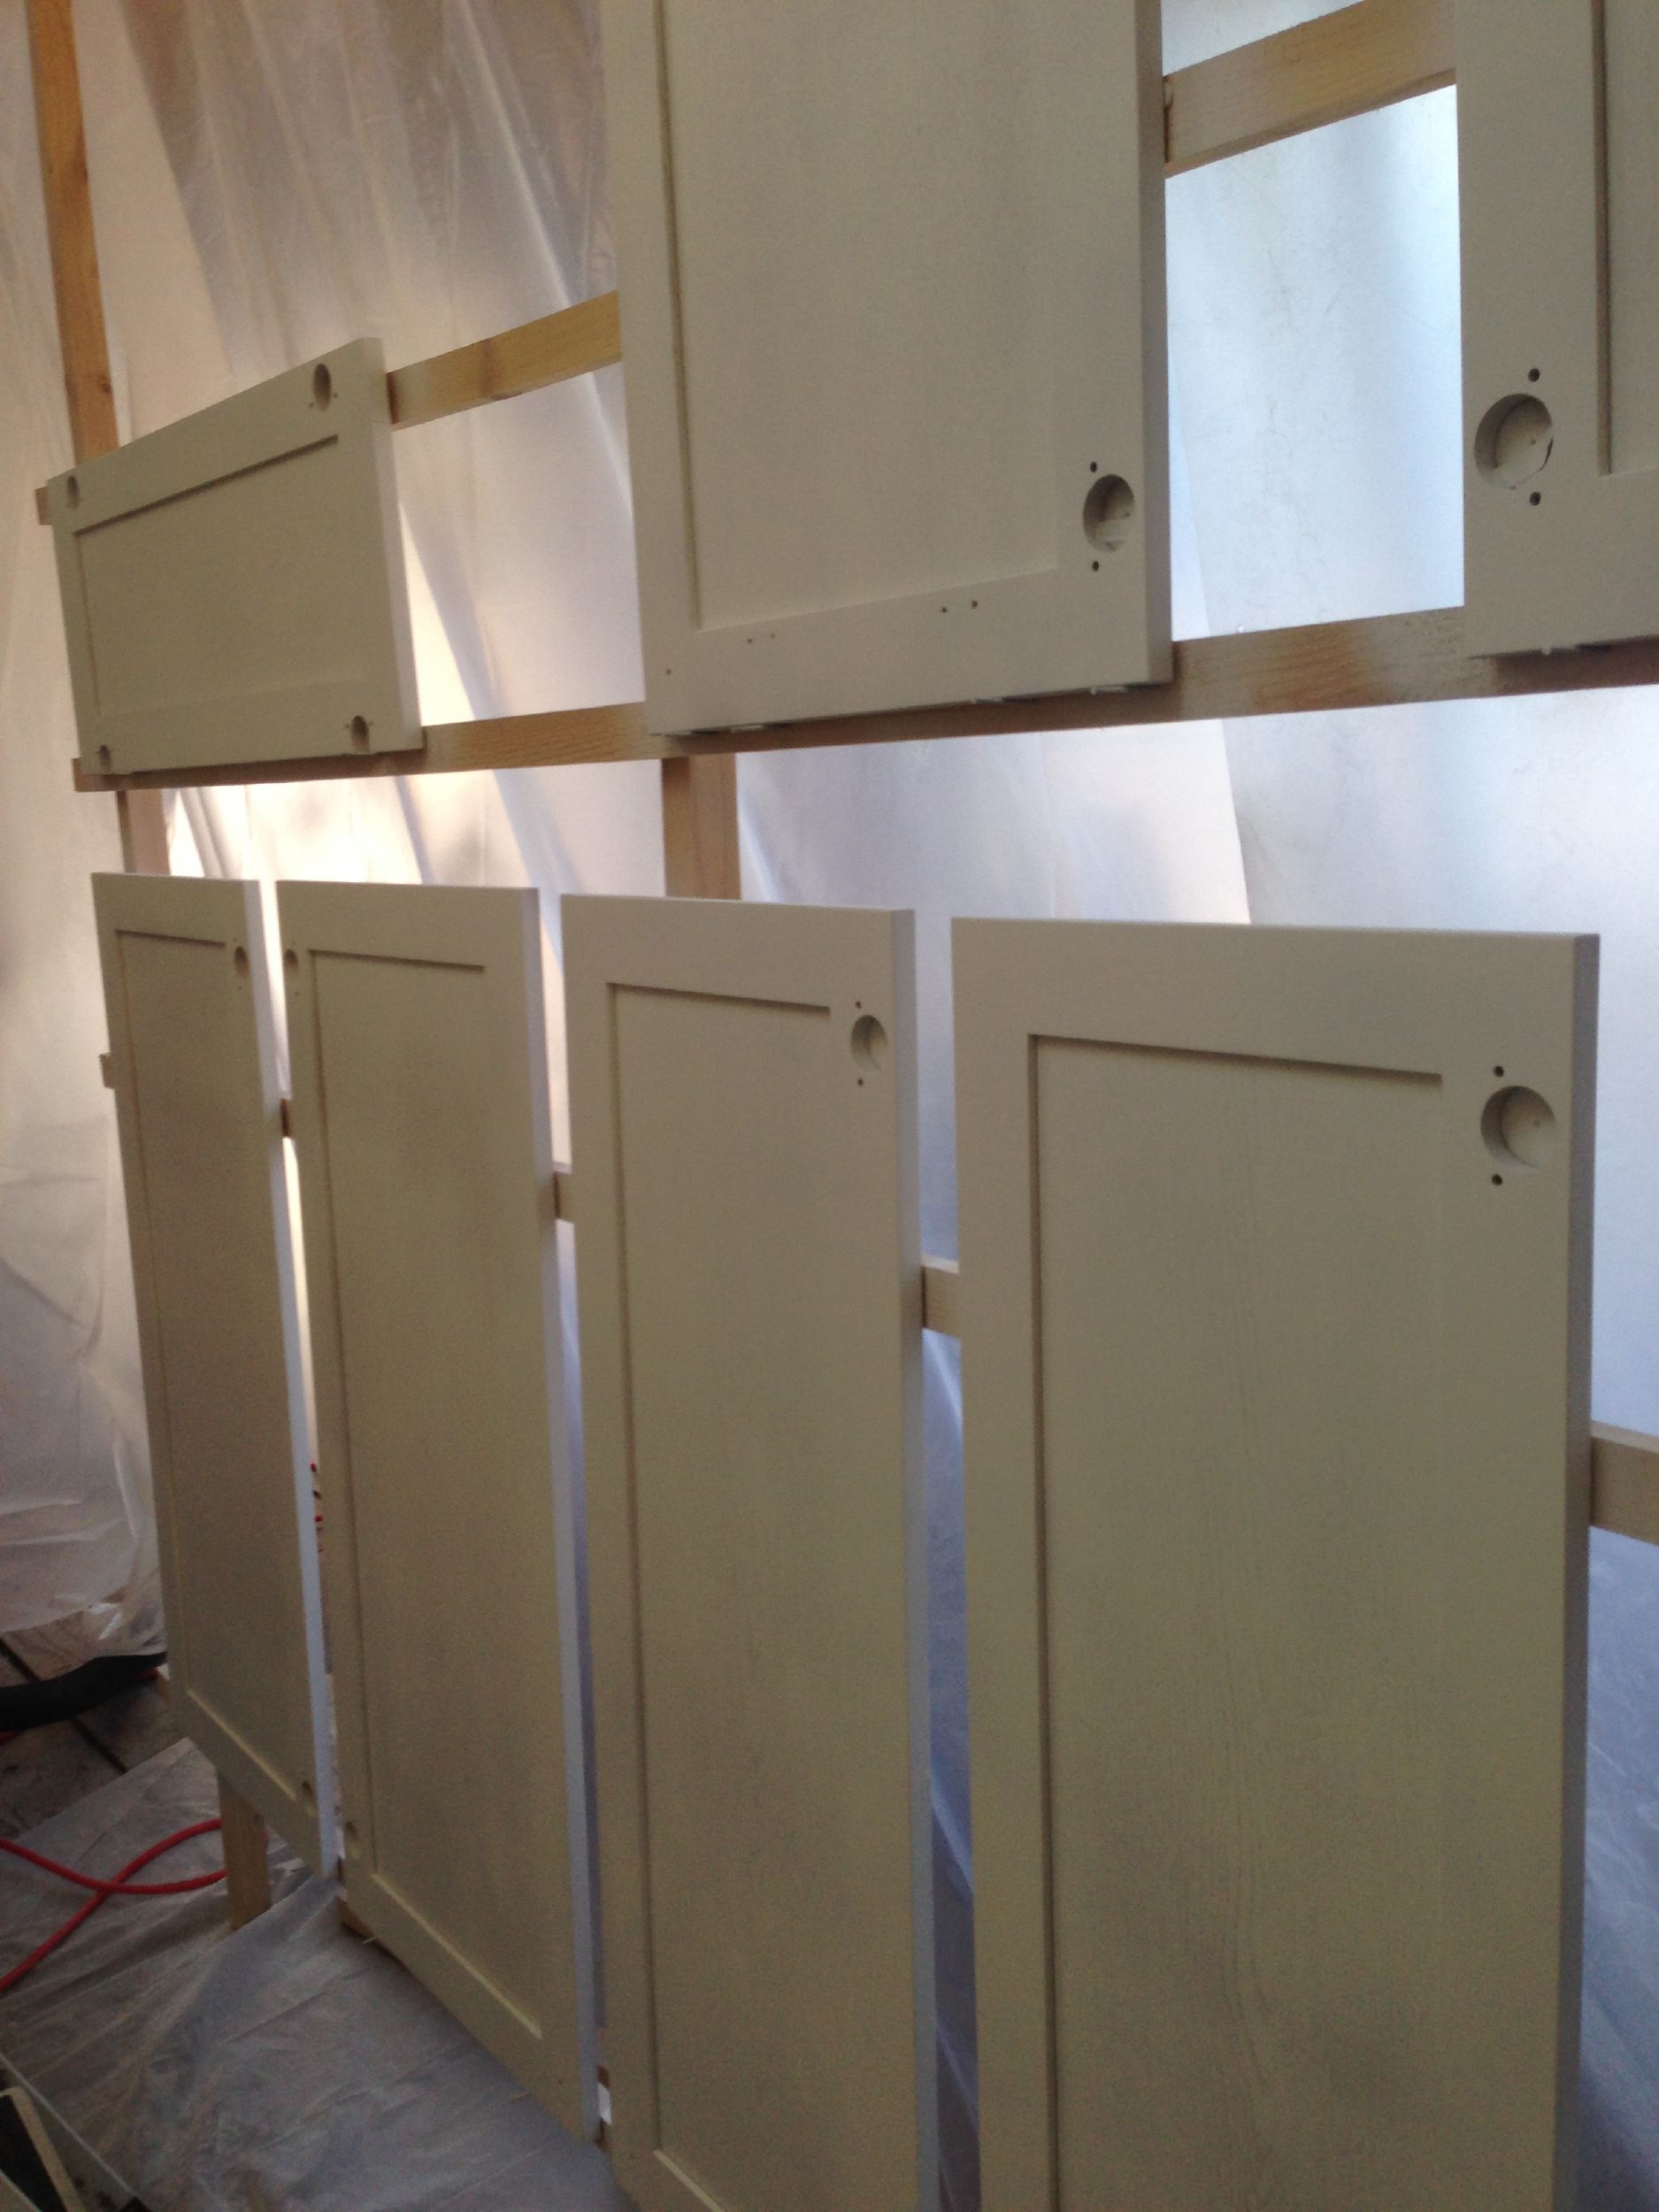
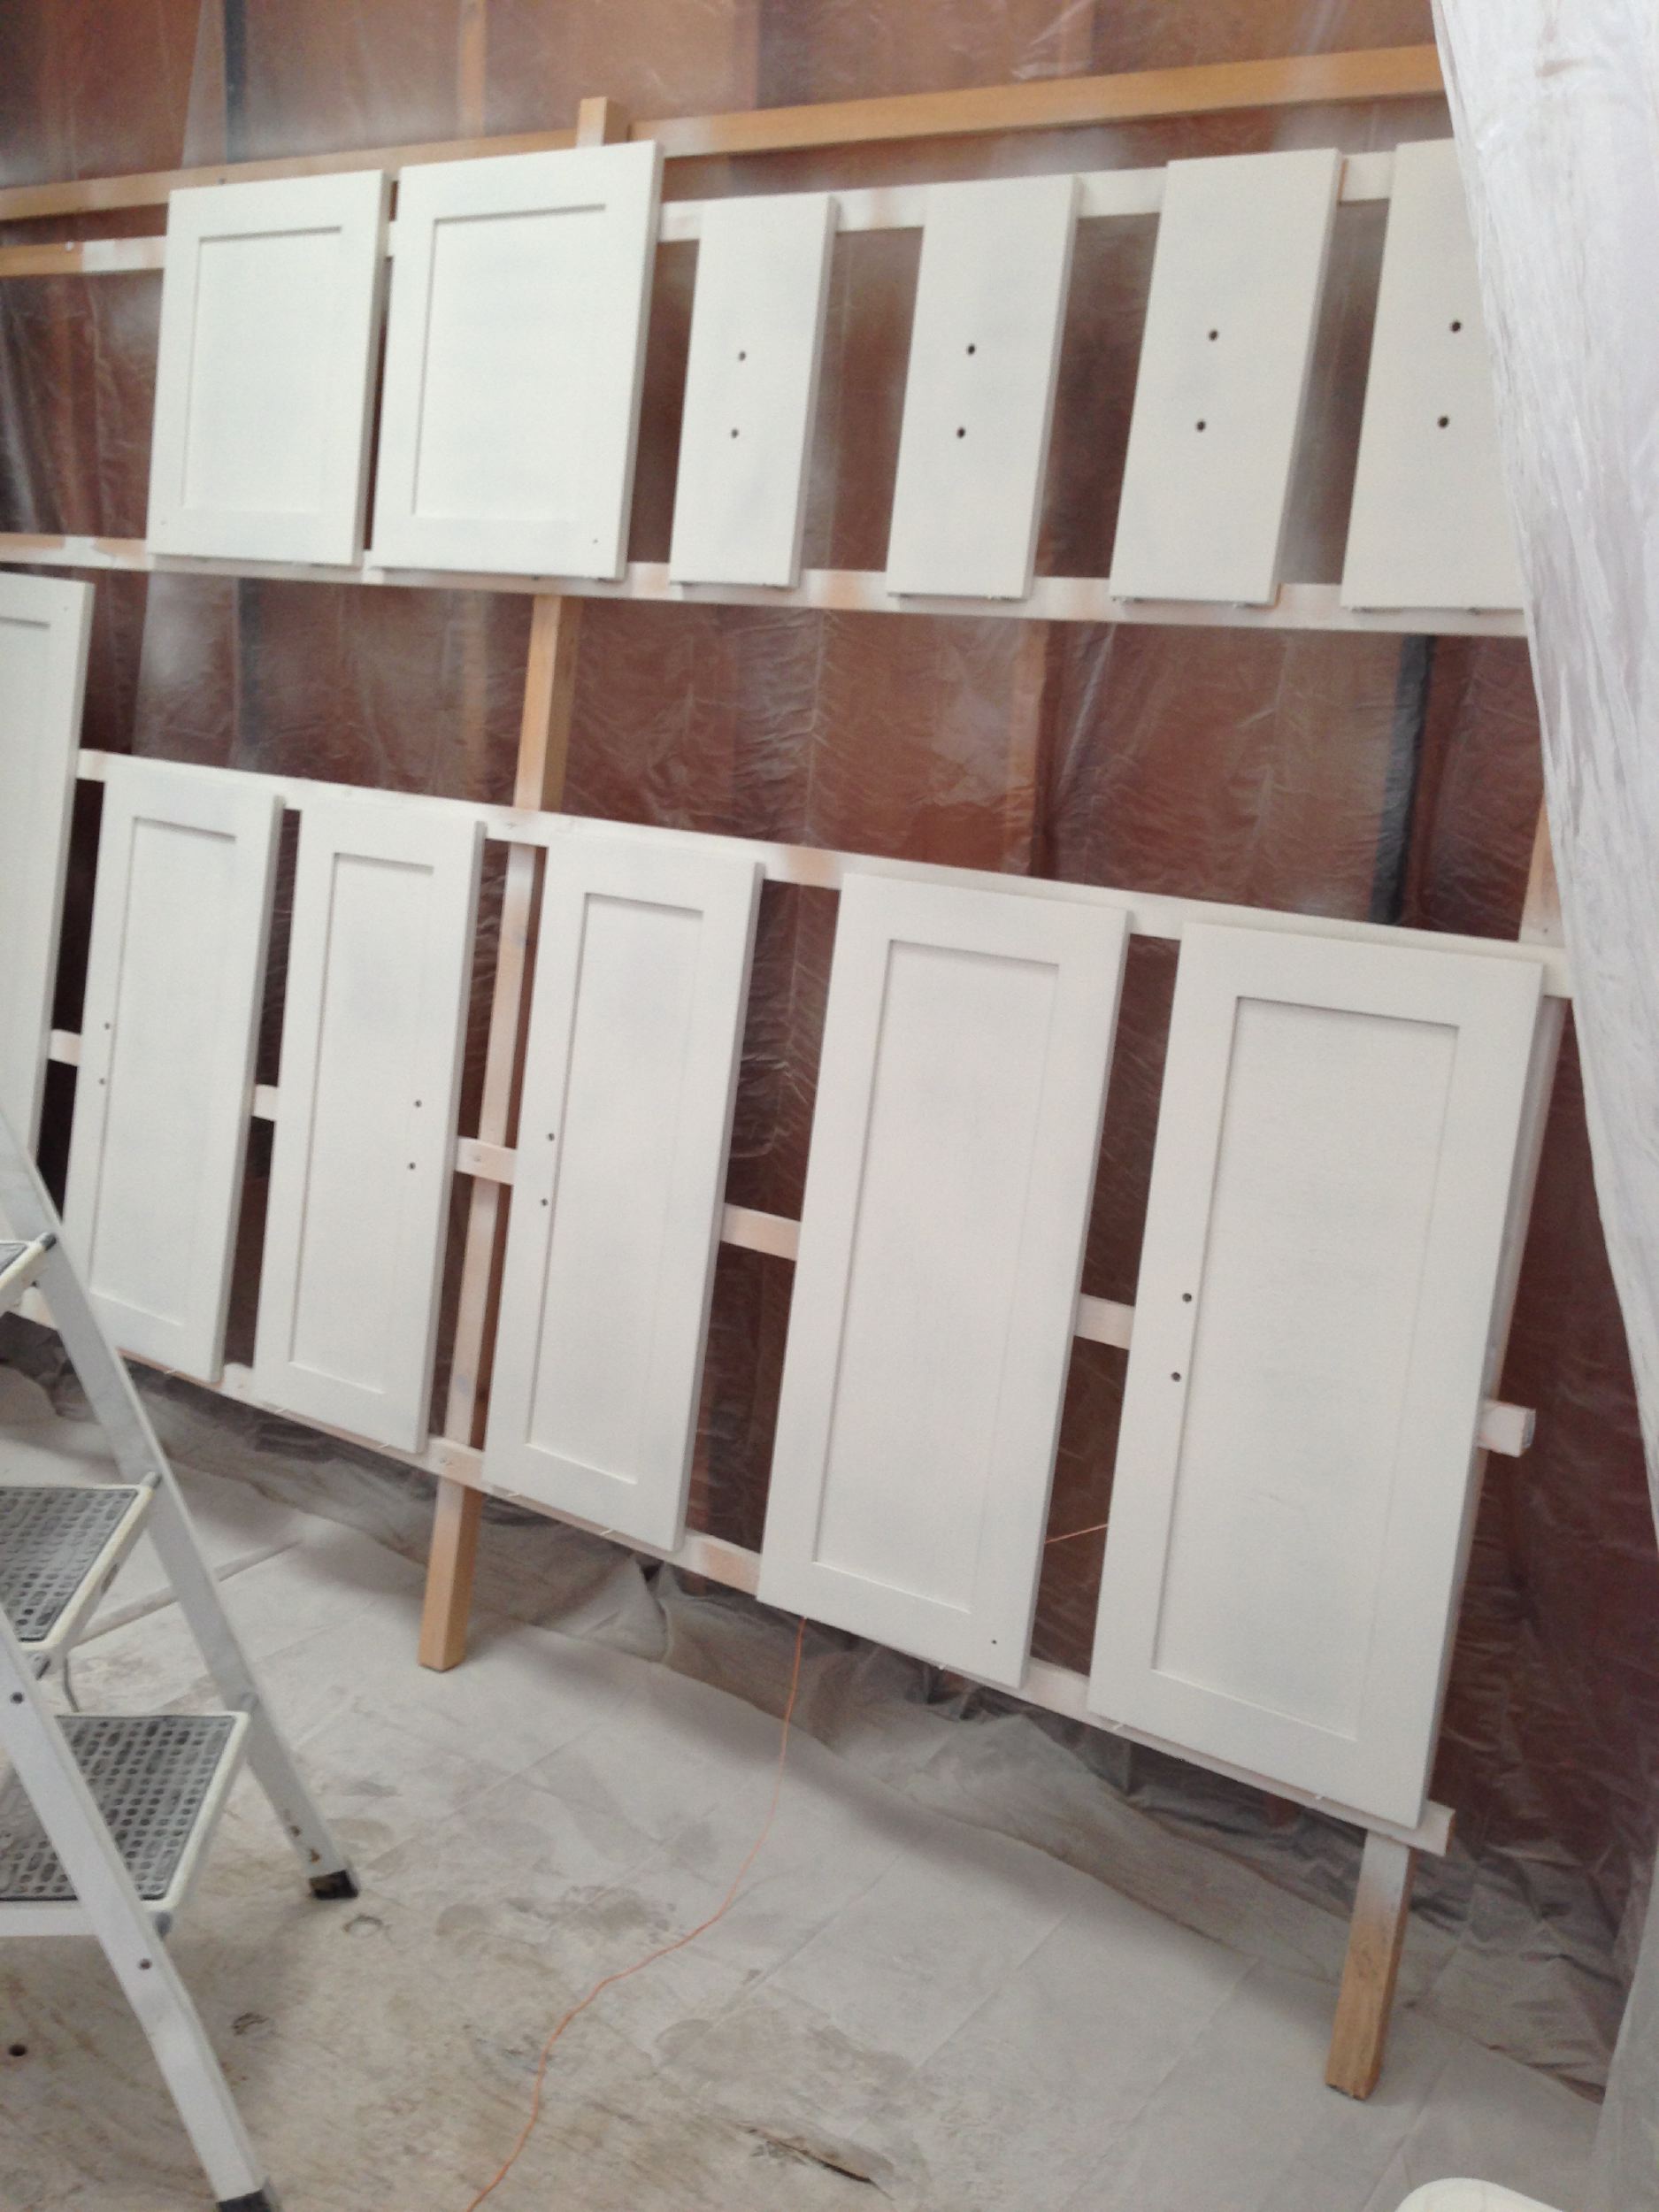
I let the primer dry for 5-8 hours before flipping the doors over to paint the other sides. It took awhile to get all the doors primed because I applied 2 layers of primer.
The toekicks of the base cabinets are painted using a brush since we weren’t as concerned with getting them absolutely smooth as the drawers and doors.

The final paint color was Sherwin Williams Sea Salt, a latex (water-based) paint. We actually took the paint chip to our local Kelly Moore paint store and had them match it since we don’t have a Sherwin Williams around us, but we liked the color.
I didn’t capture any good photos of painting the cabinets with the two top coats of paint. We spent several days letting the paint cure as well so it wouldn’t smudge or run as we handled them. Overall it took about 12 days from taking off the doors to getting them back on fully painted and cured.
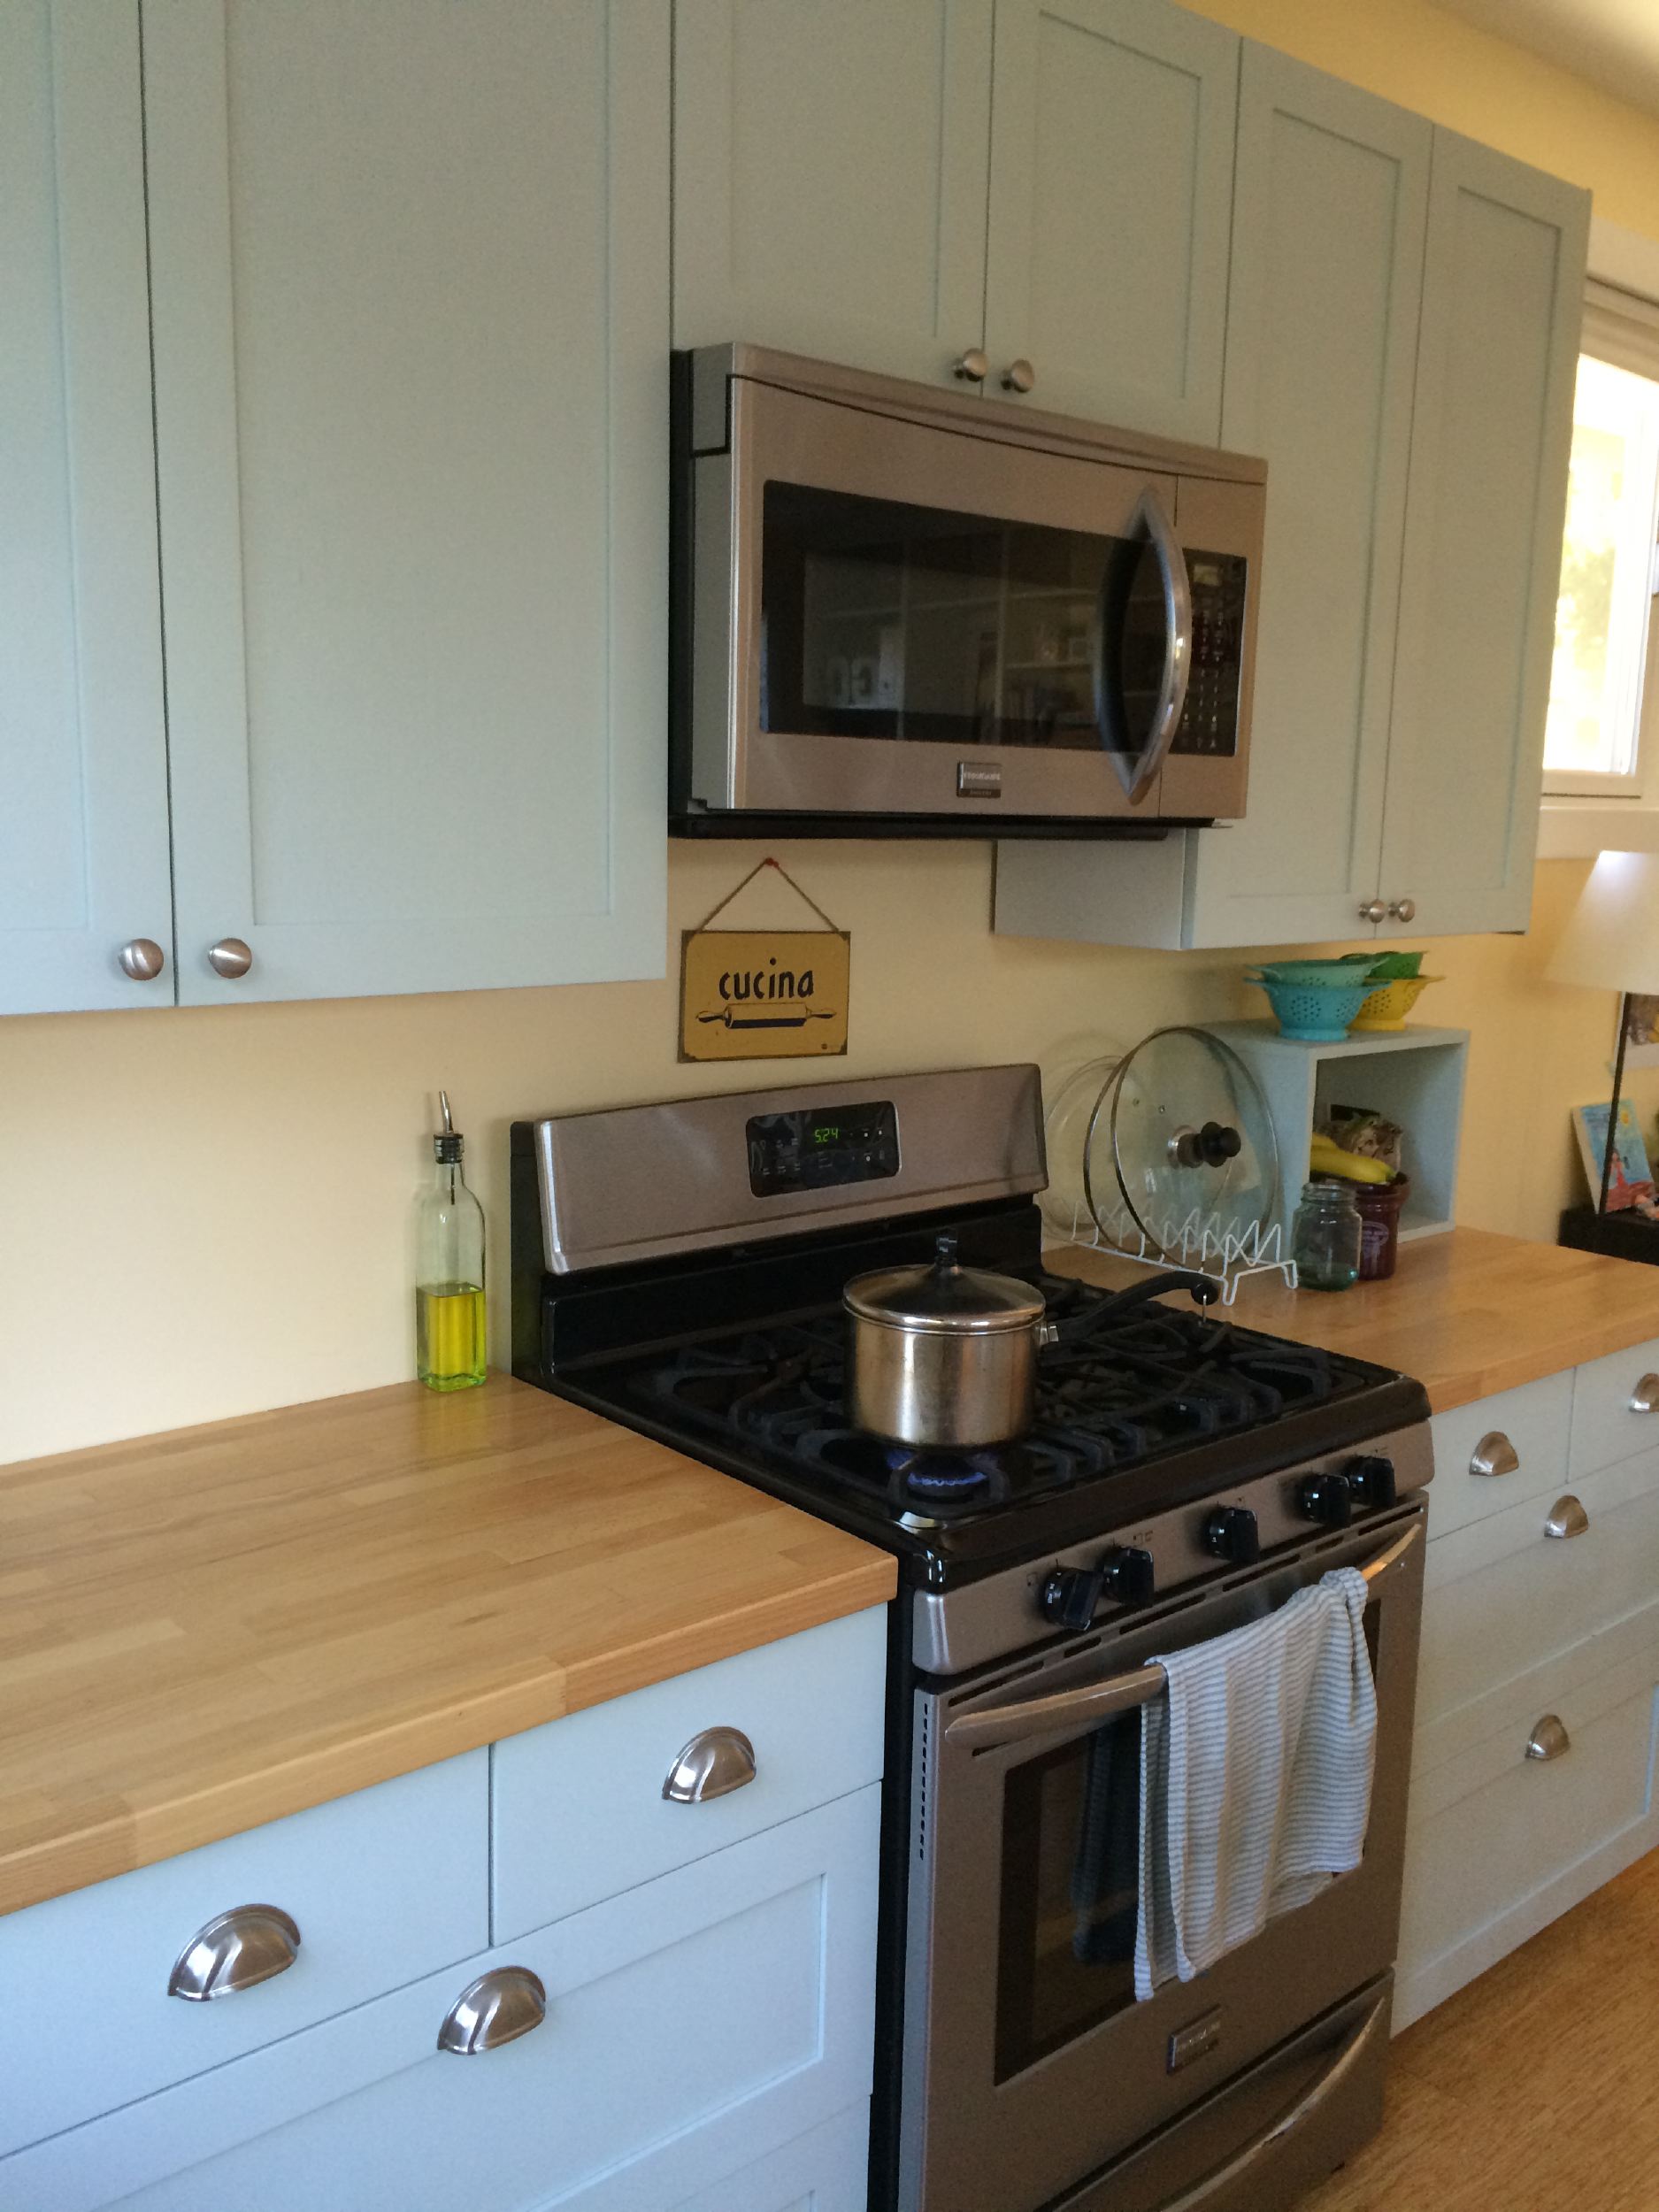
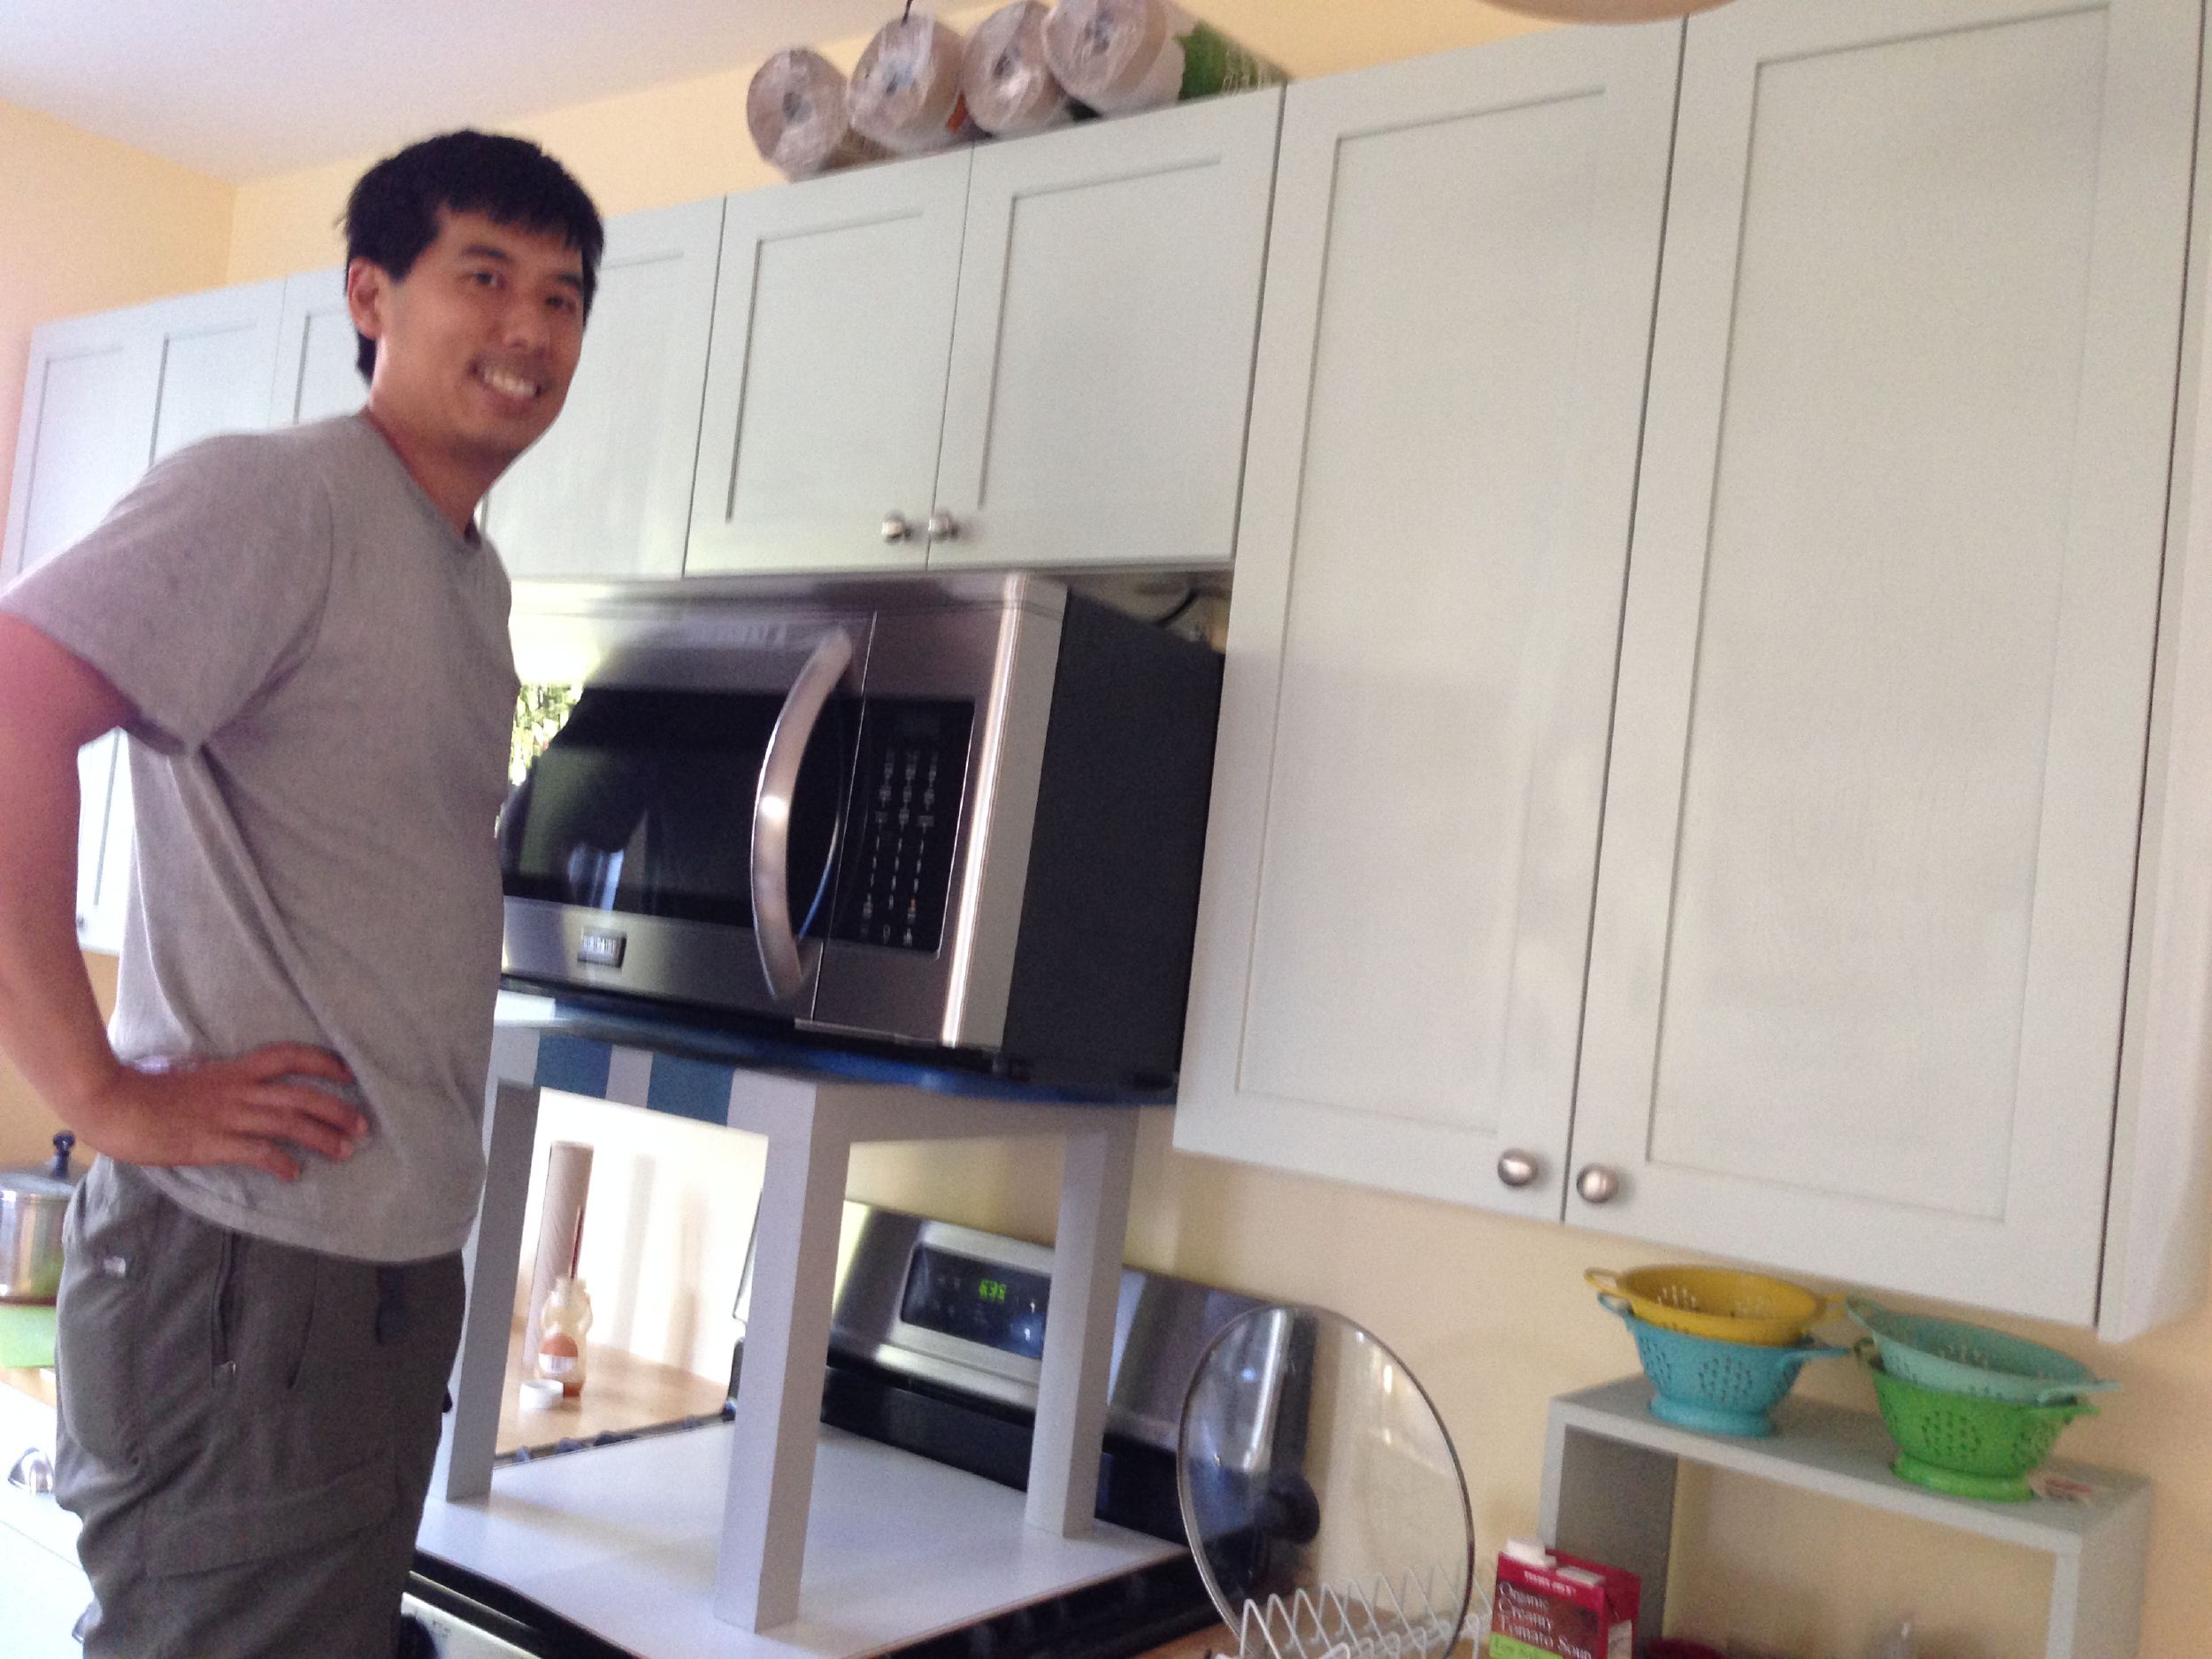
Our over-range microwave broke right as I was re-installing the doors, so I had to order a new one and install that as well. Note the use of an IKEA lack table as a stand for the microwave.
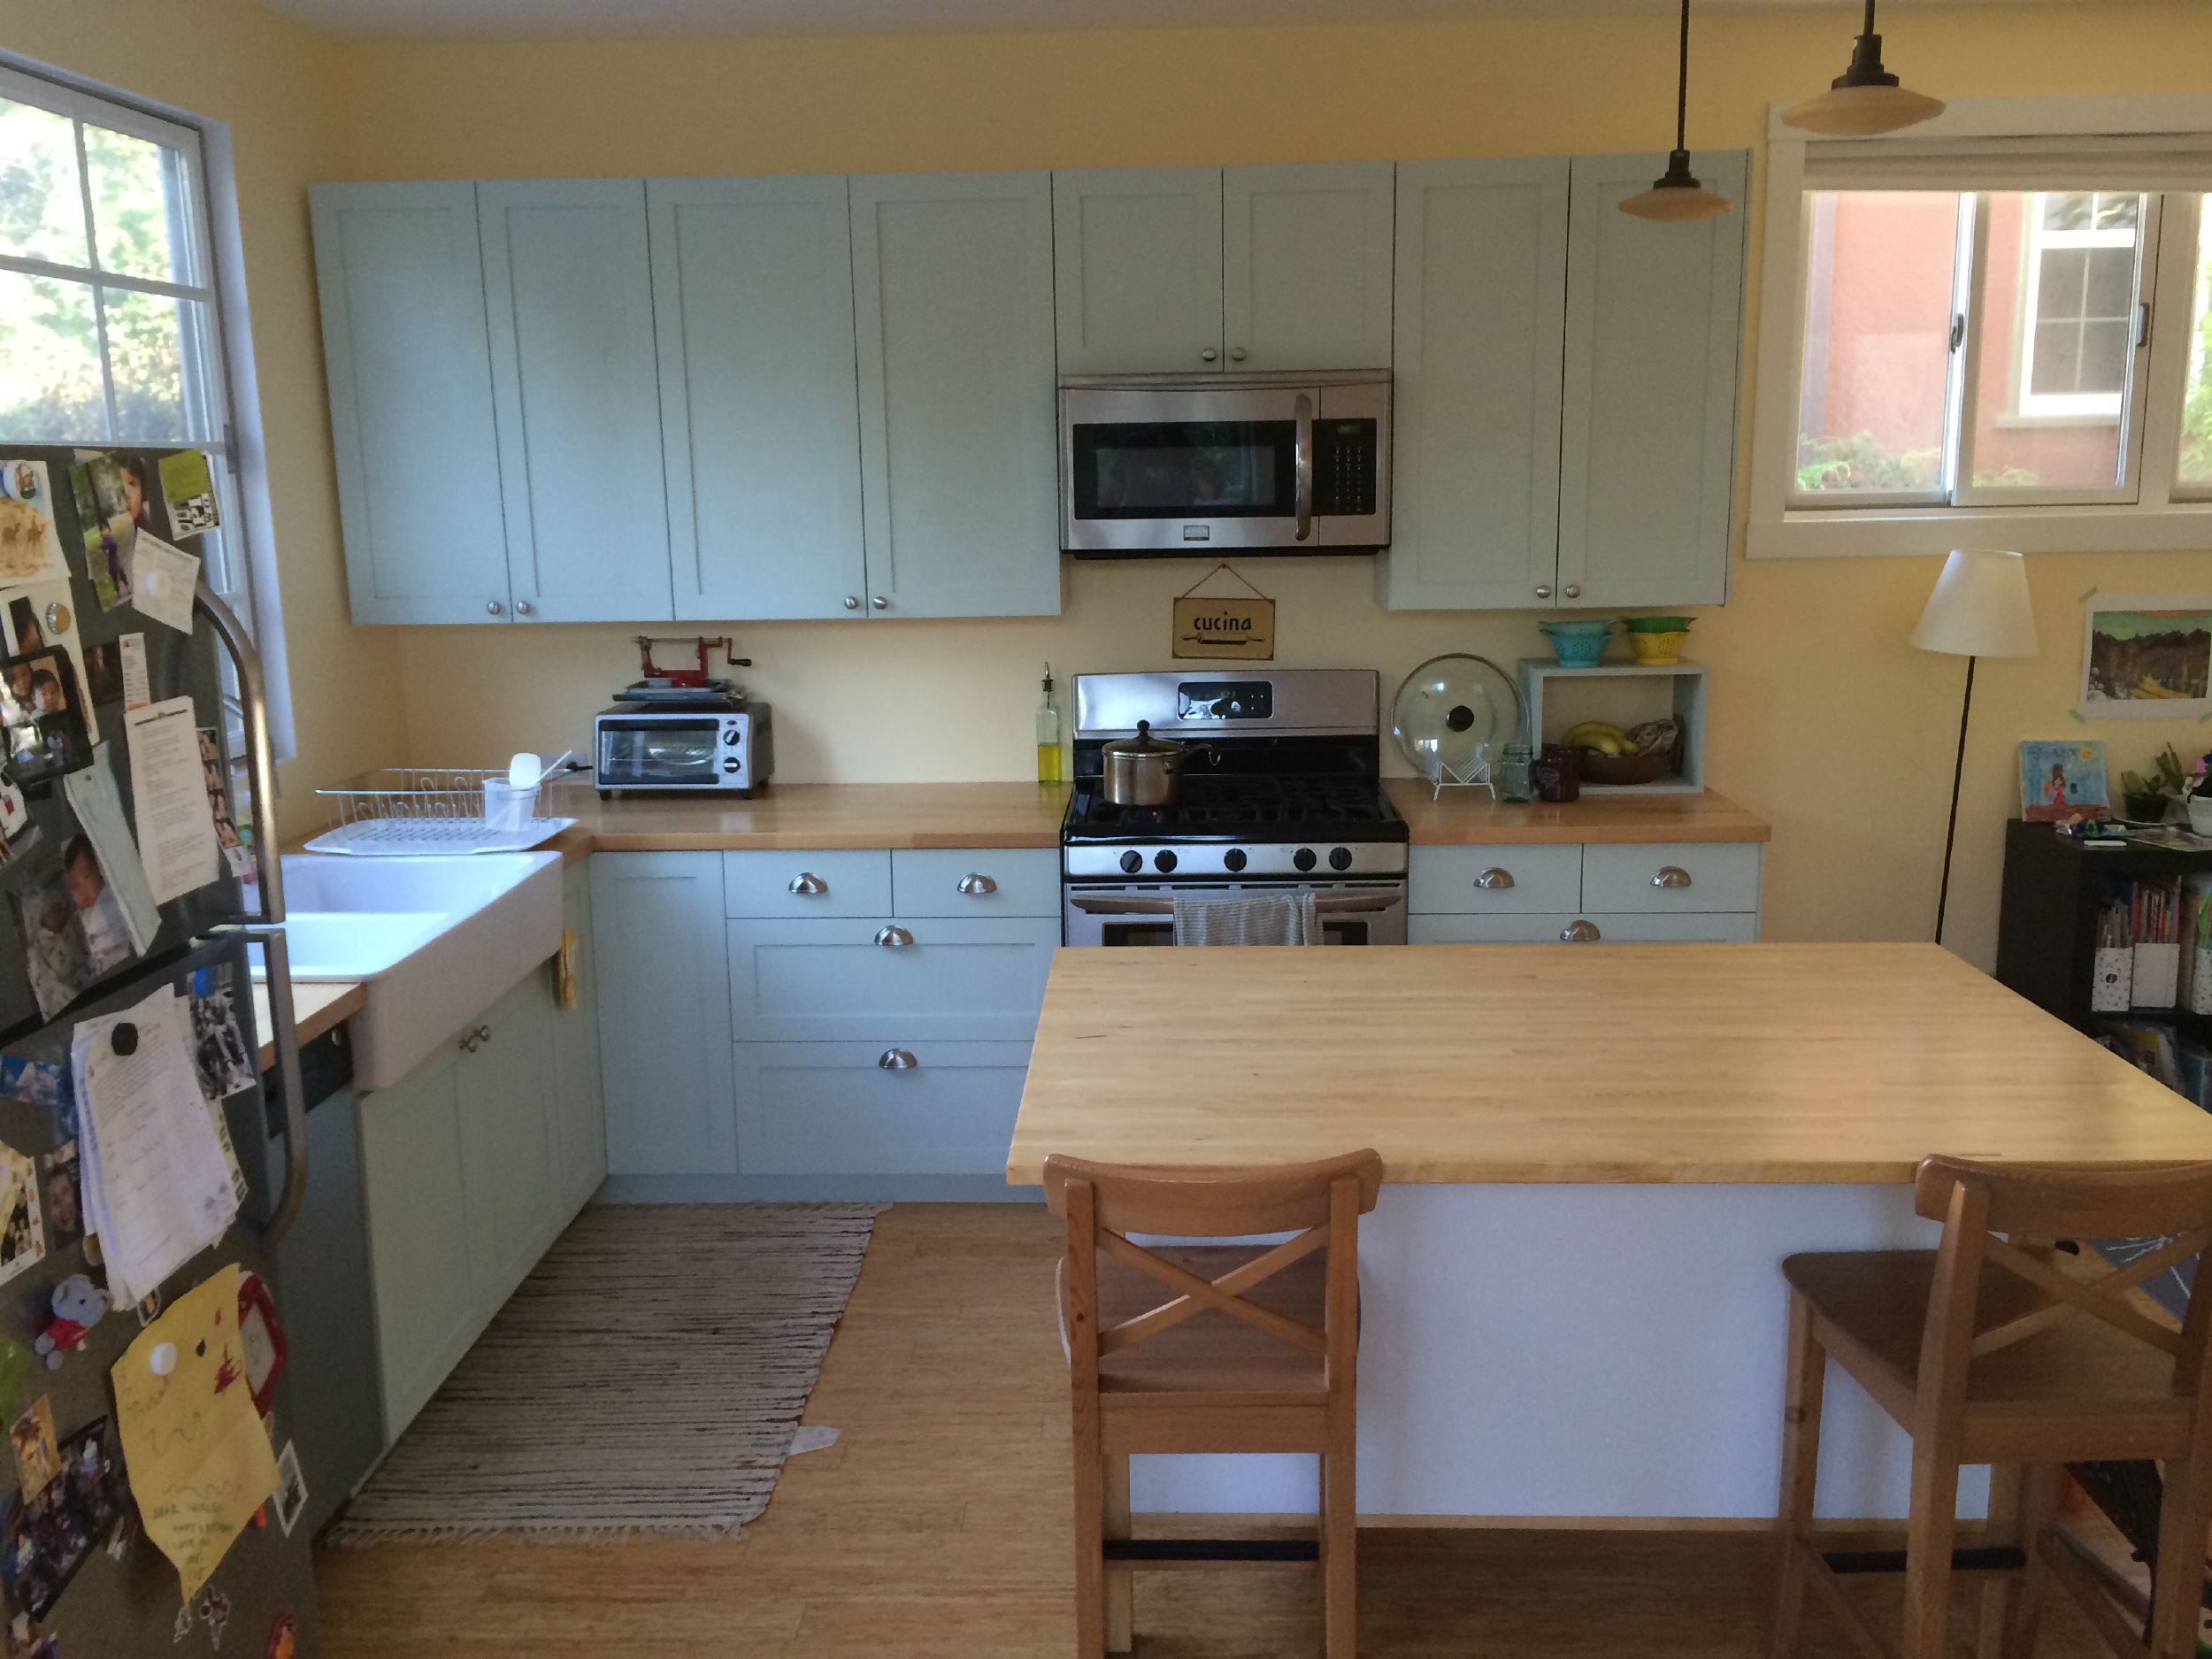
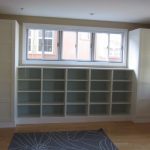
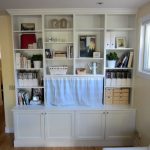
Here’s the final product of our kitchen painting. The color is much better than the original medium wood color. Shirley’s happy with the new fresh cottage-y color of the cabinets and Chris is happy we didn’t have to pay someone to paint the cabinets. And it all turned out well.
Total cost was just under $200, see list below for materials and cost.
Materials:
Critter paint sprayer . . . . . . . . . . . . . . . . . . . . . . . . . . . . . . . . . . . . . . . . . . . . . . . . . . . . . $45
Sand paper . . . . . . . . . . . . . . . . . . . . . . . . . . . . . . . . . . . . . . . . . . . . . . . . . . . . . . . . . . . . . . . . .$4
Zinsser BIN Primer . . . . . . . . . . . . . . . . . . . . . . . . . . . . . . . . . . . . . . . . . . . . . . . . . . . . . . . $41
Denatured alcohol . . . . . . . . . . . . . . . . . . . . . . . . . . . . . . . . . . . . . . . . . . . . . . . . . . . . . . . . $10
Tack cloth . . . . . . . . . . . . . . . . . . . . . . . . . . . . . . . . . . . . . . . . . . . . . . . . . . . . . . . . . . . . . . . . . .$5
Sea Salt Paint (Kelly Moore) . . . . . . . . . . . . . . . . . . . . . . . . . . . . . . . . . . . . . . . . . . . . . . .$49
Mason Jars . . . . . . . . . . . . . . . . . . . . . . . . . . . . . . . . . . . . . . . . . . . . . . . . . . . . . . . . . . . . . . . . $15
Wood for paint booth (1×2, 2x2s) . . . . . . . . . . . . . . . . . . . . . . . . . . . . . . . . . . . . . . . . .$30
Total Cost . . . . . . . . . . . . . . . . . . . . . . . . . . . . . . . . . . . . . . . . . . . . . . . . . . . . . . . . . . . . $199
Since it’s been almost 3 years since the cabinets were painted, you might be interested to know how they’ve fared, especially since we did not seal or finish the cabinets after the last coat of paint. They’ve held up very well and pretty much look as well as they did right after they were painted.
just wanted to tell u guys that, I am very inspired and impressed with all the diy u guys did. I searched built-in diy and entered ur blog, I am gonna share this with my hubby and hope we will able to tackle a project or two like u guys did.
I love this blog, you have completely changes the look and feel with some amazing color combinations. The pictures also look great. Thanks for sharing such a beautiful blog.
Are these actual wood or is this the particle board?
i have wanted to paint my cabinets for years but haven’t since I think mine are actually plastic based
The cabinets we used are wood or have a veneer of wood so they can sanded and painted. We sanded to roughen up the finish. However you can paint a laminated cabinet. It’s all in the surface prep and primer that you use. I think the BIN Zinsser primer we used will stick to anything. http://amzn.to/2wF5tRf
good luck!
Hi, we’re moving into a house that has Tidaholm cabinets and we’re planning to paint – in a very similar colour too! So glad to find your blog to see it done well!
Something we are debating is whether to try to fill the wood grain before painting. How much do you find the wood grain shows through? We’re hoping for a fairly flat/smooth finish. The results from this other Tidaholm cabinet painting suggests a fairly oaky-finish through the paint (http://cabindiy.com/how-to/painting-kitchen-cabinets/) but obviously they were using different products. If possible would you post a close up photo of the cabinetry that shows the finished texture?
Thank you so much!
Annie
Hi Annie,
We like the rustic look and so I just sprayed for color and coverage but left as much of the texture and woodgrain as possible.
Theres much more texture on the panels on the doors and drawers and less on the drawer front slabs.
Chris
I notice in your list of supplies you mention denatured alcohol but did not see it used in the work you did. What was it used for? I am getting ready to paint my cabinets and want to do it right so it lasts 30 years.
Thanks
The denatured alcohol was used as a solvent to clean up the shellac primer. Because it’s alcohol based, it won’t clean up with water like latex paint. So when I was cleaning out the sprayer I would fill it with a little alcohol and they spray to clean out the nozzle.
Good luck!
Love your ideas, therefore you are my teacher and inspiration.
Keep posting your great ideas and I’ll keep watching & learning.
Awesome job! Would you mind sharing your settings to get critter to spray well with your paint? Also did you dilute paint?
Looks great! H
How did you paint the side of the exposed cabinets? Were the sides just side panels that come off easily, or did you have to disassemble the whole cabinet?
Yes, there are side panels that you purchase when buying the cabinets at IKEA. They match the color/material of the doors and drawer fronts since all the cabinet boxes are identical. So it’s just a matter of painting them the same way, as well as the toe kicks. Pretty simple.
I didn’t dilute the paint. There aren’t any settings on the critter that I can recall. It’s just a matter of adjusting the height of the tube so that the paint is entrained properly.
Wow! Came out great! I am doing this on my own (with some prepping help from my daughter and nieces)..but the painting i will do on my own. I have so much to do – clean, fill, sand, sand again and clean. I will look into the spray paint but may just go w/ the brush. Thank you.