Here is our IKEA built-in shelf/closet project in our living room!! Read on to see how we got here…
Also see our latest IKEA built-in project. . .
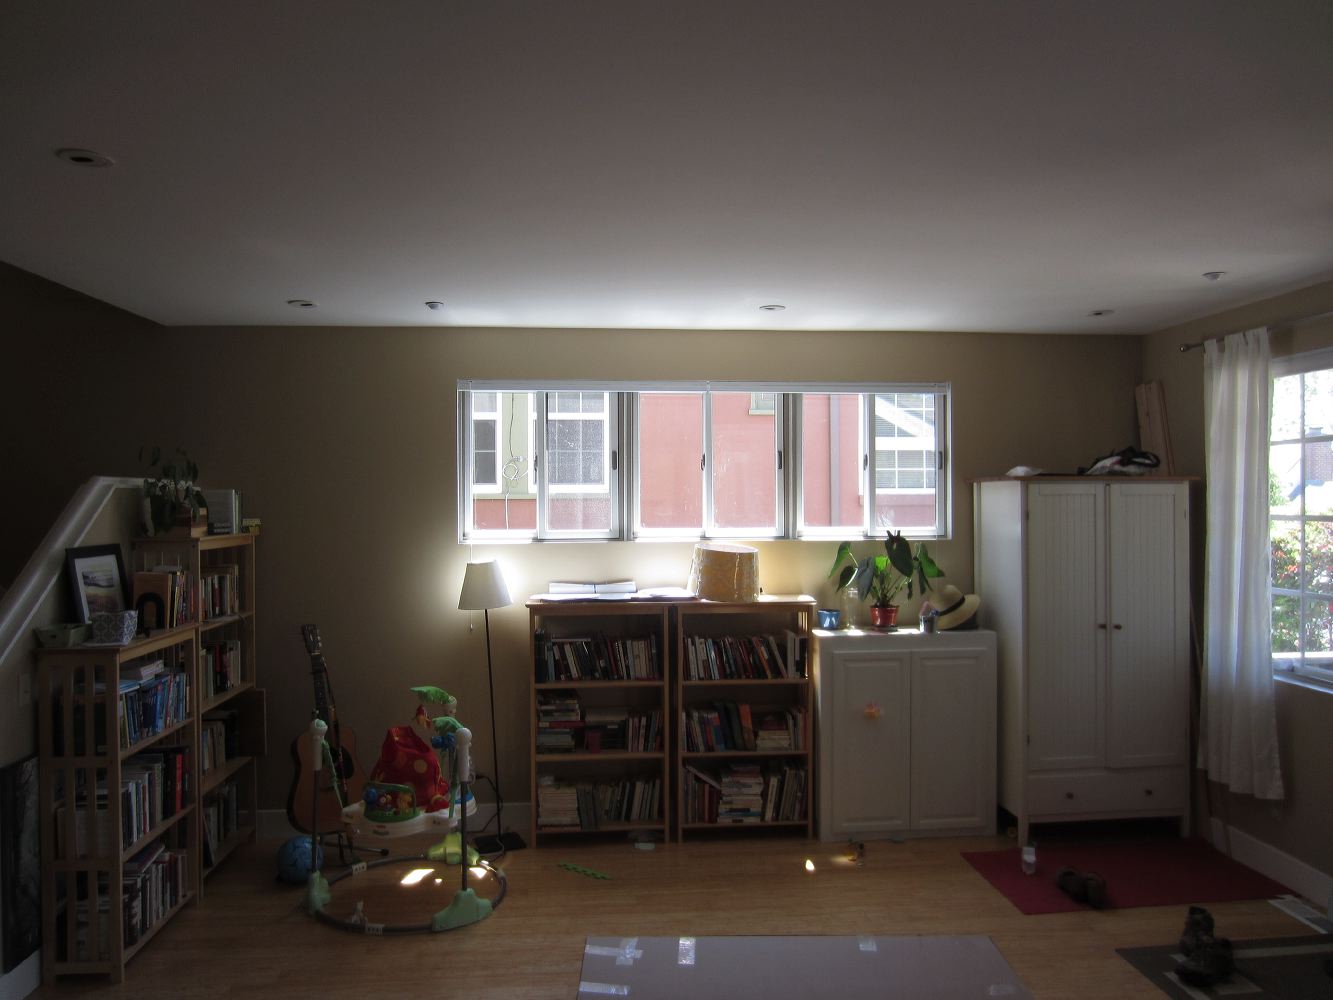
The latest project is one that we’ve seen on HGTV and online (like here and here): to take premade bookshelves and cabinets and add molding and baseboards to make it look built-in. We especially wanted to try this on the first floor because Shirley has a lot of books and there’s not a single closet on this floor. We started with the living room, in part because we wanted some place to put the vacuum cleaner.
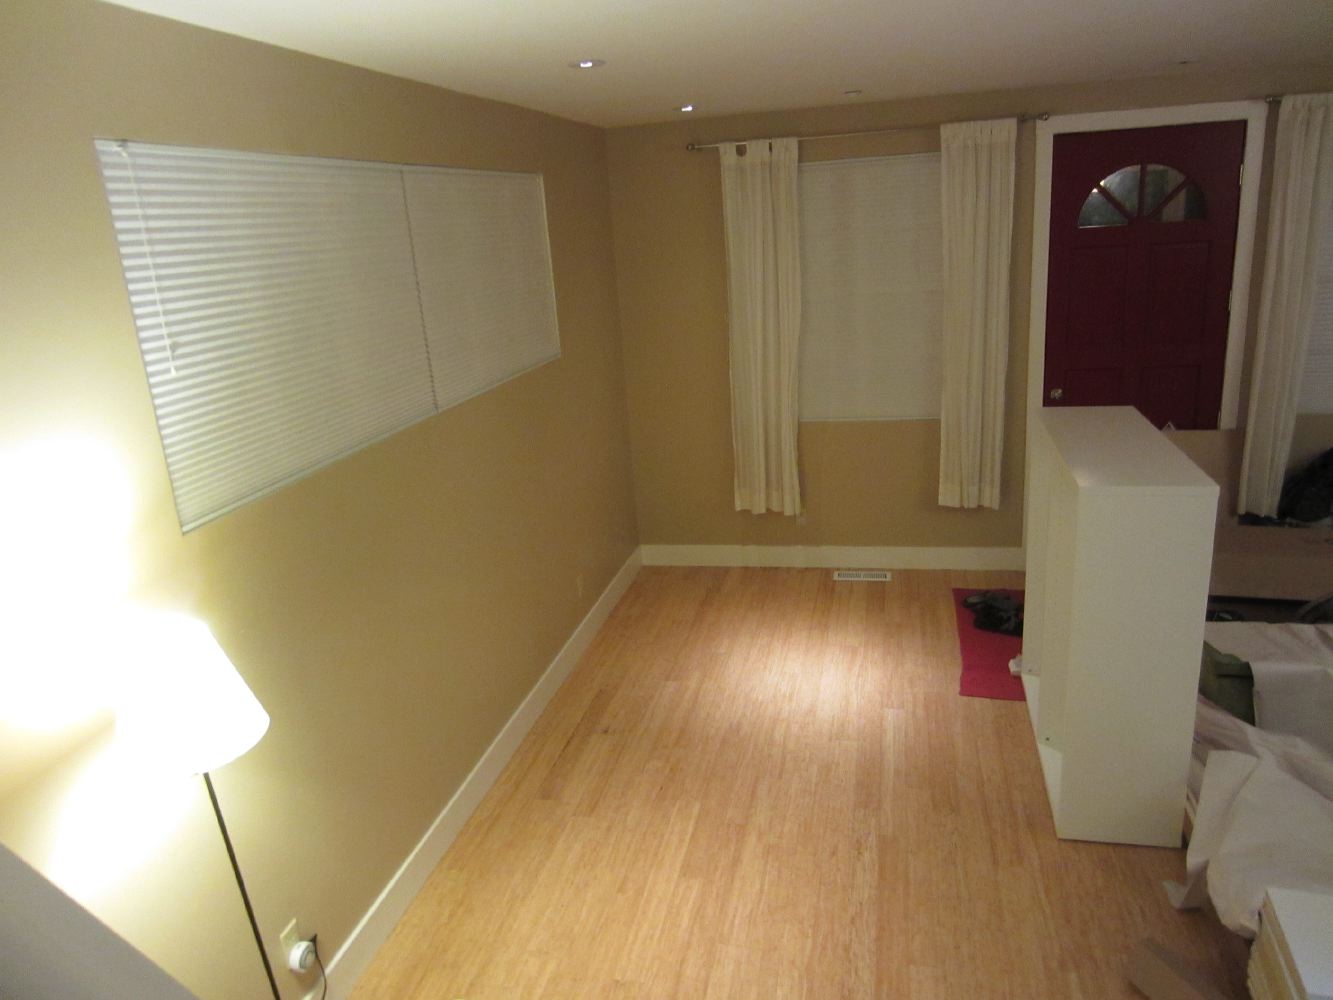
Here is how the living room looked right before we started the project.
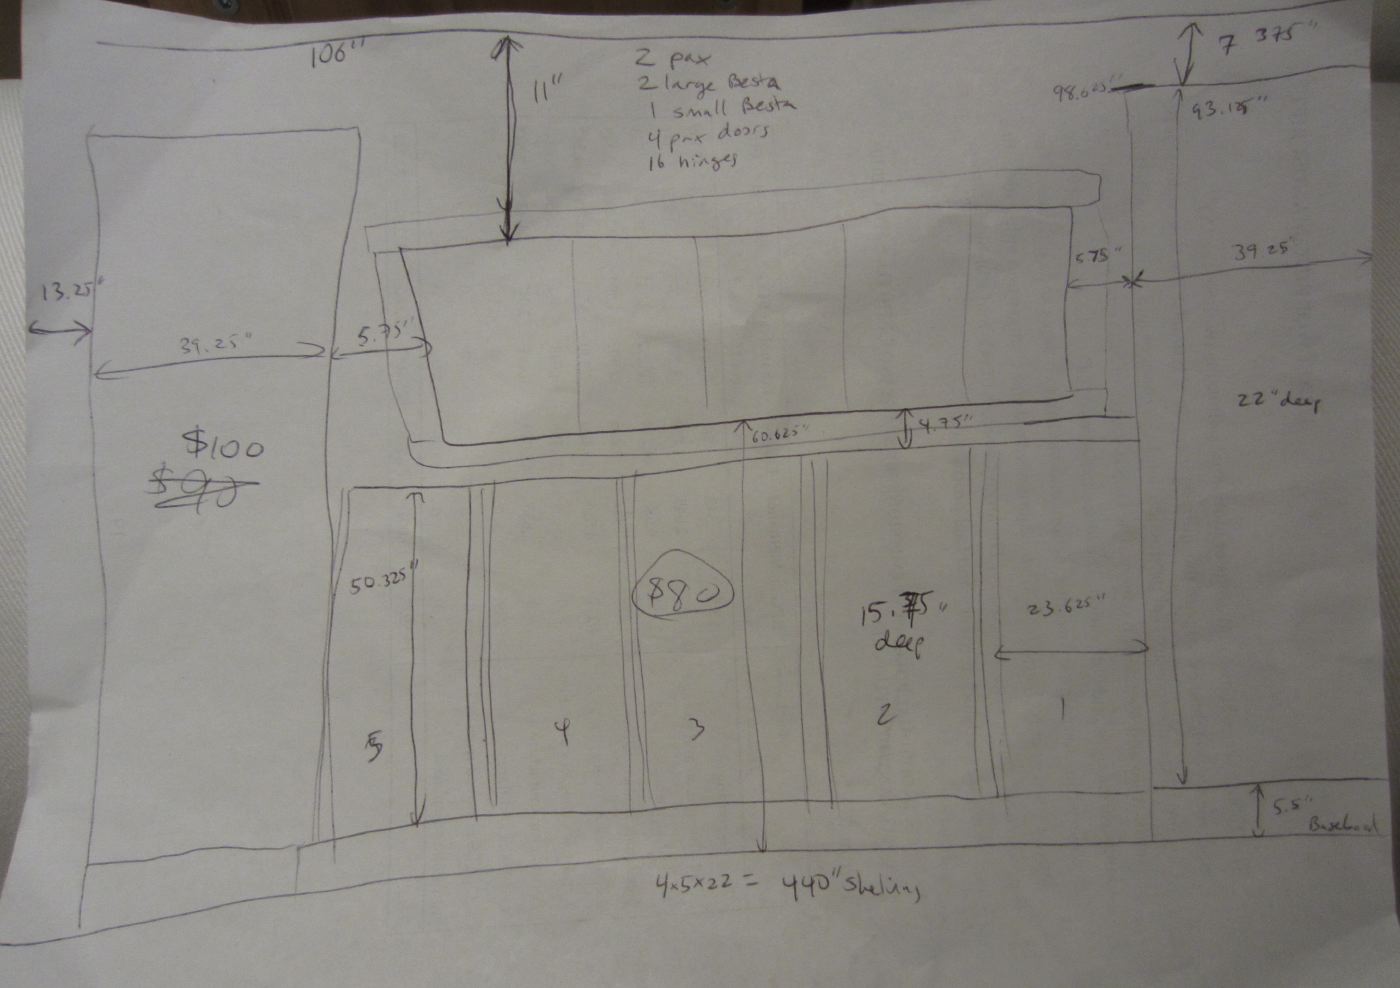
As big IKEA fans, we decided to use IKEA shelves (Besta) and wardrobes (Pax). Chris took a few measurements, looked over the dimensions of various IKEA items, and sketched out a quick plan that had great potential:
We went to IKEA on a Thursday afternoon (it’s nice to be able to work at home), bought 5 shelves and 2 large wardrobes, and fit it all into Chris’s mom’s station wagon (with the back hatch not fully closed). Everything was flat packed, so it was relatively easy to transport, though some of the boxes were quite heavy (125 lbs).
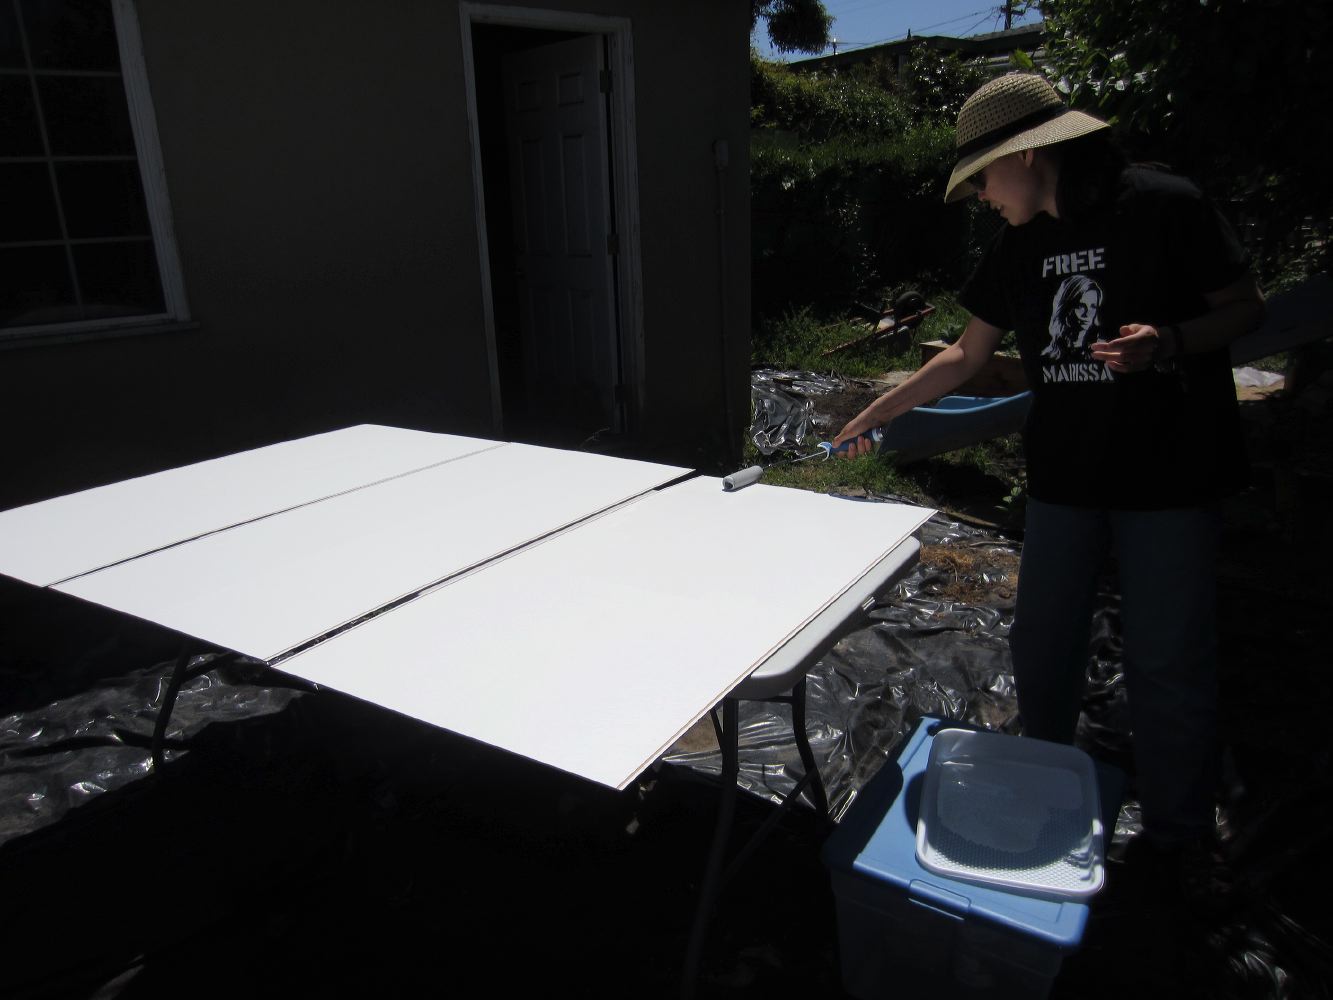
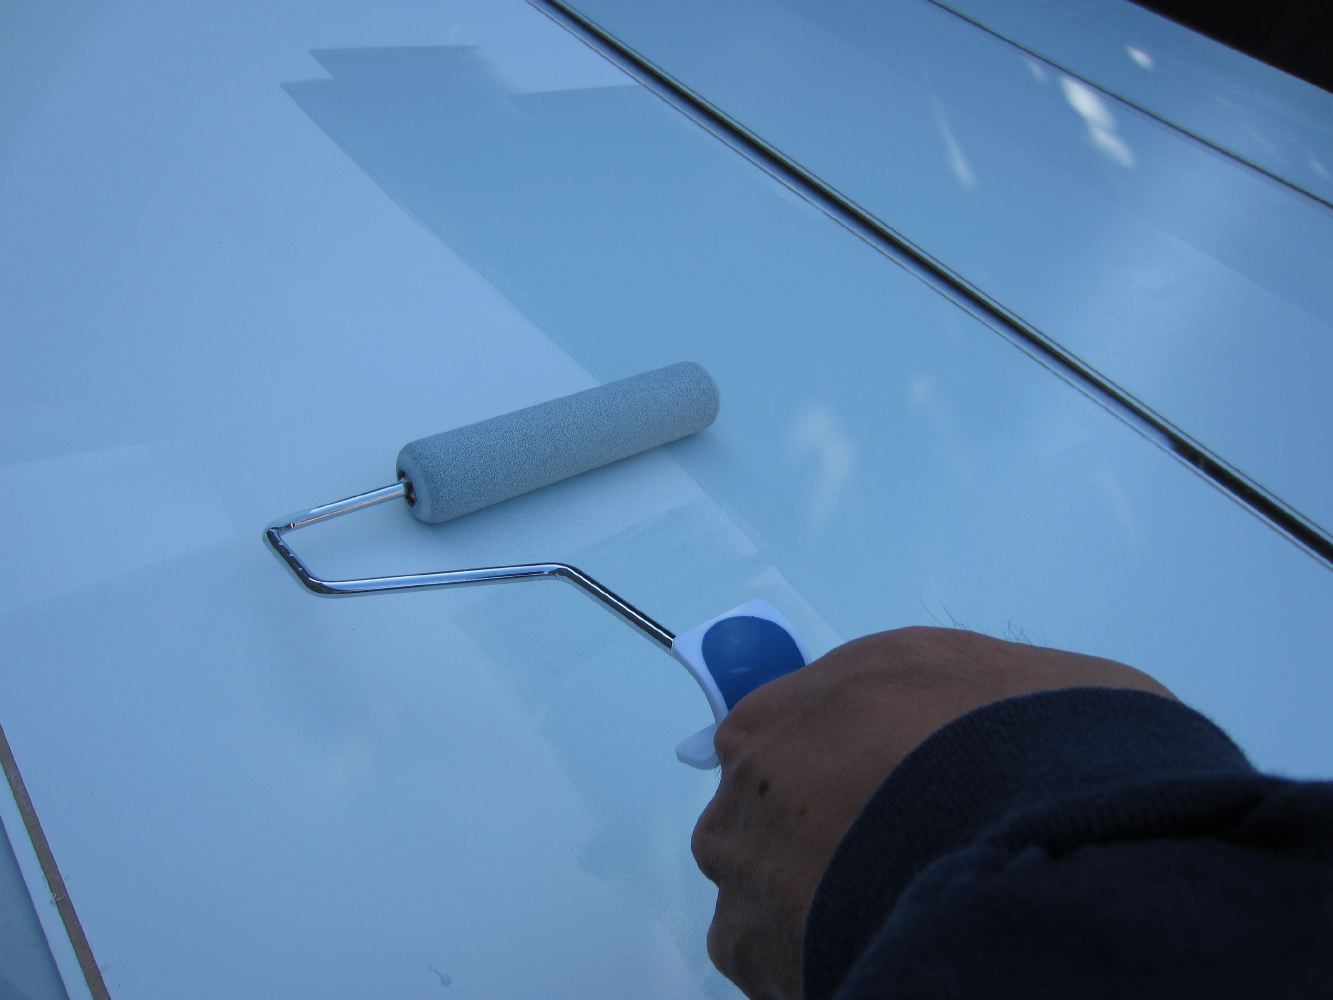
Shirley wanted the backs of the shelves to look nice (that was her job). At first we considered covering them with fabric or wallpaper, but we noticed it would be difficult to get the shelf backs to fit if we changed the thickness significantly, because the backs have to slide into a small grove in the shelf sides. So we decided to paint the shelf backs (made out of fiberboard and coated with a plastic laminate/melamine coating). The paint store guy made a big deal out of using the right primer to ensure that it would stick to the IKEA material.
Here are photos of Shirley priming the shelf backs and Chris painting them. (Note: it’s important to wear sunglasses when it is really sunny out and you are using white primer. Also note her awesome The OC “Free Marissa” shirt, circa 2005. Cue singing of “California…”) We painted the shelves a light blue (with greenish tinge) called Misty Harbor (from Kelly-Moore). We already had a quart of the paint because we had been trying different colors to paint our kitchen cabinets.
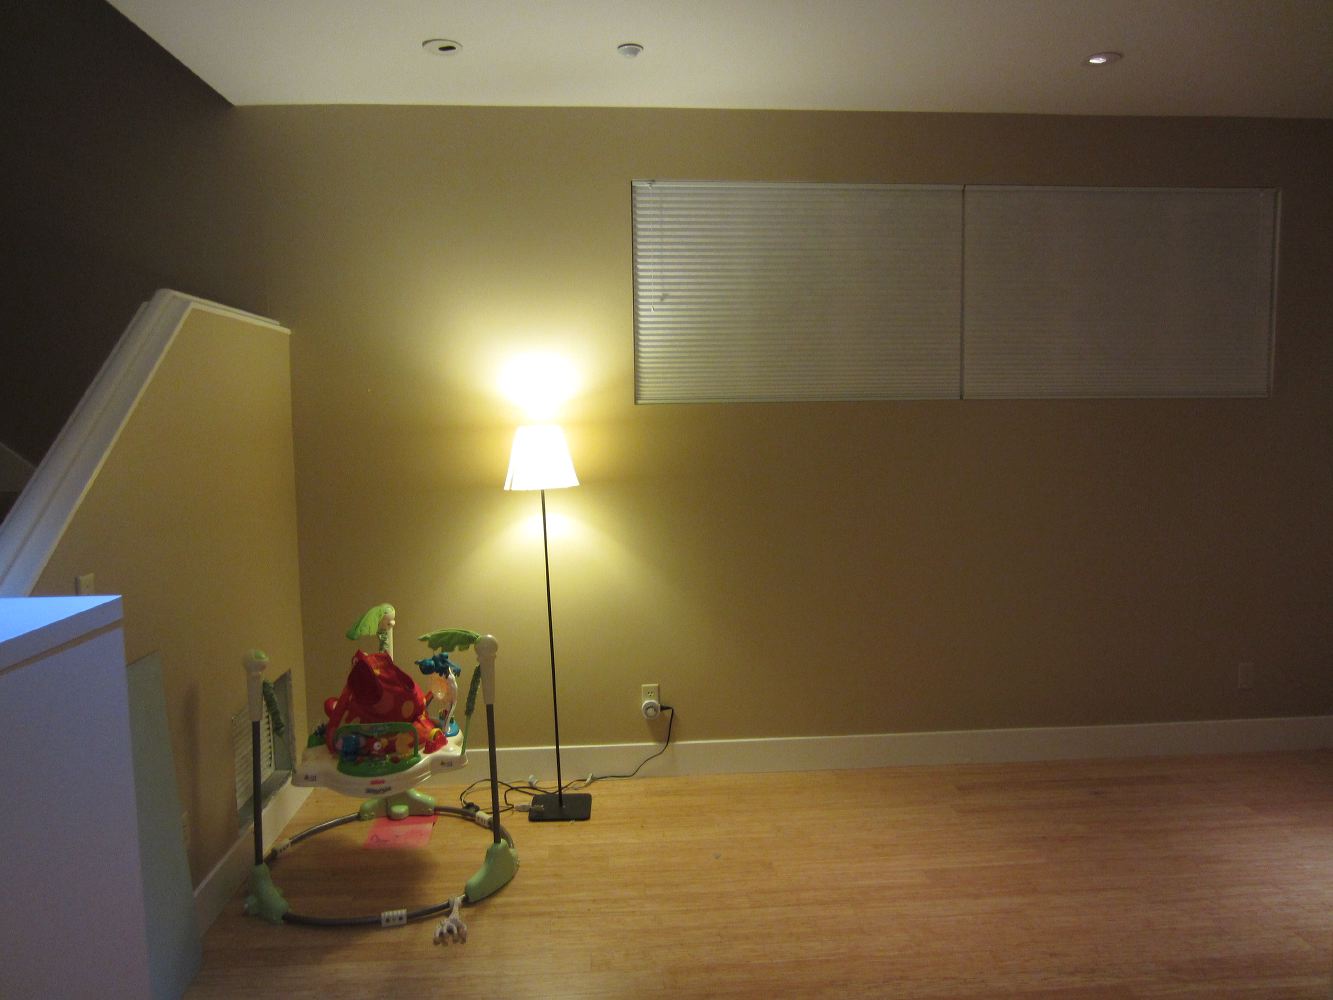
We then cleared out the existing furniture in the space and took a few pictures of the empty (and clean!) space (while the kids were asleep… we did a lot of the project then).
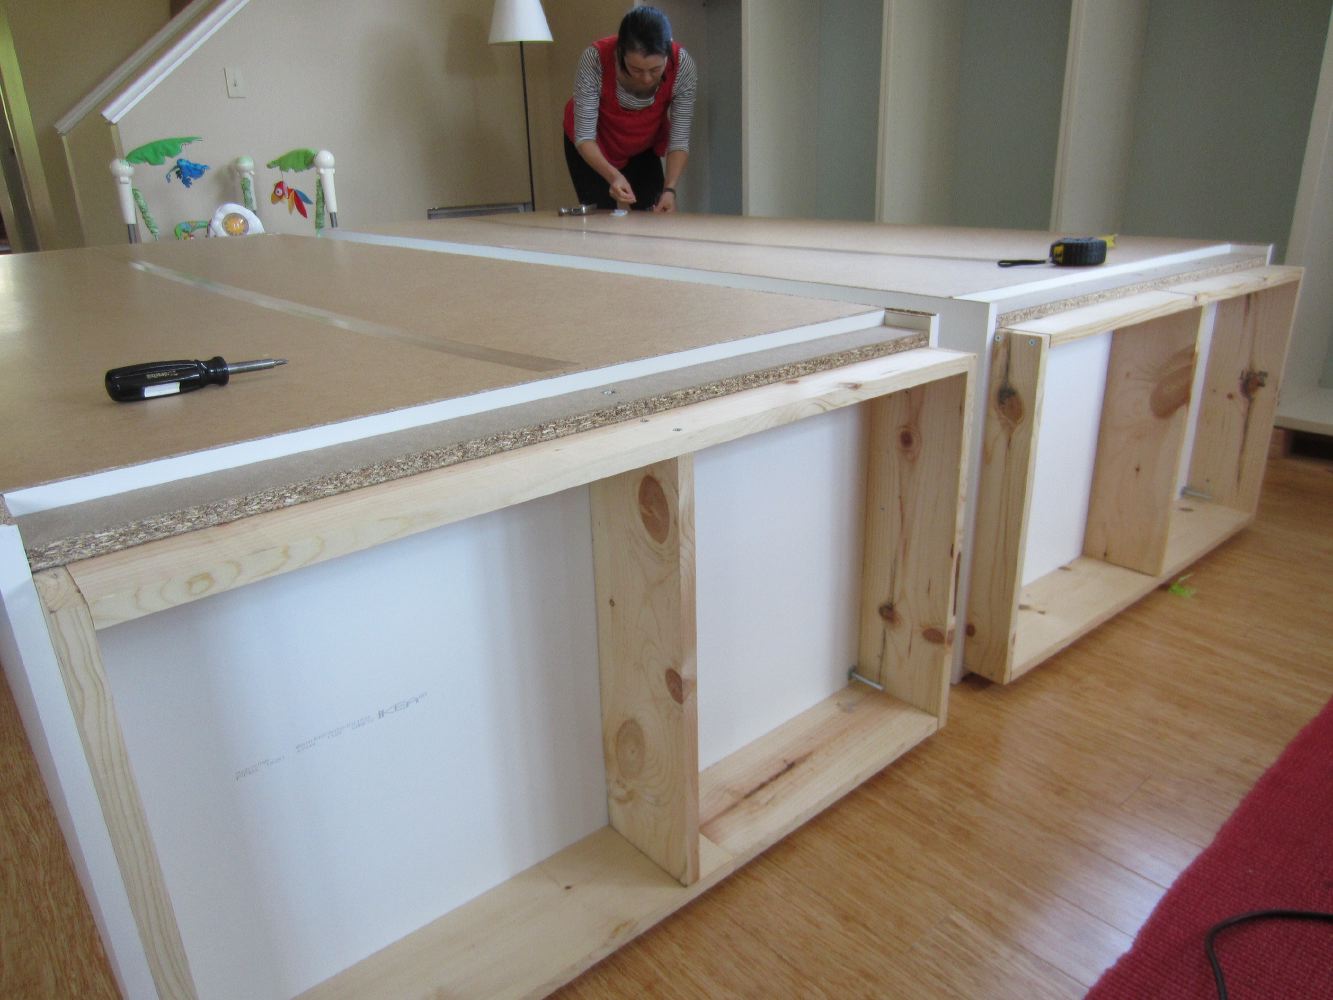
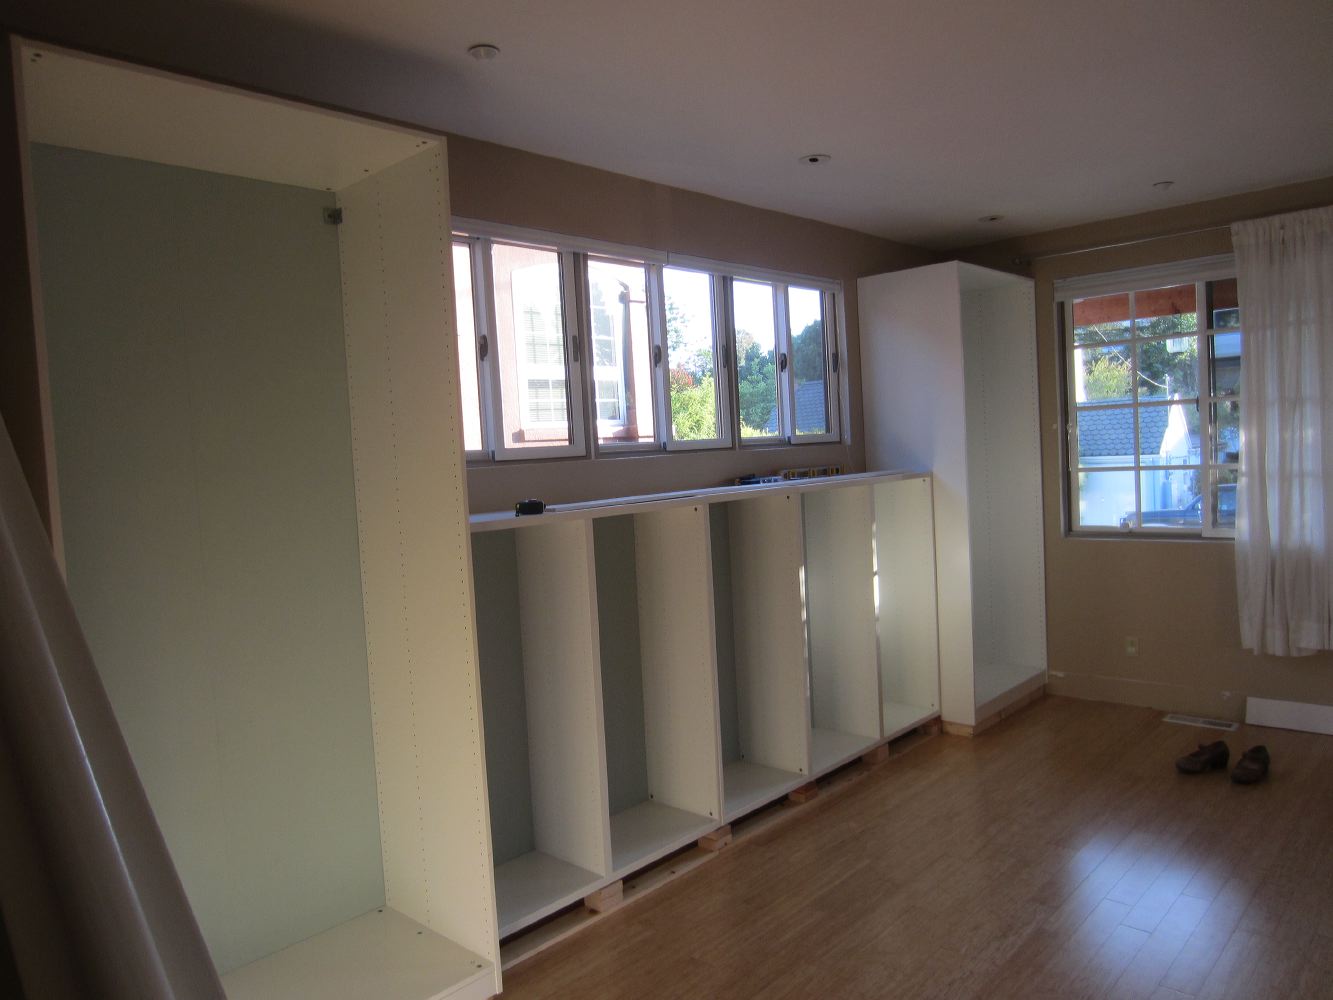
Chris also had to remove the existing baseboards so that we could have it all tie together. We assembled the Besta shelves while watching HGTV. We lined them up along the wall to see how they would look. We used the 50”-tall shelves so they would fit underneath the high window along that wall. Chris built a little platform out of 2x4s and 1x4s to raise the shelves enough so that the 5-1/2” baseboards that we used would fit correctly. The Besta shelves have little feet on the bottom that you can raise and lower using an Allen key in order to level the shelf (there’s a tiny hole on the bottom shelf so you can do it when the shelf is in place). It was quite handy, as we could raise the shelf about a half inch.
The next step was to build the Pax wardrobes. These things are quite large: 39” wide by 22” deep by 93” tall (luckily, we have 9 ft ceilings on our first floor).
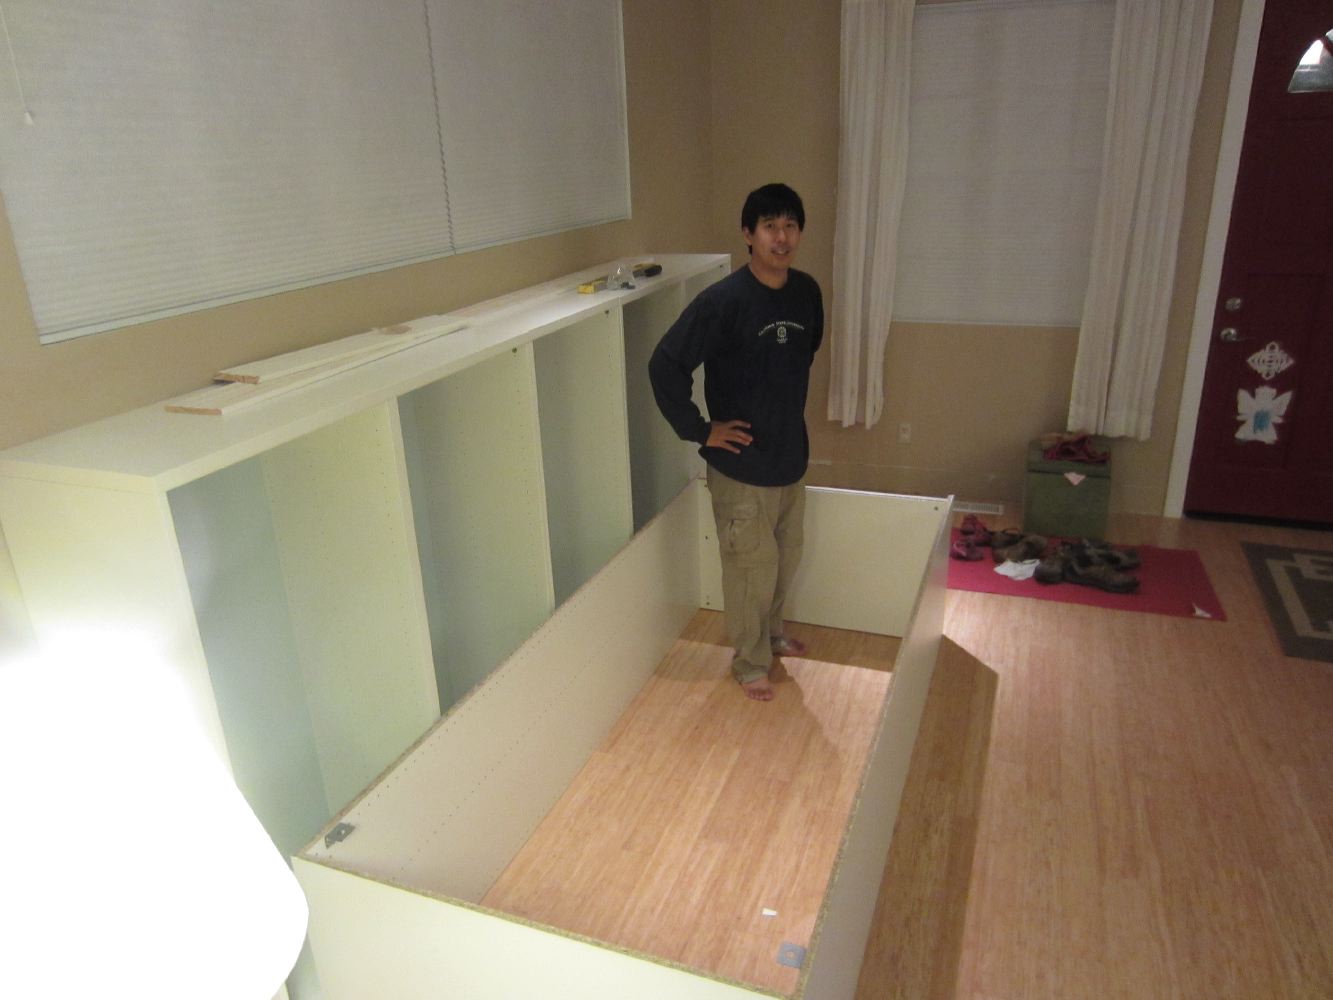
We also painted the backs of the Pax the same Misty Harbor color, repeating the process with the primer and the paint. Chris also built a little raised platform out of 1×6 wood to raise the Pax to get the baseboards to fit under the doors. In easily her handiest moment since painting the back of a shelf when she was 39 weeks pregnant, Shirley nailed the painted back to the Pax frame.
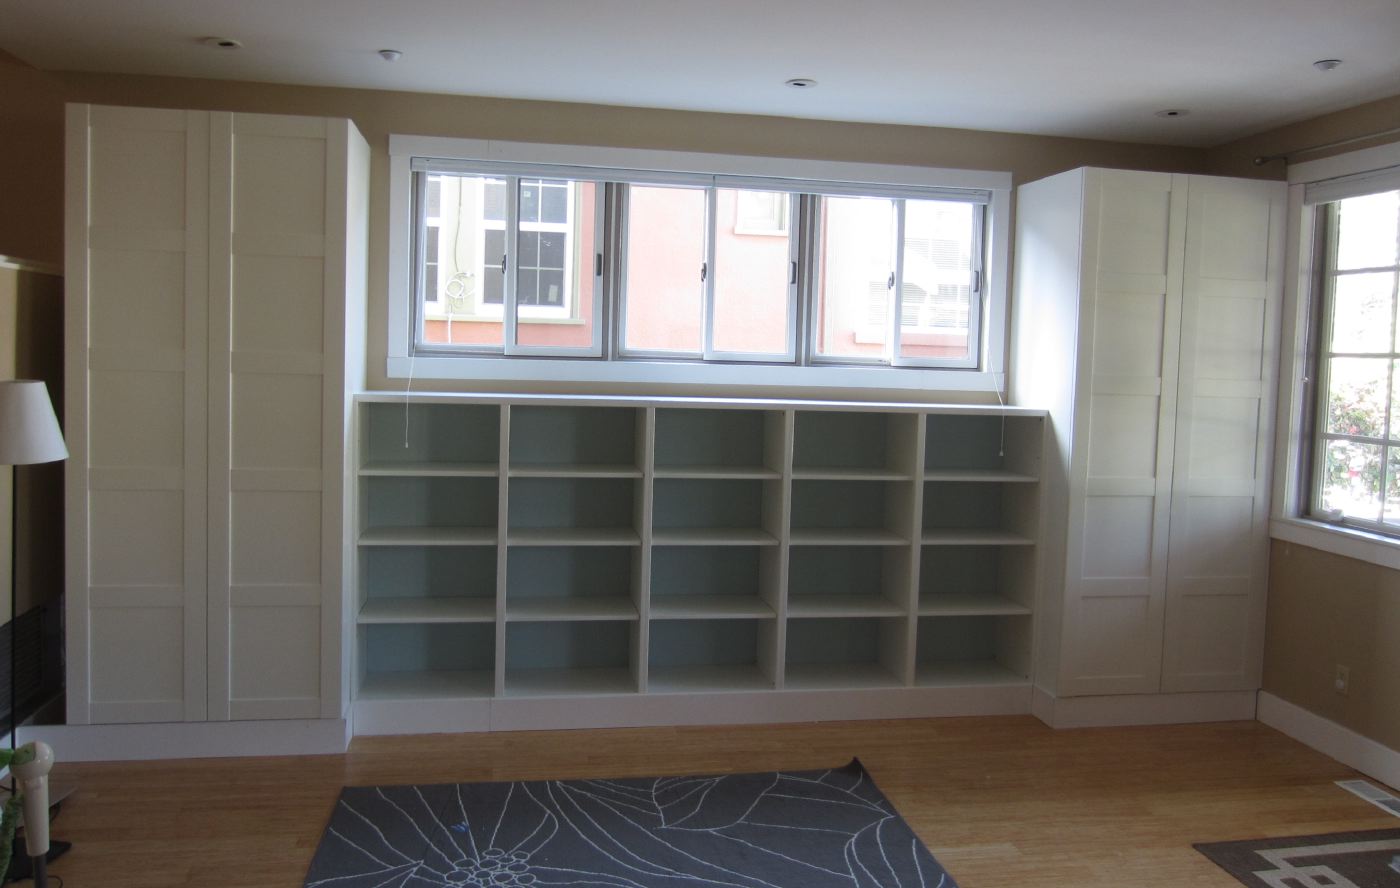
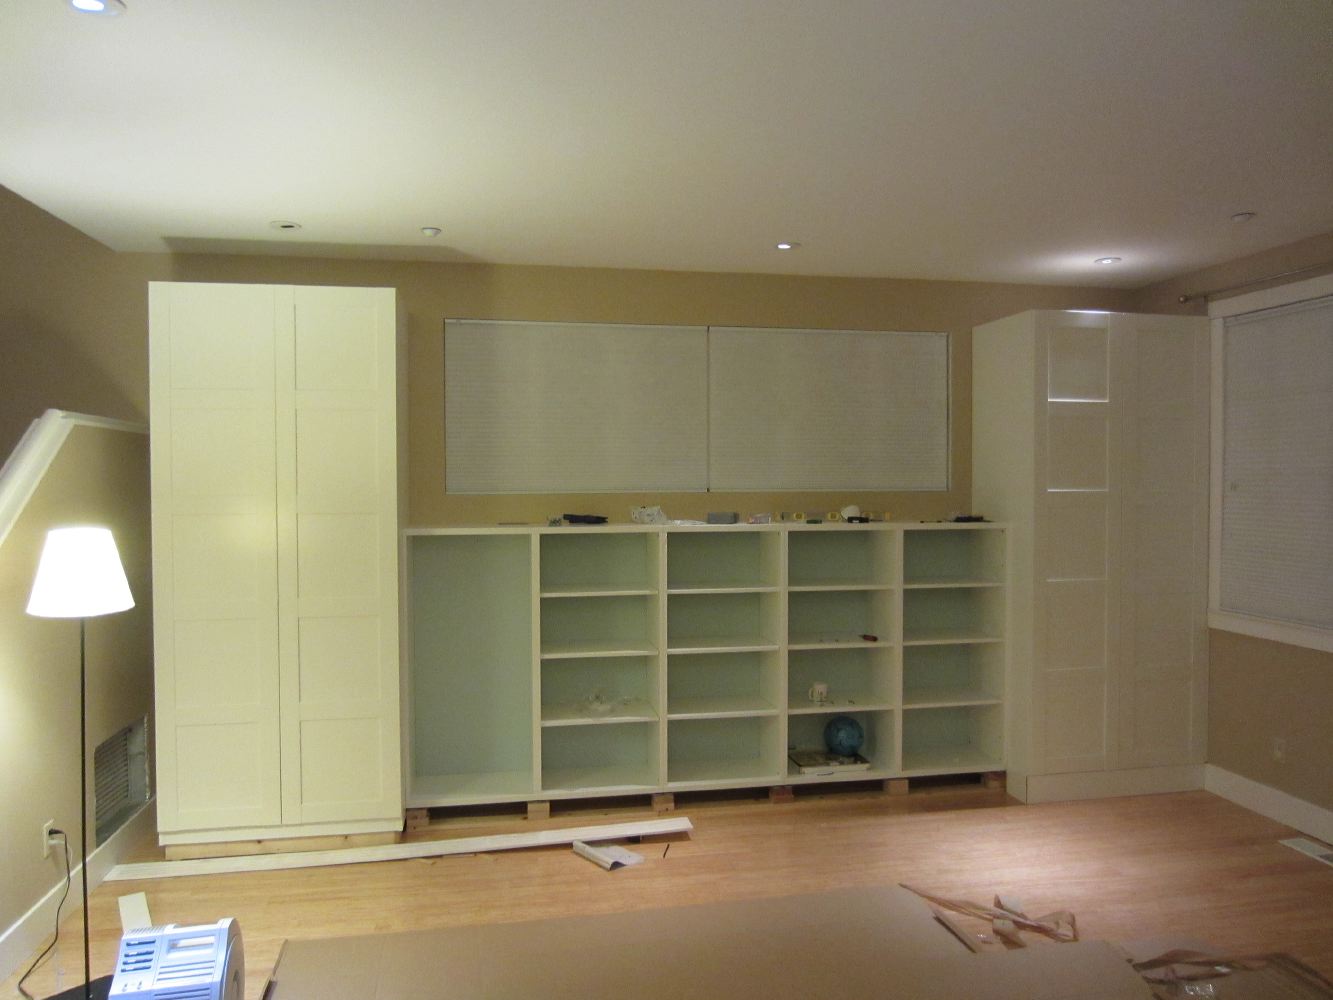
Here are all of the pieces in place.
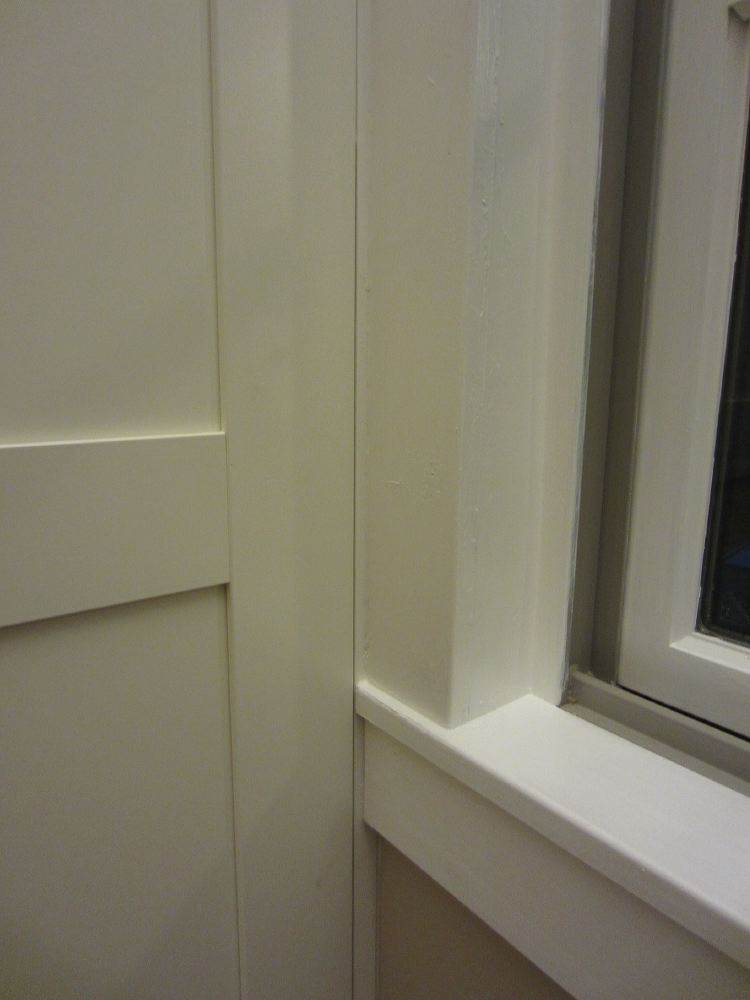
On the side closest to the front window (the one with curtains above), we had intended to put the wardrobe flush against the wall but forgot that we had planned to install window trim (including a window sill) around the front window. The trim would have jutted so far out that it would have interfered with opening the Pax closet door. Here’s a photo of the Pax closet flush against the wall.
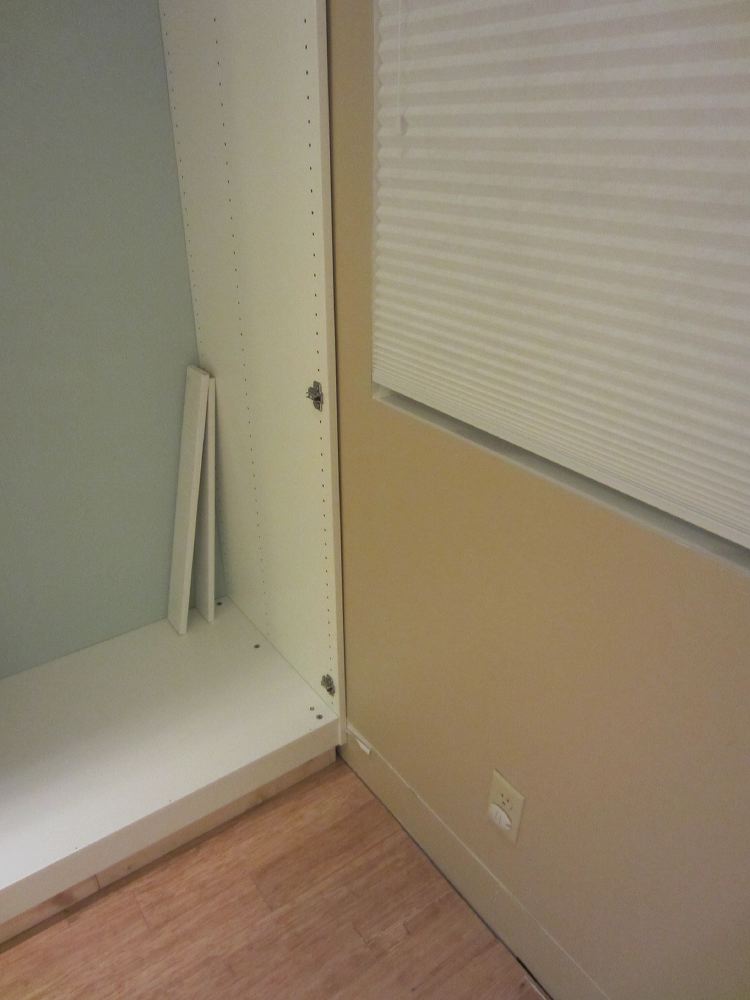
We ended up moving the Pax closet one inch away from the wall and installing a small piece of trim to cover the gap. Here’s a close-up photo of the front window trim/window sill showing how close it is to the Pax door. The door just barely touches the window sill as it opens.
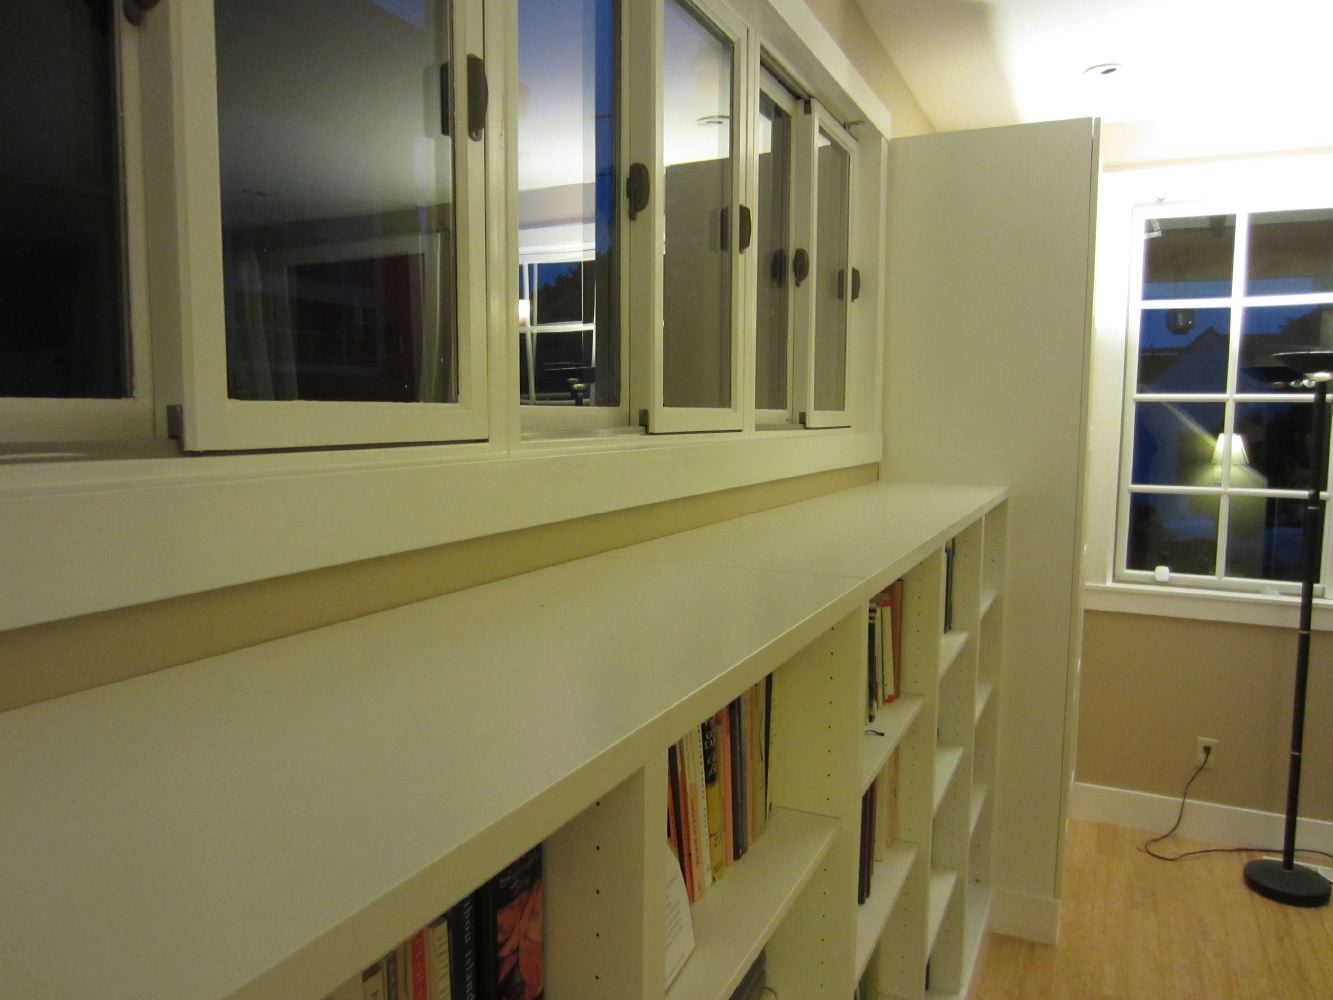
Here’s how things looked with the Pax doors installed but no baseboards or window trim around the upper window. Also notice that there is now window trim around the front window (on the right side of the picture).
Below is a photo of the finished built-ins with window trim around both windows and baseboards all finished. We still need to add clear glass knobs onto the doors. We might eventually add crown molding to the top of the Pax wardrobes.

Finally, Shirley couldn’t wait to get her books onto the shelves…
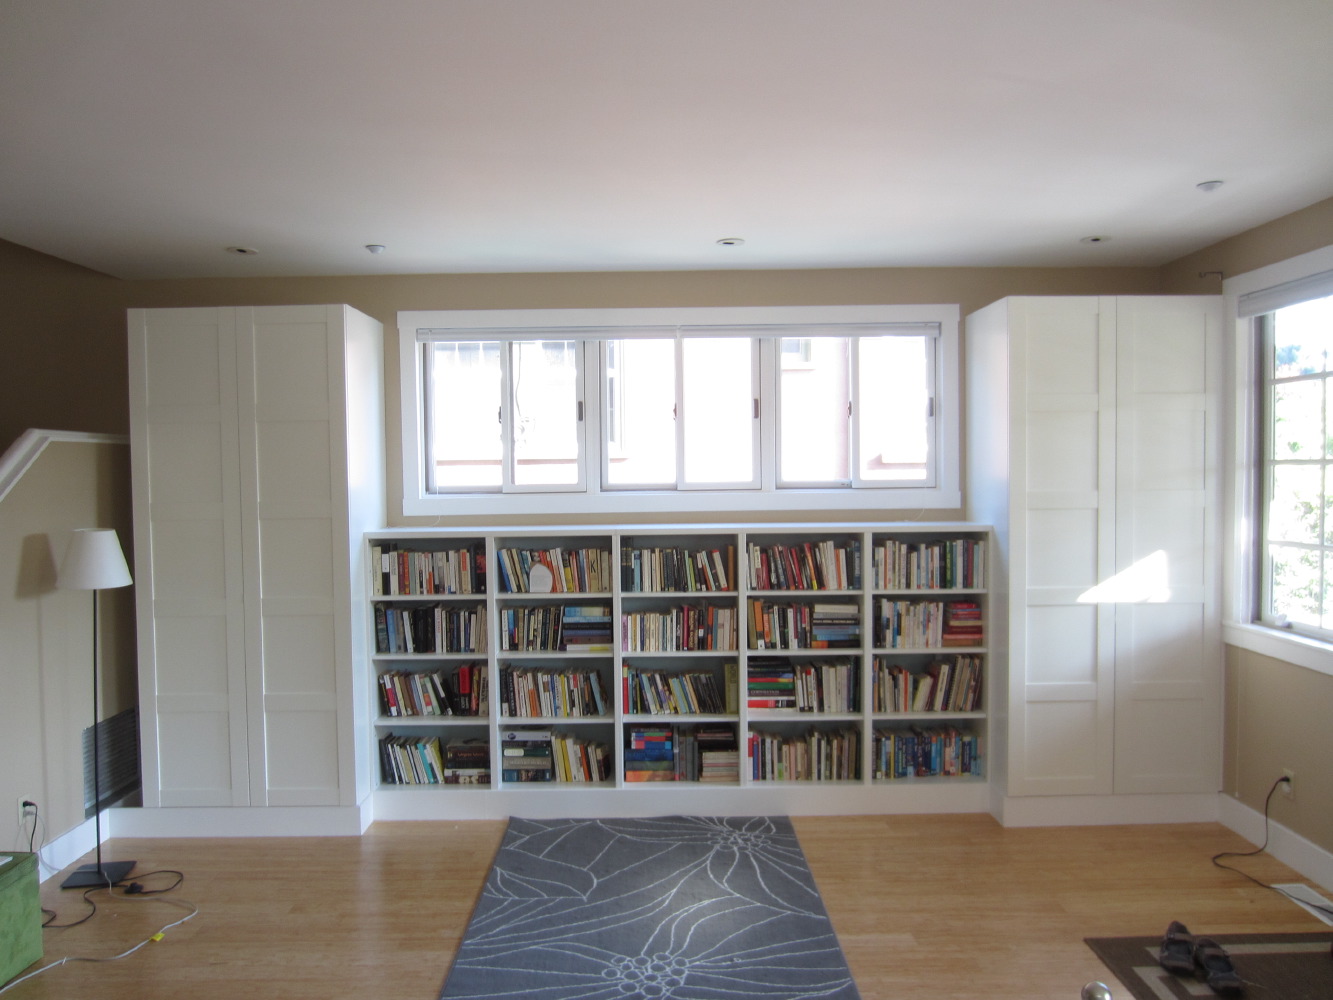
We’re pretty excited about how it turned out. It’s a far cry from how this part of the living room previously looked like.
Summary of the project cost
2 – 47×50” Besta – $130 x 2 = $260
1 – 23 x 50” Besta – $80
2 – 39 x 93″ Pax wardrobe $100 x 2 = $200
4 – Pax Bergsbo doors $50x 4 = $200
Pax Door hinges $40
Pax shelves $50
Closet rod $10
Paint + paint supplies $40
Baseboards Free (reused existing baseboards)
Assorted wood (2x4s, 1x4s, 1x6s) – ~$10
—————————————————————
Total ~$970 (including tax)
UPDATE: Our project showed up on ikeahackers!
See our latest IKEA built-in project. . .
i am really impressed by your post!
What a beautiful hack, you guys did a great job!
wow…it’s really good blog thanks for sharing. i bookmarked it.
Guys! Great job! You inspired me a lot with your hack! Great hello to you from Russia, Moscow!
Hello there! I found you looking for DIY built-ins and came across your blog! Your cabinets turned out gorgeous, very well done! I have this linked to my built-ins roundup post too today!
this turned out awesome! i’m trying to convince my husband to let me do something similar around a window seat we have in the second bedroom…. how long did it take you to finish it?
It probably took about 1 week to finish. Building the ikea stuff took a couple of hours and the rest of the time was spent figuring out how to prop the shelves up, tweaking the layout before attaching everything and then putting the baseboards on.
That is a real nice improvement from where you began!
If you’re ever looking for more projects – DIY is addictive – you can finish to the top to complete the built in look. I think though that for your location that could be a lot of work because of the pot lights on top might have to be moved out and the entire room would need crown molding.. but you know, once you get going it will come together fast and you’ll be glad you did. The left side of the cabinets is another interesting challenge for you. Is that a cold air return? That would have to be moved into the room a bit so you can box out the gap, or make some sort of handy narrow pull out draw?
Thanks for sharing, and also it is great you said how long it took and the $. Those are very important factors when others are considering doing similar construction.
WOW !!!!
Thank you for all the little details of this project, that novices like me would never consider.
Quick question: how do you attach trim to the Ikea shelves? I mean, aren’t the Ikea, made of some sort of laminate. So wouldn’t it be hard to attach the trim and baseboards? I know it can be done, obviously you did it perfectly. But me, very new to this all.
Hi, glad you like it!
The trim is added differently depending on the piece. The pax doors cover the entire frame but the trim is added to the “bottom” of the wardrobe where there is a little riser to keep the doors off the floor. The trim on the besta shelves is covering the bottom of the shelf face and also attached to the 2×4 supports below the shelf. The trim is attached using an electric brad nailer but can also be nailed in by hand. Then the gap is caulked and painted to make it uniform and cover up any irregularities.
Hi Chris and Shirley,
I have been looking to build a low platform bed, and the ones in market are very costly (for e.g. http://www.modloft.com/mags/lookbook.html#/16/)
I had this idea that I can stack 8 besta shelf units on the floor http://www.ikea.com/us/en/catalog/products/50102143/
and effectively have a platform on which I just have to place my mattress . Do you think this makes sense? Will the besta shelf be able to hold the load when falling flat and acting as a bed platform. Remember there will be 8 of them stacked in a 2×4 formation so as to give a long platform bed, on which even after placing my king size matttress there will be space on the sides.
Looks fabulous. I’m thinking of combining pax wardrobes with Besta shelving unit. Is the white on the pax the same as the white on Besta? Thanks!
Hi Suzanne,
Looking at them very carefully, I think they aren’t exactly the same but it’s quite hard to tell. I think the whites are very similar but not the same.
Beautiful work again guys. Thanks for all the photos and details too.
This is fantastic! I have a question. I’m wondering if you think it would be possible to turn the besta units on their sides? I am looking for wider spaces than they have standard. Are the adjustable shelves put in with clips or screwed in? Also, I have a tip for you on future shelving projects. If you want the backs to look good, instead of painting them, try purchasing cheap foam core at the art store. Cut it to fit the back of the shelf section and then wrap it in fabric. You can just push them in…no attachment needed. This is nice because if you change your mind on style or color you can easily switch fabric or take them out. You can even change them with the seasons!
Looks amazing and very nice attention to detail.
I was wondering if you could tell me the measurements for the different thicknesses of panels are? Like what’s the thickness of the shelves? And is it different to the thickness of the middle vertical panels and the bottom and top panels?
good job guys but next time go right to the ceiling and sides to wall for an authentic “built in” look! Keep up the upgrades!!
Thanks for posting this. I would like to make a storage for my kids’ books and toys. Currently my living room is very cluttered because I just use whatever book shelf (just like your previous short bookshelves) I have. In addition, your detailed explanation including calculation for cost really help me. The end result looks really good!
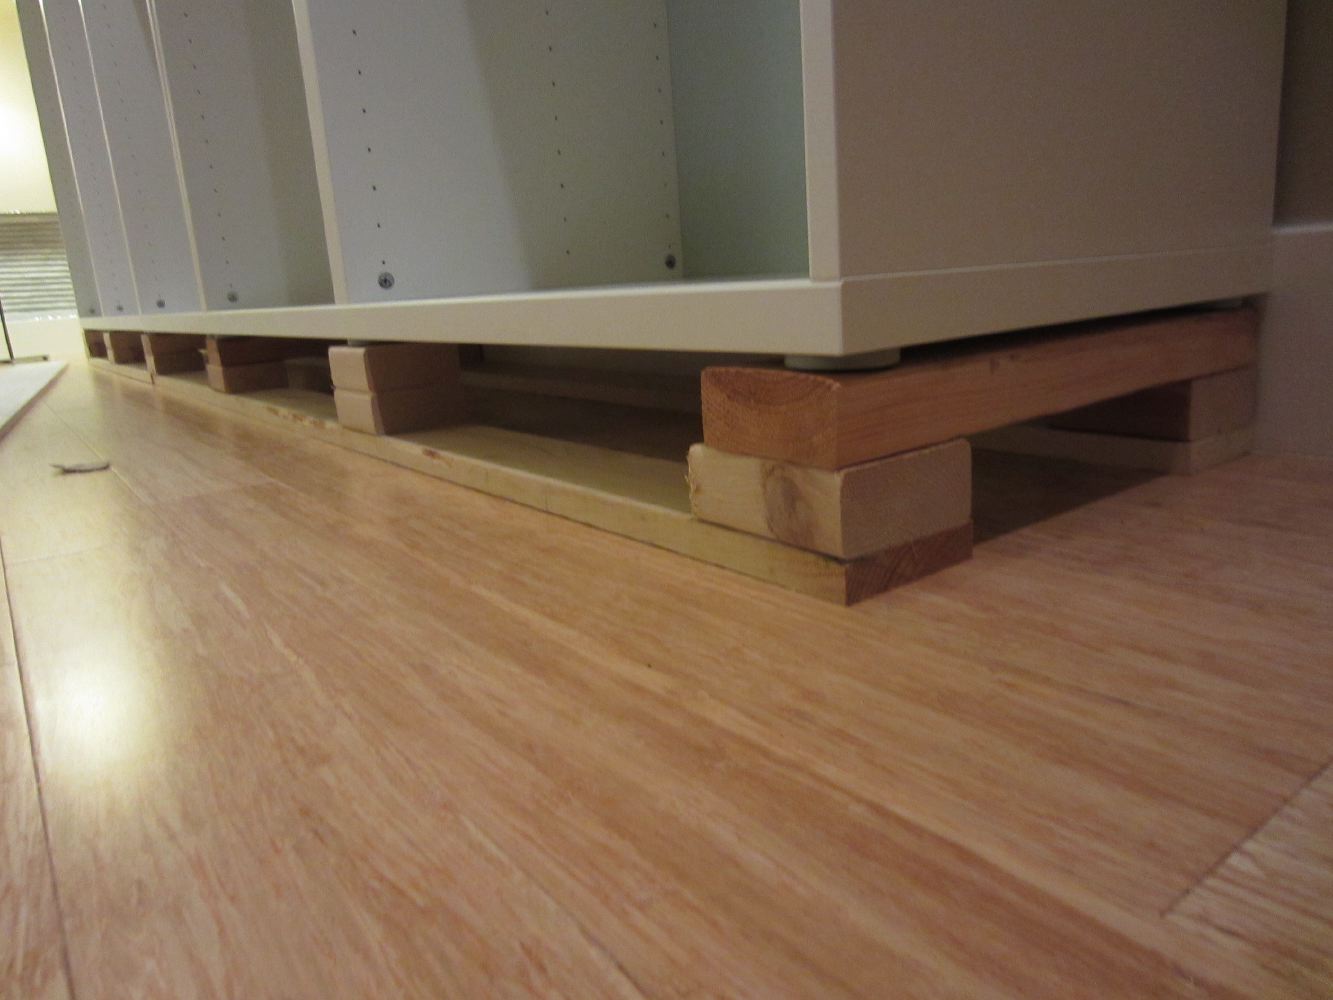
I’m just finding this post trying to figure out how to raise a Pax cabinet above existing baseboards. I’m using this in kitchen and I don’t want to cut and remove the existing baseboards. How did you attach the platform to the bottom of the Pax cabinet (nails, screws, glue)?`
I screwed the 1×6 pieces of wood directly to the Pax through the 4 vertical sides of the Pax base. If you look in the picture carefully, you’ll see the wood pieces touching the back and side pieces of the bottom of the Pax. After getting the 4 wood pieces in, I screwed the 1x6s together and put in the 5th center piece to support the middle.
Hope that is helpful and good luck!